- What Jellyfin is
- Which install to use
- Before you install
- Docker Compose
- Debian and Ubuntu
- Synology
- The SynoCommunity package
- Container Manager
- Proxmox
- Home Assistant
- TrueNAS SCALE
- Windows and macOS
- Other systems
- First launch
- Clients
- Common questions
- How Jellyfin differs from Plex
- Why the library is empty
- Which port to open
- Can Jellyfin run in Home Assistant Container
Jellyfin is a media server for your own films, shows, and music. It plays that library on a TV, a phone, and a browser, with no subscription and no account at the project. Below is how to install it with Docker and with the Debian/Ubuntu package, on Synology in two ways, on Proxmox, in Home Assistant, on TrueNAS SCALE, and on Windows and macOS.
On a Synology NAS I run Jellyfin as a SynoCommunity package, without Docker. The other paths follow the Jellyfin documentation and two related guides on this site: an SMB share inside an LXC and Home Assistant on Proxmox.
What Jellyfin is
Jellyfin keeps posters and metadata on your machine and reads files from the folders you add. A client asks the server, and the server sends a stream. If the TV cannot play the codec, the server transcodes the file on the fly. That uses the CPU or the integrated graphics.
It is not a cloud drive and it is not a torrent client. Files arrive on their own: from a NAS disk, a shared folder, or a directory another program fills. A Jellyfin account exists only on your server. The project site does not issue one.
- Films, shows, and music in one library, with resume.
- Official apps for Android, Android TV, iOS, desktop, Roku, LG webOS, Samsung Tizen, and Xbox.
- A web interface on port 8096 when there is no app.
- Several users, each with their own libraries.
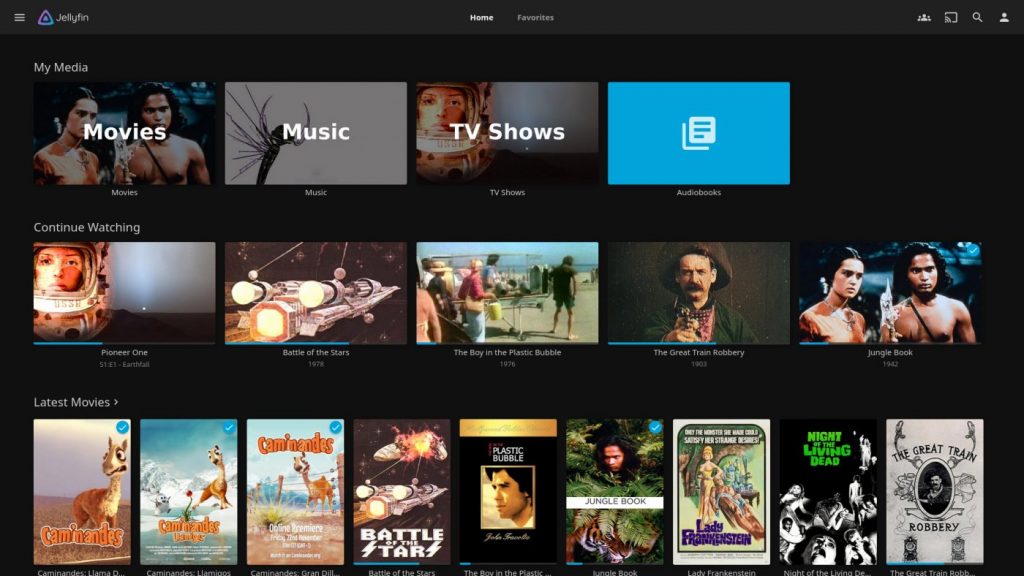
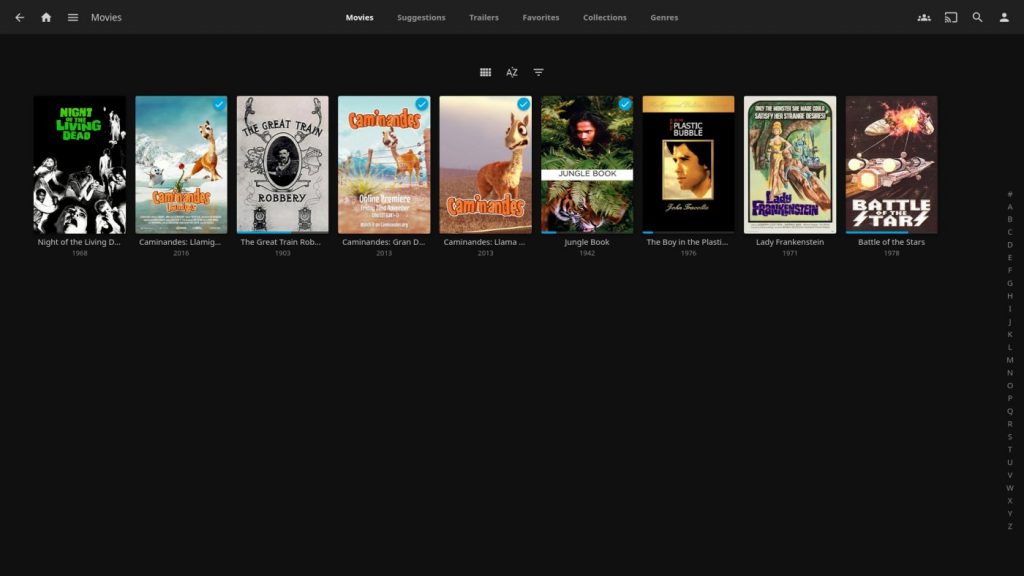
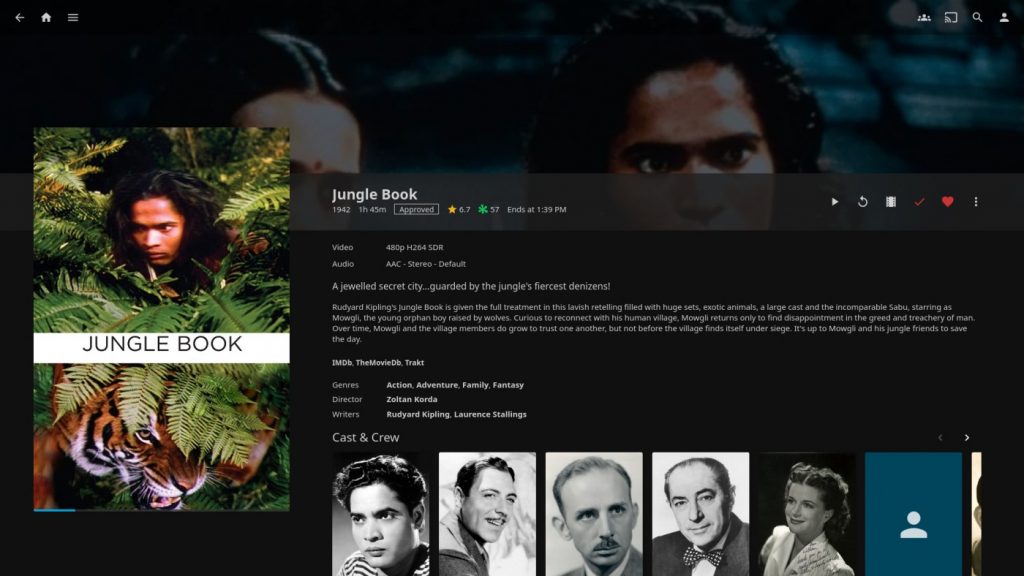
The four screens below are from the Jellyfin website: home, the library, a movie page, and playback.

Which install to use
- Synology without Docker. The SynoCommunity package, when Container Manager is missing or you do not want a container. This is what my NAS runs. It needs DSM 7.2 or newer.
- Synology in Container Manager. The path in the Jellyfin docs: the jellyfin/jellyfin image. Their guide assumes DSM 7.0 or newer and at least 4 GB of RAM for the container.
- A Linux server. Docker Compose with the same official image. Jellyfin recommends this when there is no package for the distribution.
- Debian and Ubuntu. The official repository, without Docker. The same installer works inside a Proxmox container or virtual machine.
- Proxmox. An LXC from the community-scripts helper, or a Debian container plus the official installer. Media on a NAS is mounted separately.
- Home Assistant. An add-on installs the server only on Home Assistant OS. The built-in integration does not install a server. It connects to a Jellyfin that is already running.
- TrueNAS SCALE 24.10 or newer. The catalog app, or your own Compose file. TrueNAS CORE is not supported.
- Windows and macOS. The installer from the website. A container on those systems is not supported.
Before you install
- A media folder the server can read. Plain file names work best: title and year for a film, Show/Season 01 for a season.
- A computer, NAS, or mini PC that stays awake while someone is watching.
- Memory. The Jellyfin Synology guide asks for at least 4 GB for the container. A small library with no transcoding can run with less. Transcoding 4K cannot.
- An address on your own network. After setup the page is http://IP:8096. Leave port 8096 off the public internet and use a VPN from outside.
How much hardware a given number of streams needs is covered in the Jellyfin hardware selection guide. A small NAS without hardware transcoding is a better fit for direct play, when the TV already understands the file.
Docker Compose
The official image is jellyfin/jellyfin. The same build is published as ghcr.io/jellyfin/jellyfin. Jellyfin treats the LinuxServer.io and hotio images as third-party builds. On Windows and macOS a container is not supported. Install the native program there.
Install Docker Engine and the Compose plugin first. The Ubuntu commands are in the Docker documentation. That page marks get.docker.com as a test convenience script. The same engine steps are written out in Nextcloud on your own server. Published container ports bypass ufw and firewalld. The details are in the Docker firewall note and in the VPS checklist.
Create the config and cache directories first. Replace /srv/media with the folder that already holds the films.
sudo mkdir -p /srv/jellyfin/config /srv/jellyfin/cacheSave this as docker-compose.yml beside those directories. Port 8096 is the web interface. Port 7359/udp is local server discovery. If the media is not owned by root, add a user line with that account’s numeric uid and gid. Without it, the process inside the container runs as root, which is how the container guide is written.
services:
  jellyfin:
    image: jellyfin/jellyfin
    container_name: jellyfin
    ports:
      - "8096:8096/tcp"
      - "7359:7359/udp"
    volumes:
      - /srv/jellyfin/config:/config
      - /srv/jellyfin/cache:/cache
      - /srv/media:/media
    restart: unless-stopped
From the directory that holds the file:
docker compose up -dThen open http://SERVER-IP:8096. Hardware transcoding is switched on later in the Jellyfin dashboard, under Playback, after /dev/dri is passed into the container. The per-GPU steps are in the transcoding documentation.
Debian and Ubuntu
For Debian, Ubuntu, and close derivatives, Jellyfin publishes a script that adds the repository and installs the packages. Download it and check the checksum first. The line install-debuntu.sh: OK means the file matches the sum on the site. Open the script in less, then run it.
curl -s https://repo.jellyfin.org/install-debuntu.sh -O
curl -s https://repo.jellyfin.org/install-debuntu.sh.sha256sum -O
sha256sum -c install-debuntu.sh.sha256sum
sudo bash install-debuntu.sh
The script also targets Linux Mint, Raspberry Pi OS, and KDE Neon. For Fedora, Arch, and other distributions Jellyfin recommends a container. Third-party packages exist, and support for those starts with the people who build them. After installation the page is the same: http://IP:8096.
Synology
A NAS has two workable paths. The SynoCommunity package does not need Docker and installs on models where Container Manager is unavailable. The container is the method Jellyfin’s own guide describes. Many ready-made NAS boxes are too weak to transcode. The Synology page says so directly.
The SynoCommunity package
Add the repository once: Package Center → Settings → Package Sources → Add. The name can be SynoCommunity and the location is https://packages.synocommunity.com. The package then appears under Community. On DSM 7, a warning that the publisher is third-party shows for every such package. The source, folder permissions, and a manual spk install are covered in SynoCommunity on Synology.
- Package Center → Community → Jellyfin → Install. The package needs DSM 7.2 or newer.
- Control Panel → Shared Folder → the video folder → Edit → Permissions. In the dropdown at the top, choose System internal user and find sc-jellyfin.
- Grant Read only and click OK. Jellyfin does not need to change the media files.
- Restart the package in Package Center.
- Open http://NAS-IP:8096 and finish the wizard.
An empty library is almost always a missing read permission, or missing traverse permission on a parent folder. On an Intel CPU, hardware transcoding starts with the SynoCli Video Driver package from the same Community section. In Jellyfin that is Dashboard → Playback → Transcoding → Video Acceleration API (VAAPI) and the device /dev/dri/renderD128. If the device is denied, the user sc-ffmpeg needs the same media permissions as sc-jellyfin.
Container Manager
- Install Container Manager from Package Center. The icon can be tucked into the main menu at the top left.
- Open the Registry tab, search for Jellyfin, and download the official jellyfin/jellyfin image. Keep latest in the version window and click Apply.
- Open the Container tab and click Create. Select the image, set a name, and enable auto-restart so the container comes up with the NAS.
- In the limits, the Jellyfin guide suggests all CPU cores and at least 4 GB of RAM.
- Add three folders. The mount point /config is settings, /cache is the cache and temporary transcode files, and /media is the films. The media folder can be mounted read only.
- Publish port 8096 TCP. If the wizard asks for a local port, leave it at 8096.
- On the last step, run the container when the wizard finishes and click Apply.
- From another device, open http://NAS-IP:8096.
Proxmox
On Proxmox, an LXC is the lighter place for Jellyfin. The disks with the films can stay on the NAS. A ready container is installed by the community-scripts helper. Run the command in the node shell, not inside another virtual machine.
bash -c "$(curl -fsSL https://raw.githubusercontent.com/community-scripts/ProxmoxVE/main/ct/jellyfin.sh)"The script downloads from GitHub. If that download fails, create a Debian or Ubuntu container from a Proxmox template and run the official installer from the Debian and Ubuntu section inside it.
The script asks for the container settings itself. When it finishes, the web interface is at the container address on port 8096. An SMB share cannot be mounted from inside an unprivileged LXC. The Proxmox host mounts it and passes the folder in as a bind mount. The steps are in SMB share in a Proxmox LXC container. Until that folder is passed in, the setup wizard starts and the library stays empty.
Home Assistant
Home Assistant has two different Jellyfin features, and they are easy to mix up. The Jellyfin integration under Settings → Devices and services only attaches a server that is already running, as a source of music and films. It does not install the program. A server add-on exists only where the add-on store exists, which is Home Assistant OS. How to install HAOS on Proxmox is in Install Home Assistant on Proxmox VE.
The Jellyfin project does not ship an add-on. A working option is the third-party repository alexbelgium/hassio-addons. The Jellyfin add-on there is built on the LinuxServer.io image, not on a package from the Jellyfin site.
- Settings → Add-ons → Add-on store. Open the three-dot menu and choose Repositories.
- Add https://github.com/alexbelgium/hassio-addons and reload the list.
- Find Jellyfin, install it, and start it.
- In the add-on configuration, set the folder that holds the films. This add-on calls that option data_location. Fill in a network password only if the add-on itself mounts a remote disk. If Home Assistant can already see the files, a path to them is enough.
- Open the add-on web interface. The usual Jellyfin port is 8096.
Once the server answers, add the integration separately: Settings → Devices and services → Add integration → Jellyfin. The URL has to be complete, for example http://192.168.1.10:8096. That is what the integration documentation asks for. Home Assistant then sees music, movies, and TV shows. Other library types do not appear. If Home Assistant itself runs as a container and has no add-on store, install the server as a neighboring container from the Docker Compose section, and add only the integration in Home Assistant.
TrueNAS SCALE
Jellyfin supports TrueNAS SCALE 24.10 and newer, because apps there run on Linux and Docker. TrueNAS CORE is based on FreeBSD, and Jellyfin does not support it. Unofficial builds are a separate project. The SCALE catalog app uses the official jellyfin/jellyfin image, and iXsystems maintains that app, not the Jellyfin team. Questions about the catalog screens belong with TrueNAS. Both methods are written up in the Jellyfin SCALE guide.
From the app catalog: Apps → Discover Apps → Jellyfin → Install. Refresh the catalog if the card is missing. The default name is fine. The default user and group are 568, the apps service account. That account cannot sign in to the Jellyfin web interface. The setup wizard creates the admin user. SCALE’s default web port for the app is 30013. Change it to 8096, or phones and TVs will not find the server on their own: they look for 8096. Enable Host Network only when you need DLNA. Put config, cache, and transcode temporary files on three datasets on an SSD, not on the same spinning disks as the media library.
The other method is your own Compose app: Discover Apps → the three-dot menu → Install via YAML. Paste the file from the Docker Compose section, point the volumes at /mnt/… paths, and set user to 568:568 if you want the apps account. That install stays editable as YAML. A custom app created without YAML is edited through the form afterwards.
Windows and macOS
On Windows, download the installer from the Jellyfin downloads page and run it. The guide marks the Windows service option as optional and does not recommend it unless you need it. When the installer finishes, open http://local-IP:8096. To update, quit Jellyfin from the tray icon and run the new installer. Uninstall it from Windows installed apps.
On a Mac, download the DMG from the same page. For Apple Silicon on a macOS older than 14, move to a newer macOS or use the x86 build. Drag the app into Applications, start it, and choose Launch from the menu bar. An update replaces the app after you stop the server from the menu bar or the dashboard.
Other systems
On Unraid, Jellyfin is a Community Applications template, not a package from the Jellyfin website. The fields match the Docker Compose file: image jellyfin/jellyfin, port 8096, and config, cache, and media folders. On other Linux distributions that have no official repository, Jellyfin also asks for a container.
First launch
The wizard is the same on every install. It asks for the interface language, an administrator name and password, and the library folders. Set the library type immediately: movies, shows, or music. Mixing those in one folder mixes up seasons and films. The metadata language and country can stay as the wizard sets them and be changed later in the dashboard.
Skip the remote-access offer on that step unless a reverse proxy is already in front of Jellyfin and you know who can reach the port. On a home network, http://IP:8096 is enough. From outside, use a VPN rather than forwarding port 8096 on the router. Do not use the administrator account on a TV. Add a separate user who can open only the libraries you choose.
Clients
The official apps are listed at jellyfin.org/downloads: Jellyfin Media Player for the desktop, Android, Android TV and Fire TV, iOS and iPadOS, Roku, LG webOS, Samsung Tizen, Xbox, and the JellyCon add-on for Kodi. In the Roku store the app may say a cable or satellite subscription is required. That is a store limitation. Jellyfin does not need a subscription. The server also opens in a browser with no app installed.
Common questions
How Jellyfin differs from Plex
Both play your library on other screens. Jellyfin does not require an account at the project in order to watch your own files, and it does not sell a subscription for server features. Plugins, button names, and apps differ. The server is yours either way: the files stay with you.
Why the library is empty
The server cannot see the folder. On Synology, sc-jellyfin is missing read permission. In Docker, the directory owner does not match and user was left unset. In a Proxmox LXC, the share was never passed in from the host, so the folder is not there. After fixing permissions, refresh the library from the library menu. Reinstalling the server does not help.
Which port to open
On the local network, 8096 TCP. Port 7359 UDP is only for automatic server discovery. On TrueNAS SCALE the wizard fills in 30013. Change that to 8096. Do not publish these ports on the public internet.
Can Jellyfin run in Home Assistant Container
That install has no add-on store, so the add-on will not install. Run the server as its own Docker container and add the Home Assistant integration using that container’s address.
No email, no trackers — just the update feed.