



- Creating and preparing a virtual machine for OpenWRT
- Removing the virtual disk before importing the OpenWRT IMG into Proxmox
- Downloading the OpenWRT install image for Proxmox
- Importing the OpenWRT IMG into Proxmox and activating the virtual disk image
- Setting the OpenWRT password
- Expanding the OpenWRT disk in Proxmox
- Localizing the OpenWRT LuCI web UI
- Configuring Proxmox OpenWRT network interfaces
- Upgrading OpenWRT x86
- Notes
- Backing up Proxmox VE network settings
- Proxmox WAN port device mix-up in OpenWRT
This guide covers installing a virtual OpenWRT router in Proxmox VE and assumes Proxmox VE is already installed on your device. A detailed Proxmox install guide is available at https://openode.ru/topic/522-proxmox-ve-8-rukovodstvo-po-bystromu-startu-chast-1/
At the time of writing, this uses Proxmox VE 8.0.4, OpenWRT 22.03.5, and an N5105 mini PC. I also recommend this mini PC with stronger hardware and an Intel i5–i7 CPU. Your hardware and software versions may differ, but the guide should still apply in most cases.
This OpenWRT install and setup guide is also partly applicable to PCs, server hardware, and other x86 (Intel/AMD) virtualization platforms
Creating and preparing a virtual machine for OpenWRT
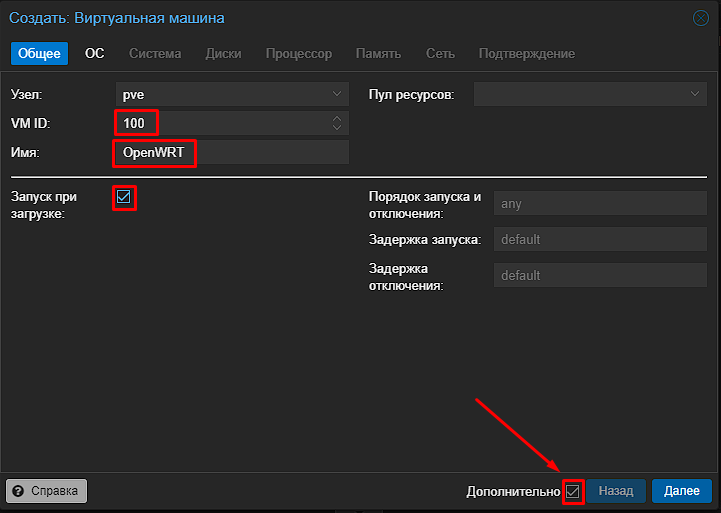
Open the Proxmox (PVE) virtual environment and click “Create VM” in the upper-right corner

Next, set a “Name” for the virtual machine and a “VM ID”. In Name you can enter any meaningful title. In VM ID use a number not used by other PVE VMs—you will need it later when importing the OpenWRT IMG file.
Enable Advanced for the extended menu, then enable Start at boot
Click Next
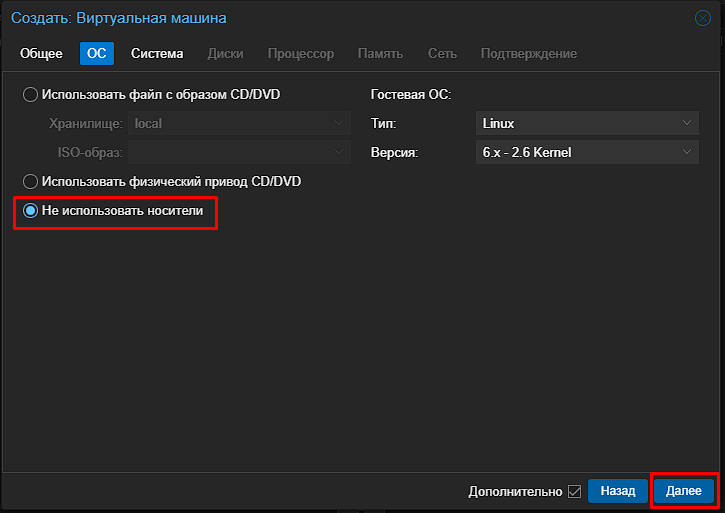
On the next OS page, select Do not use any media, then click Next
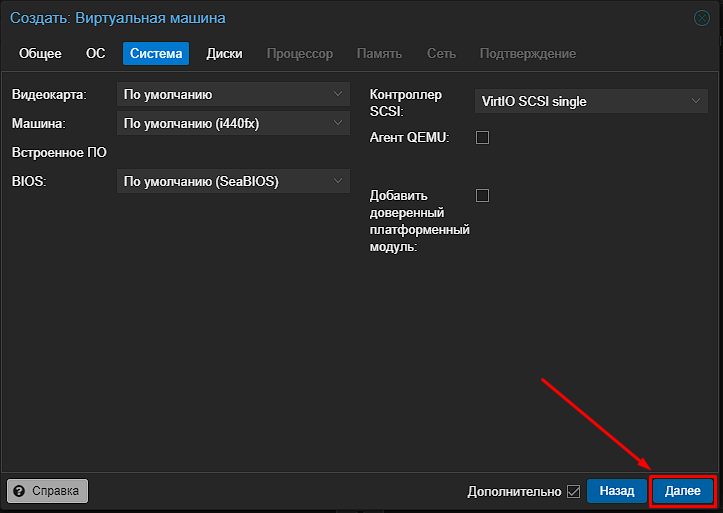
On the System page, leave all defaults and click Next
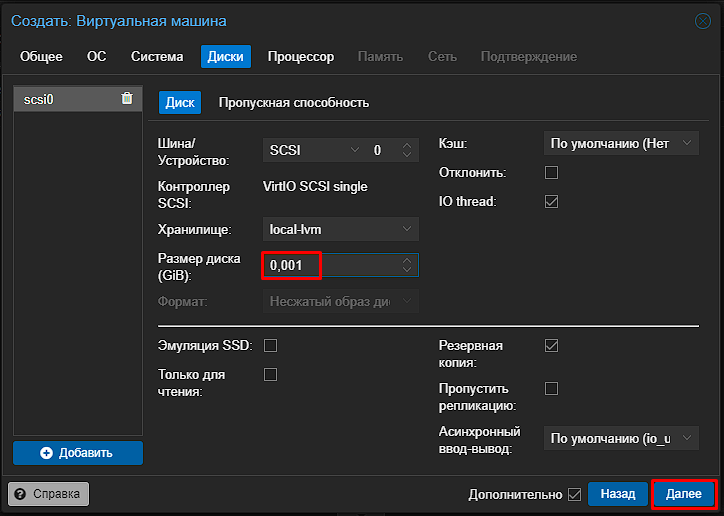
On the Disks page, set the minimum Disk size—we will delete it later. Click Next
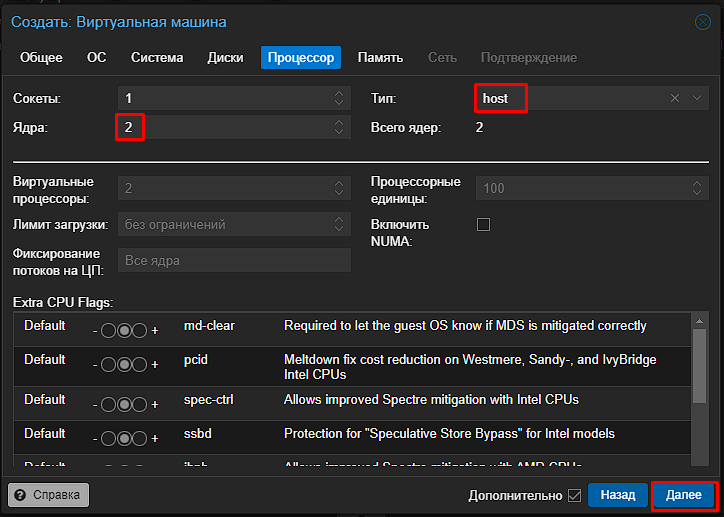
On the CPU page, set Type to host to avoid performance limits. For Cores, set 2 cores or 1 depending on how you will use it. Click Next
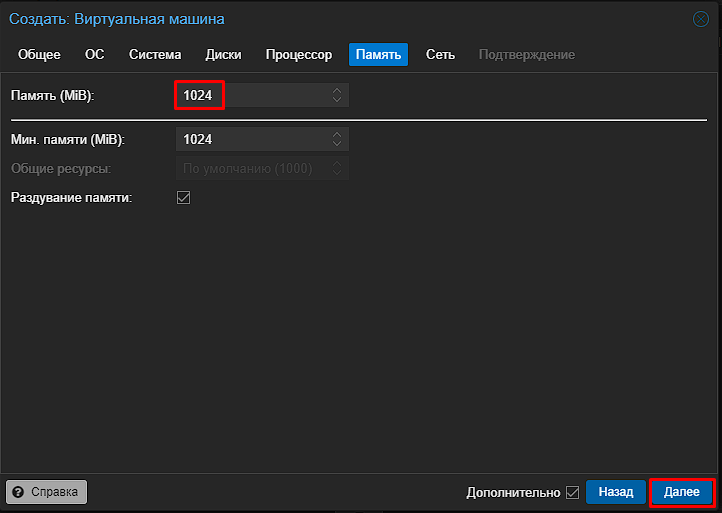
On the Memory page, you can set 1024 MB. That is enough; you can increase RAM later if needed
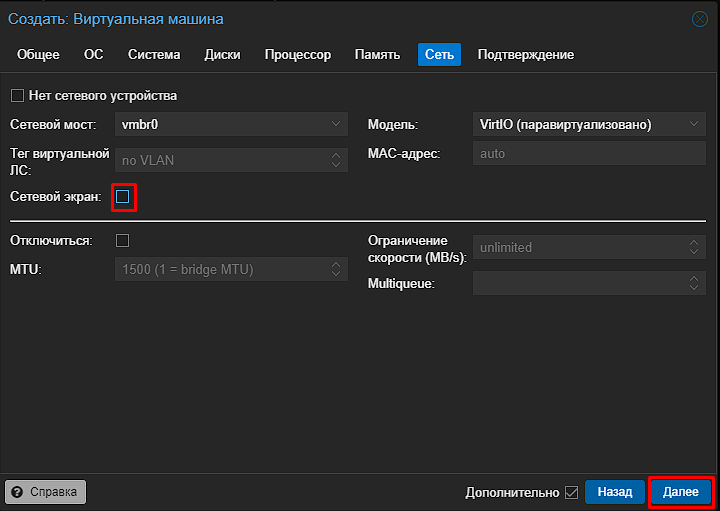
On the Network page, disable Firewall because we will use the OpenWRT firewall, then click Next
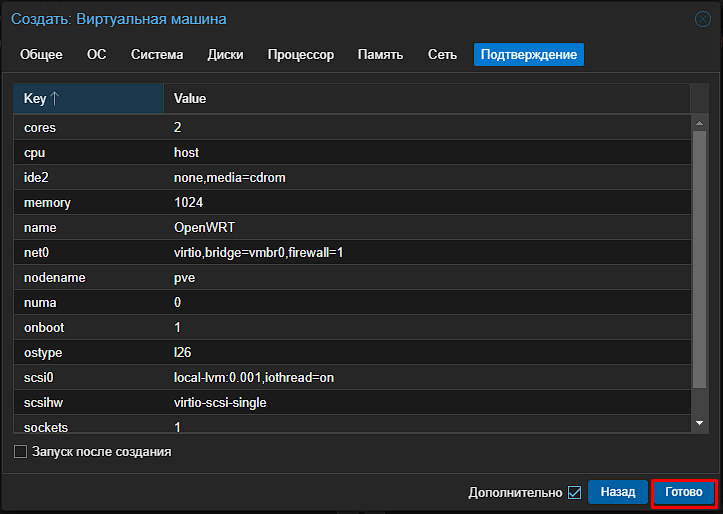
On the final Confirm page, click Finish
Removing the virtual disk before importing the OpenWRT IMG into Proxmox
In the next steps we will import a ready IMG disk image, so remove the empty virtual disk created by default.
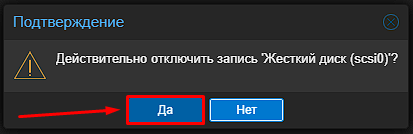
Select the VM created in the previous step in the left panel, open the Hardware tab, select Hard Disk, click Detach, and confirm with Yes
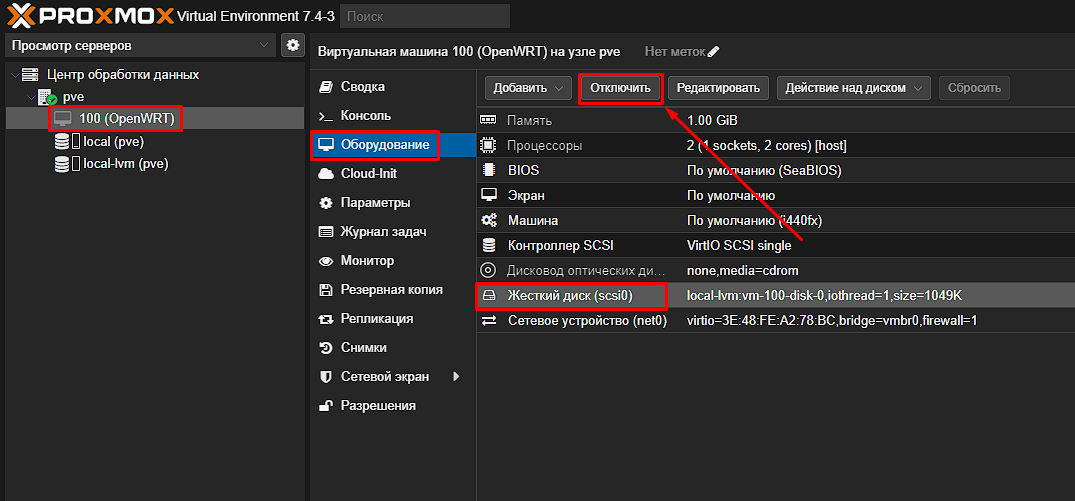
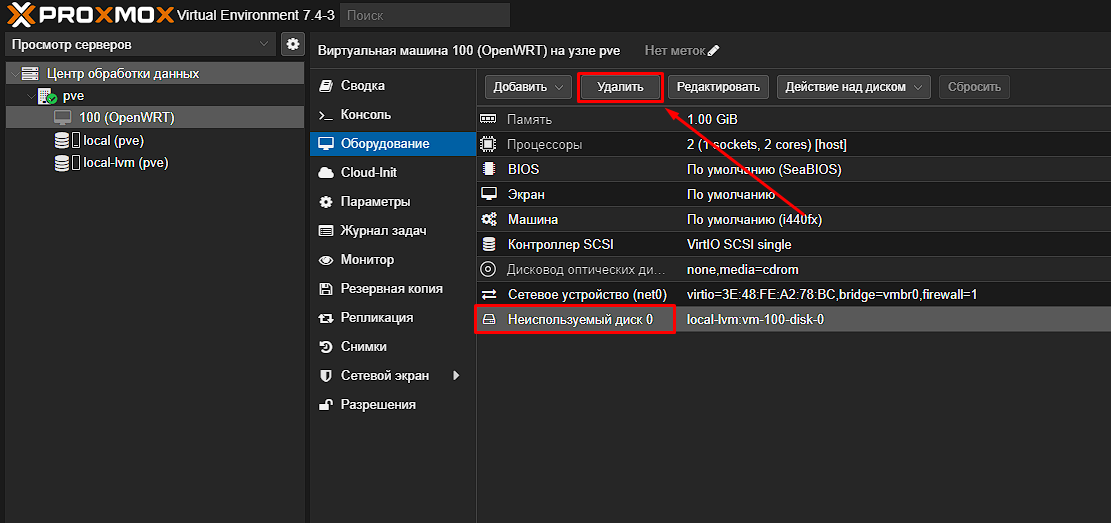
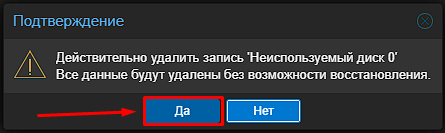
Then select Unused Disk 0 and click Remove. Confirm with Yes
Downloading the OpenWRT install image for Proxmox
To download the current official OpenWRT image for Proxmox, go to https://downloads.openwrt.org/releases/
Select the current release version, open targets, choose architecture x86, then open 64 and copy the link to the current openwrt-XX.XX.X-x86-64-generic-ext4-combined.img.gz image
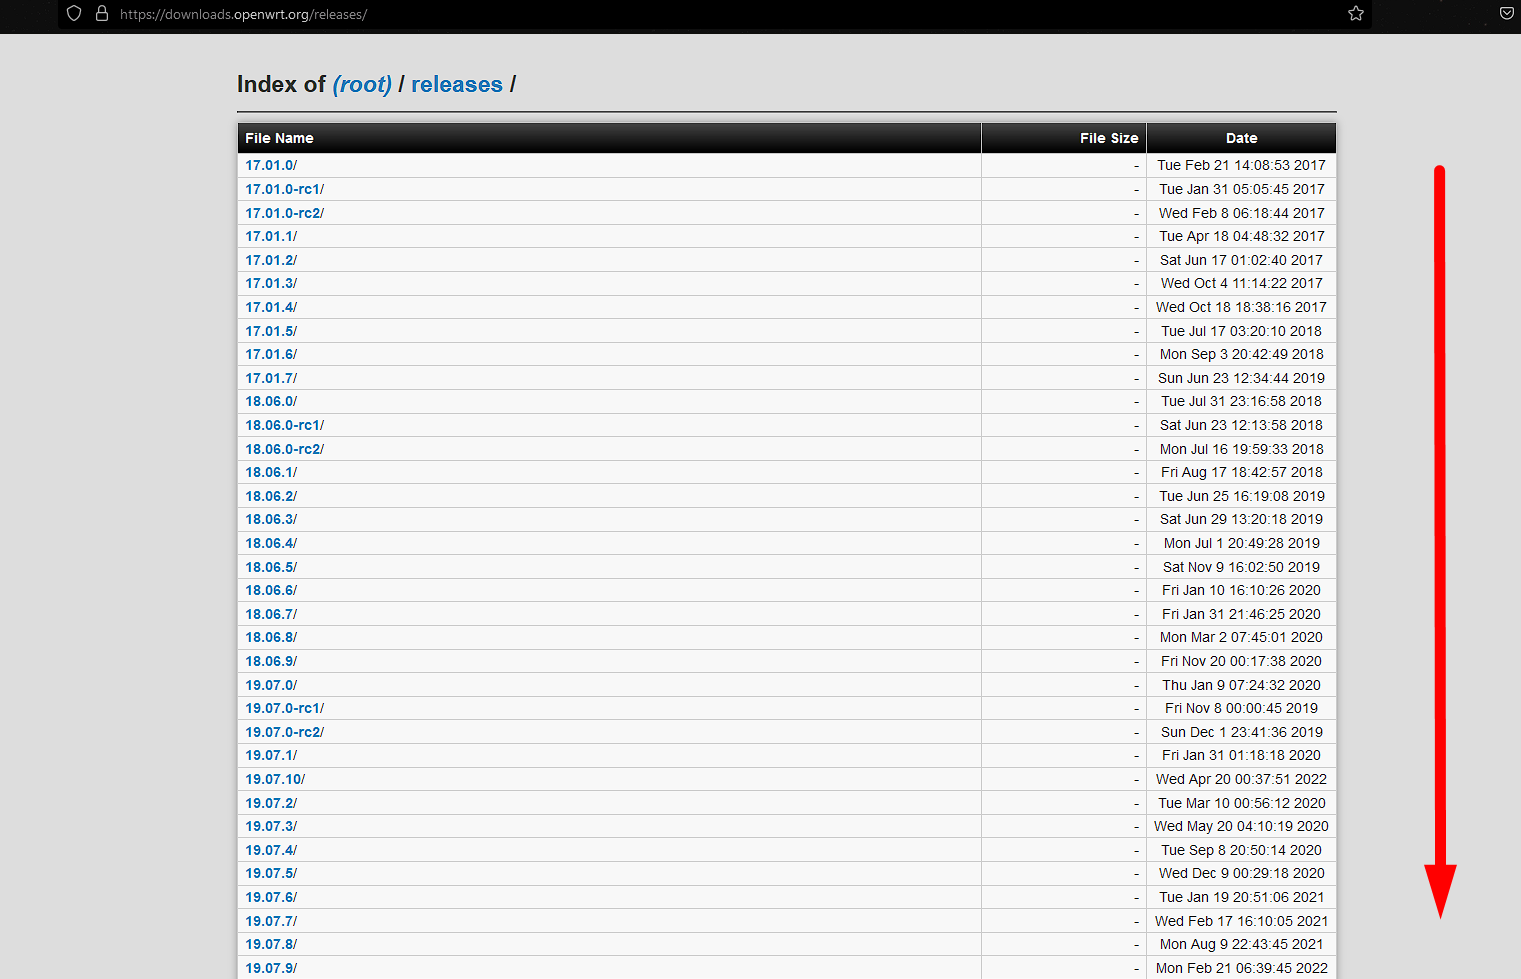
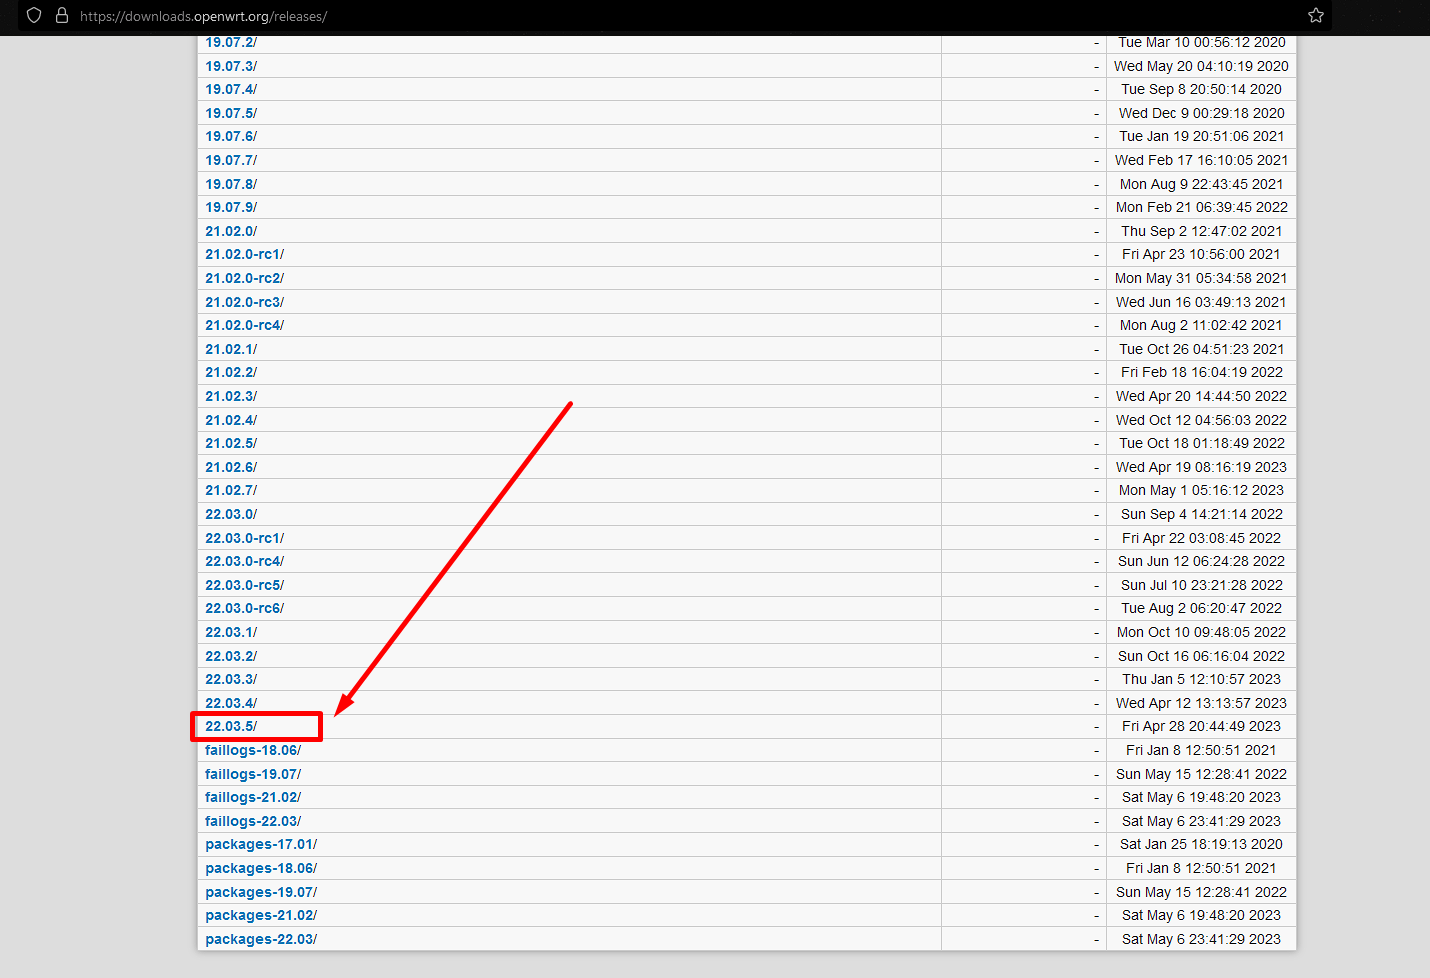

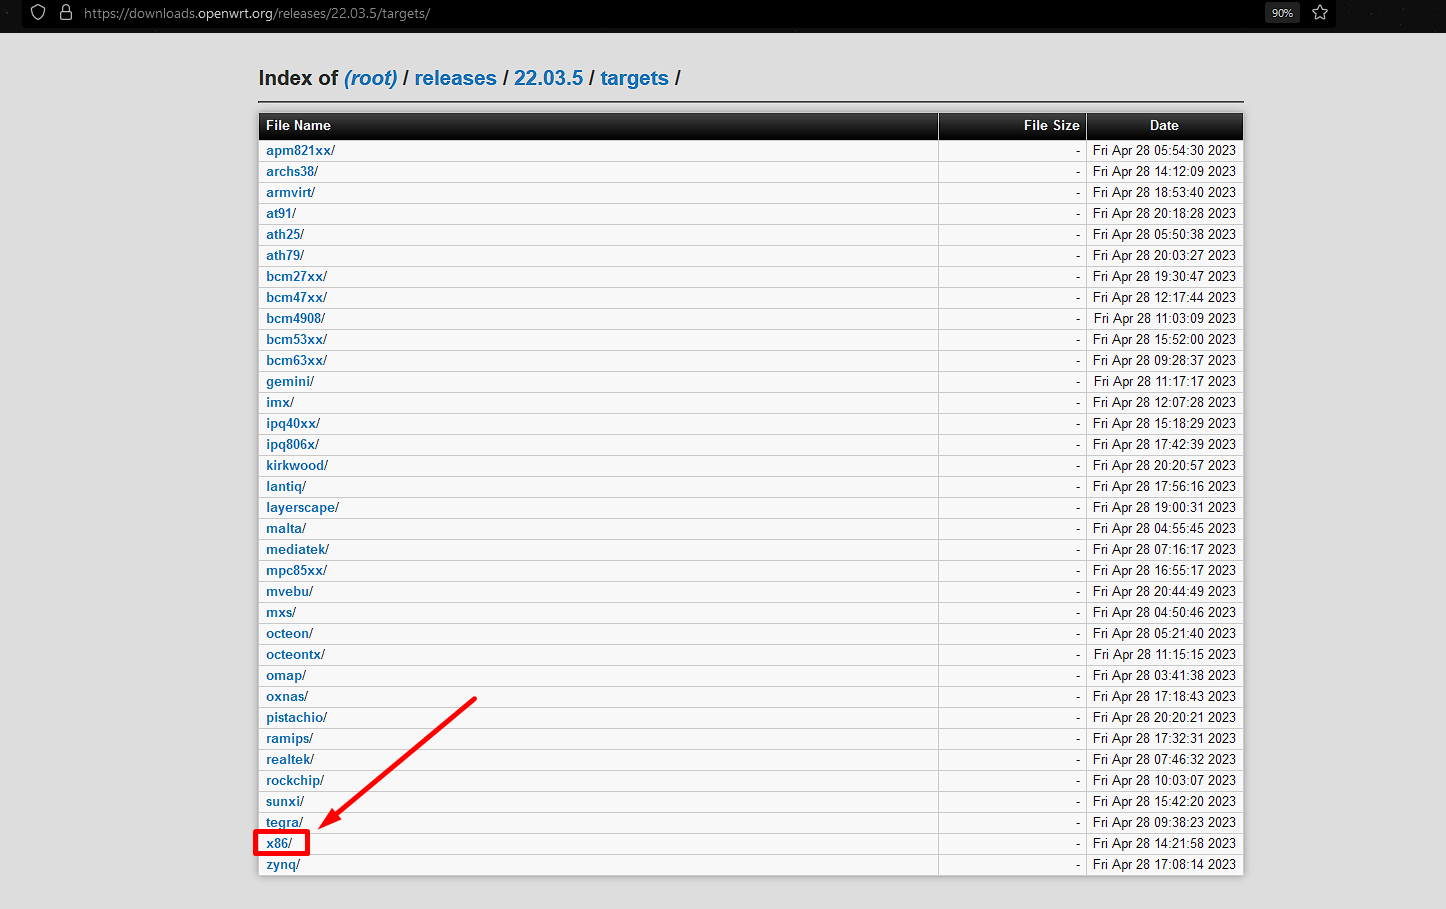
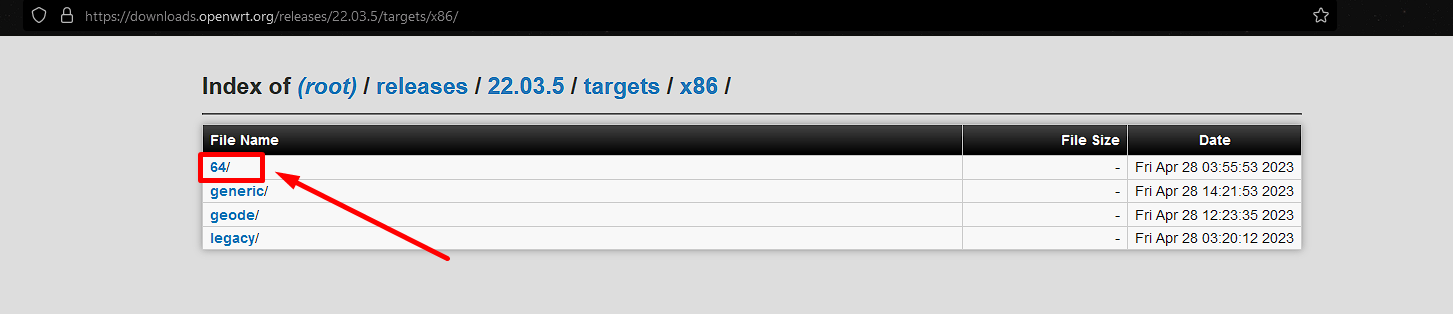
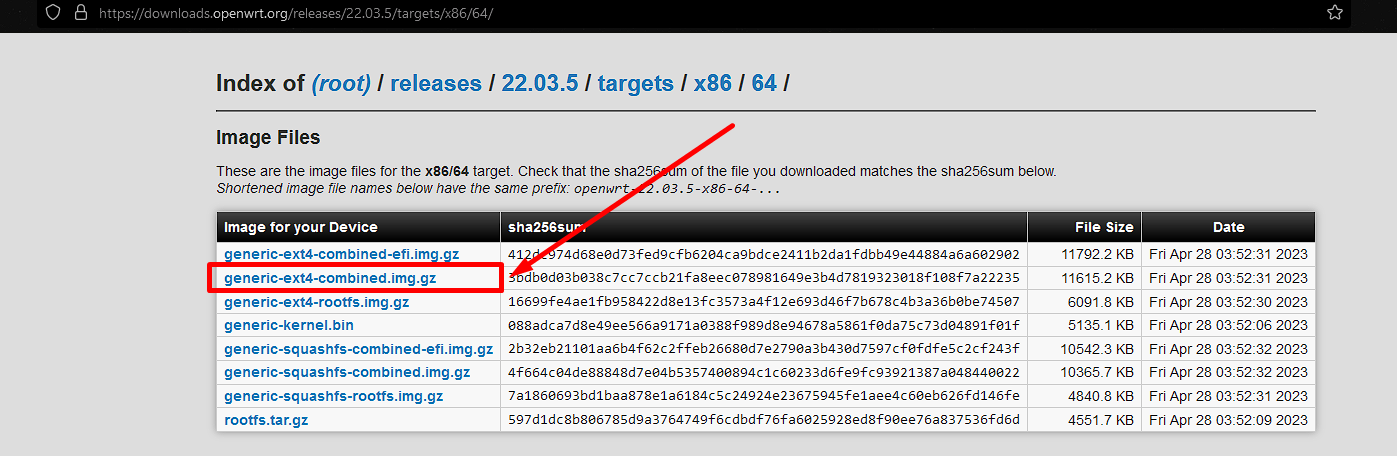
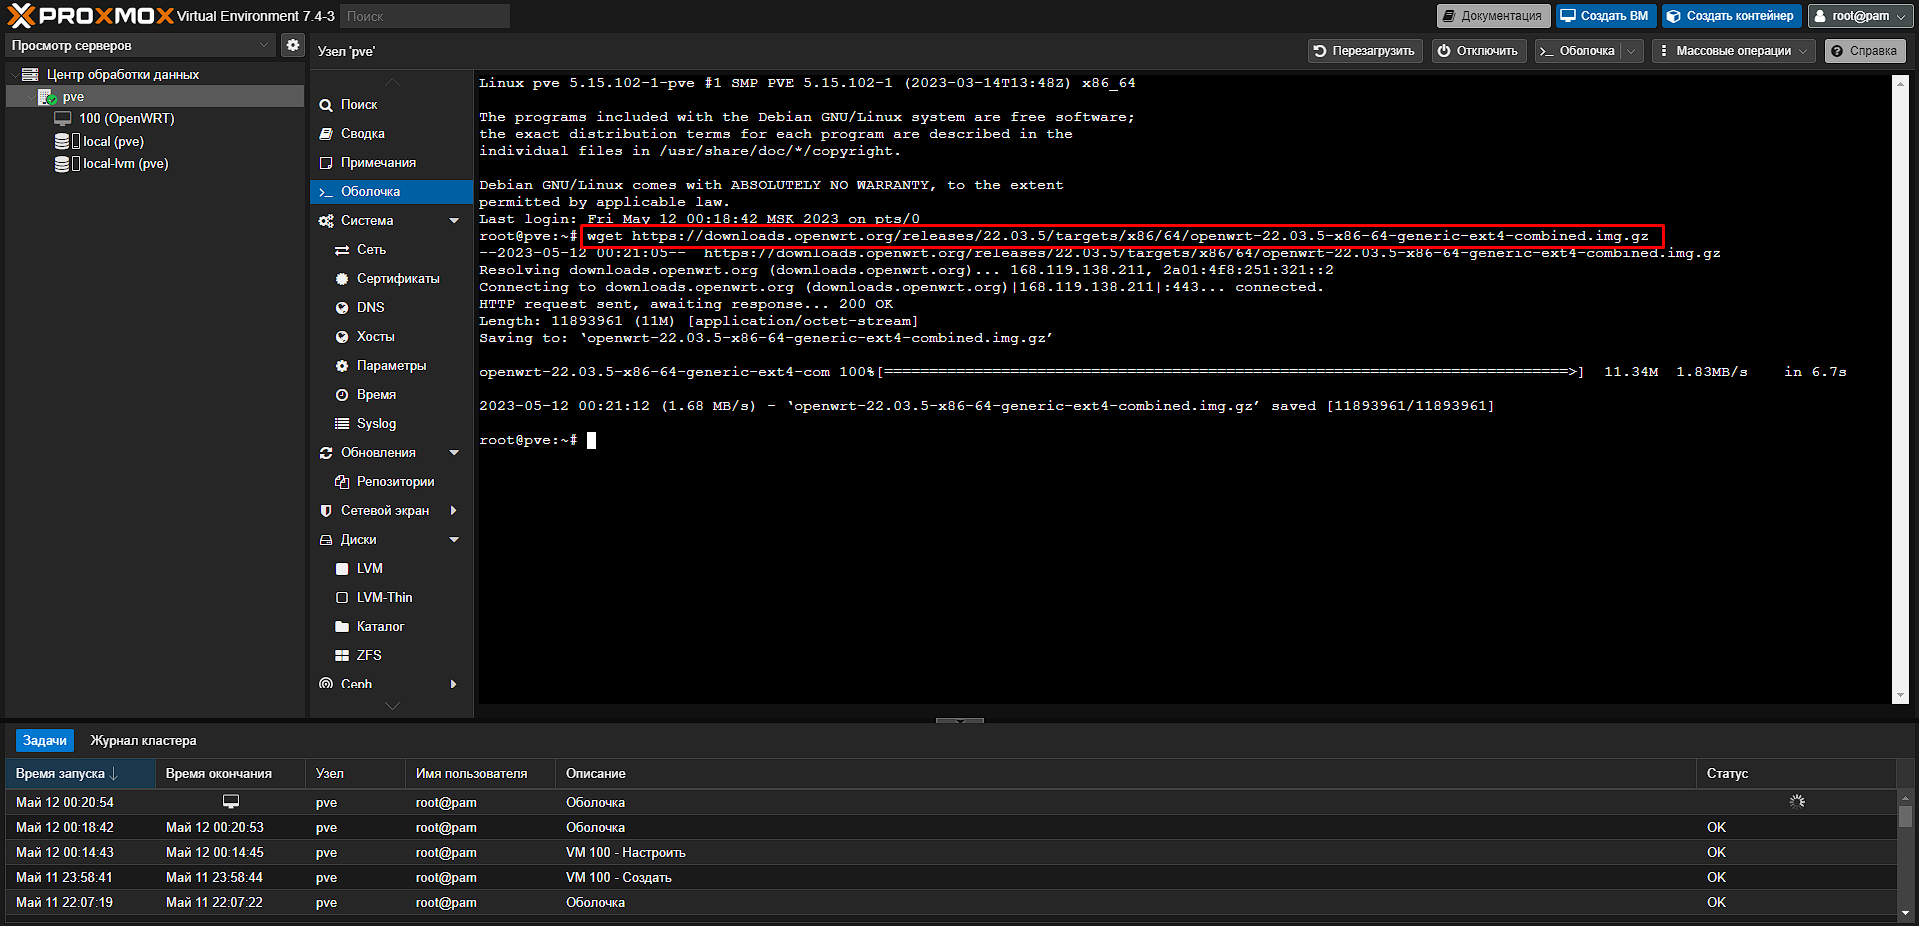
The command to download the latest official OpenWrt image from the downloads site looks like this:
wget https://downloads.openwrt.org/releases/22.03.5/targets/x86/64/openwrt-22.03.5-x86-64-generic-ext4-combined.img.gzAs an alternative firmware you can use a ready-made build with Passwall. What Passwall is and how to use it is covered here: https://habr.com/ru/articles/755934/. Besides Passwall, the build includes LuCI, dnsmasq-full, upnp, QoS, OpenVPN, WireGuard + Passwall with NaiveProxy and Hysteria. Firmware files for our x86-64 architecture can be downloaded here: https://disk.yandex.ru/d/-0TWYBj_CqrQMQ
An alternative command to download the OpenWRT Passwall image from my site looks like this:
wget https://kiberlis.ru/files/openwrt-22.03.5-x86-64-generic-ext4-combined.img.gzYou can run the command via any SSH client or directly in the Proxmox UI
Under targets/x86/64 several disk image files are available with different traits (for Proxmox you need ext4-combined.img.gz or squashfs-combined.img.gz):
- ext4-combined.img.gz (Recommended for Proxmox) This disk image uses a single read/write ext4 partition without a read-only squashfs root filesystem. As a result the root partition can be expanded to fill a large disk (e.g. SSD/SATA/mSATA/SATA DOM/NVMe, etc.). Features such as failsafe mode or factory reset will not be available, because they require a read-only squashfs partition. The image includes both boot and root partitions, plus an MBR area with updated GRUB2.
- ext4-combined-efi.img.gz Same as the previous image, but intended for EFI boot.
- ext4-rootfs.img.gz Root filesystem partition image only. Useful for installing OpenWRT without overwriting the boot partition and MBR area.
- kernel.bin
- squashfs-combined.img.gz This disk image uses the traditional OpenWrt layout with a read-only squashfs root and a read/write partition for settings and installed packages. Because of how this image is built, you will have less than 100 MB free for extra packages and settings, and extroot will not work. The main difference from ext4-combined.img.gz is the ability to factory-reset OpenWRT and protection against losing router access after a failure. I find these features pointless with Proxmox and more relevant when OpenWRT runs as a standalone system, since you can restore an OpenWRT snapshot instead—including for a factory reset.
- squashfs-combined-efi.img.gz Same as the previous image, but intended for PC BIOS boot instead of EFI. EFI boot is also supported.
- squashfs-rootfs.img.gz
- rootfs.tar.gz Contains all files from the root partition. You can extract it onto a root filesystem without rewriting the partition. To avoid conflicts, back up old files first and extract onto an empty filesystem.
Importing the OpenWRT IMG into Proxmox and activating the virtual disk image
After the img.gz download finishes, unpack it to an IMG file with the following command (the filename after gunzip may differ depending on the image and version you chose)
gunzip openwrt-22.03.5-x86-64-generic-ext4-combined.img.gzThen rename it to a shorter name (openwrt.img) so it is easier to type.
mv openwrt-22.03.5-x86-64-generic-ext4-combined.img openwrt.imgYou can also download the OpenWrt file to your computer, unpack it to IMG, rename it, and upload it to the Proxmox server with SFTP clients WinSCP or FileZilla.
Next, import the IMG into the virtual machine. Run the following command to load the image. 100 is the VM ID from the first step (your VM ID may differ from mine), openwrt.img is the file we just downloaded, and local-lvm is the VM storage name
qm importdisk 100 openwrt.img local-lvm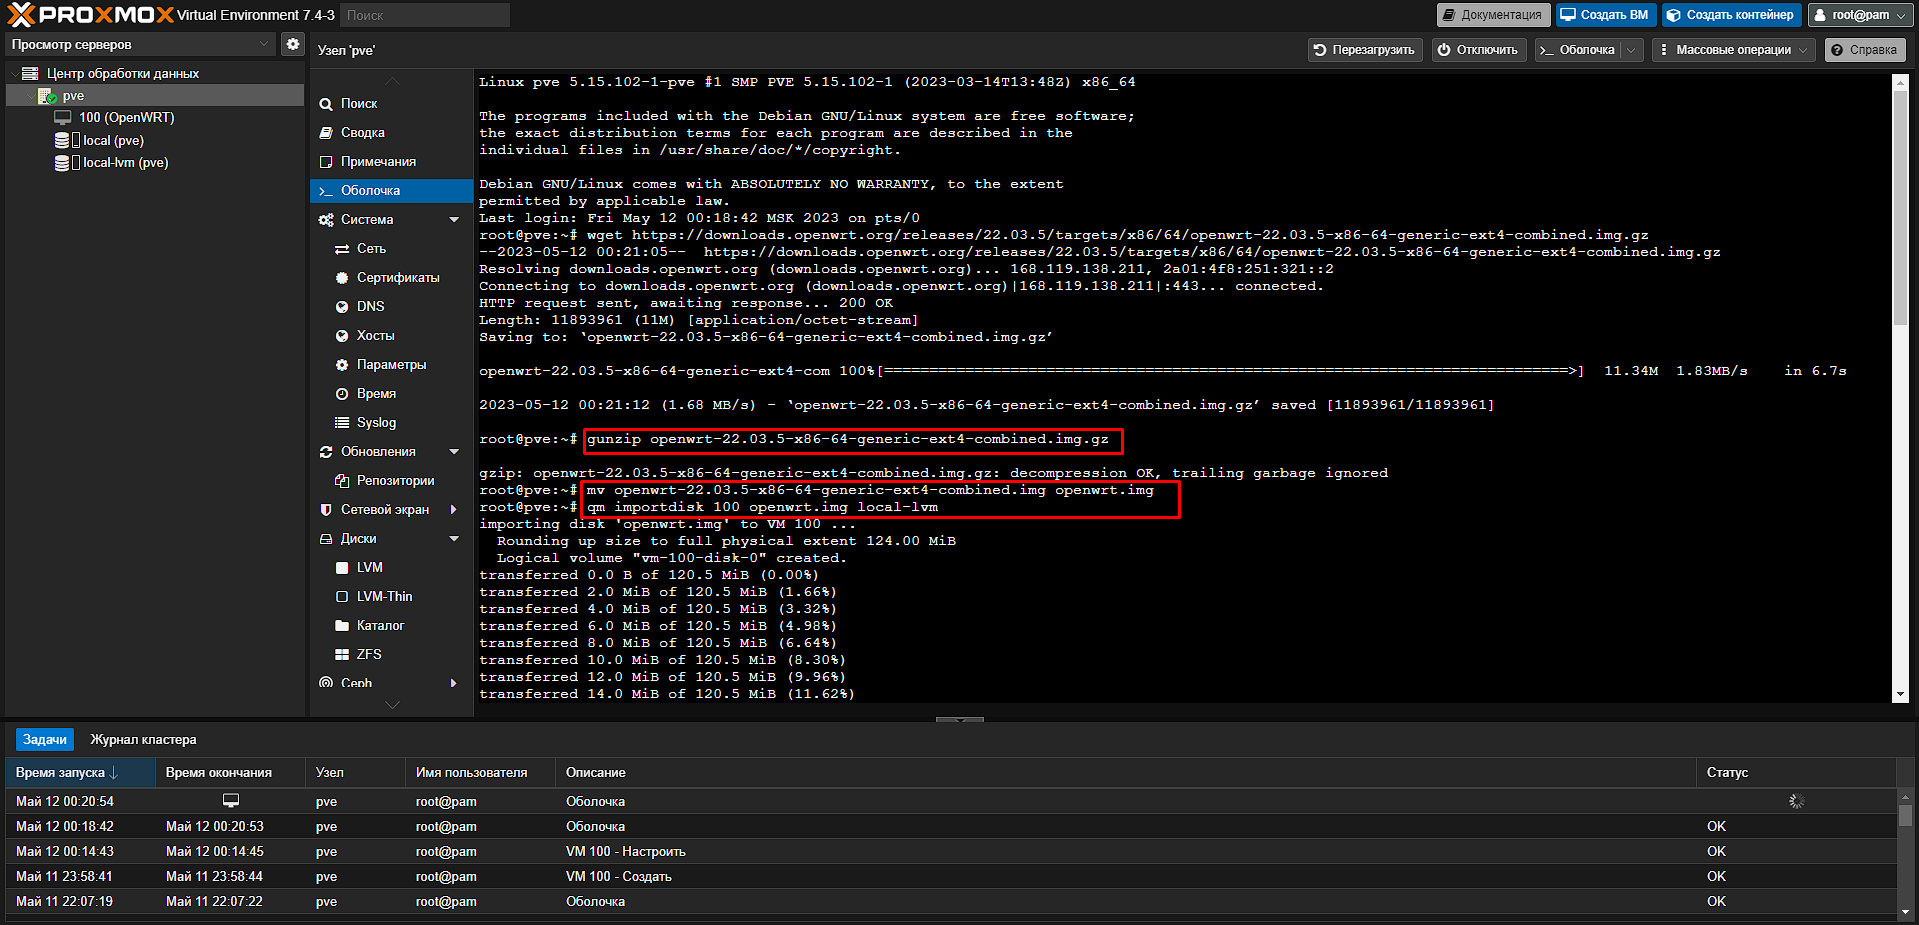
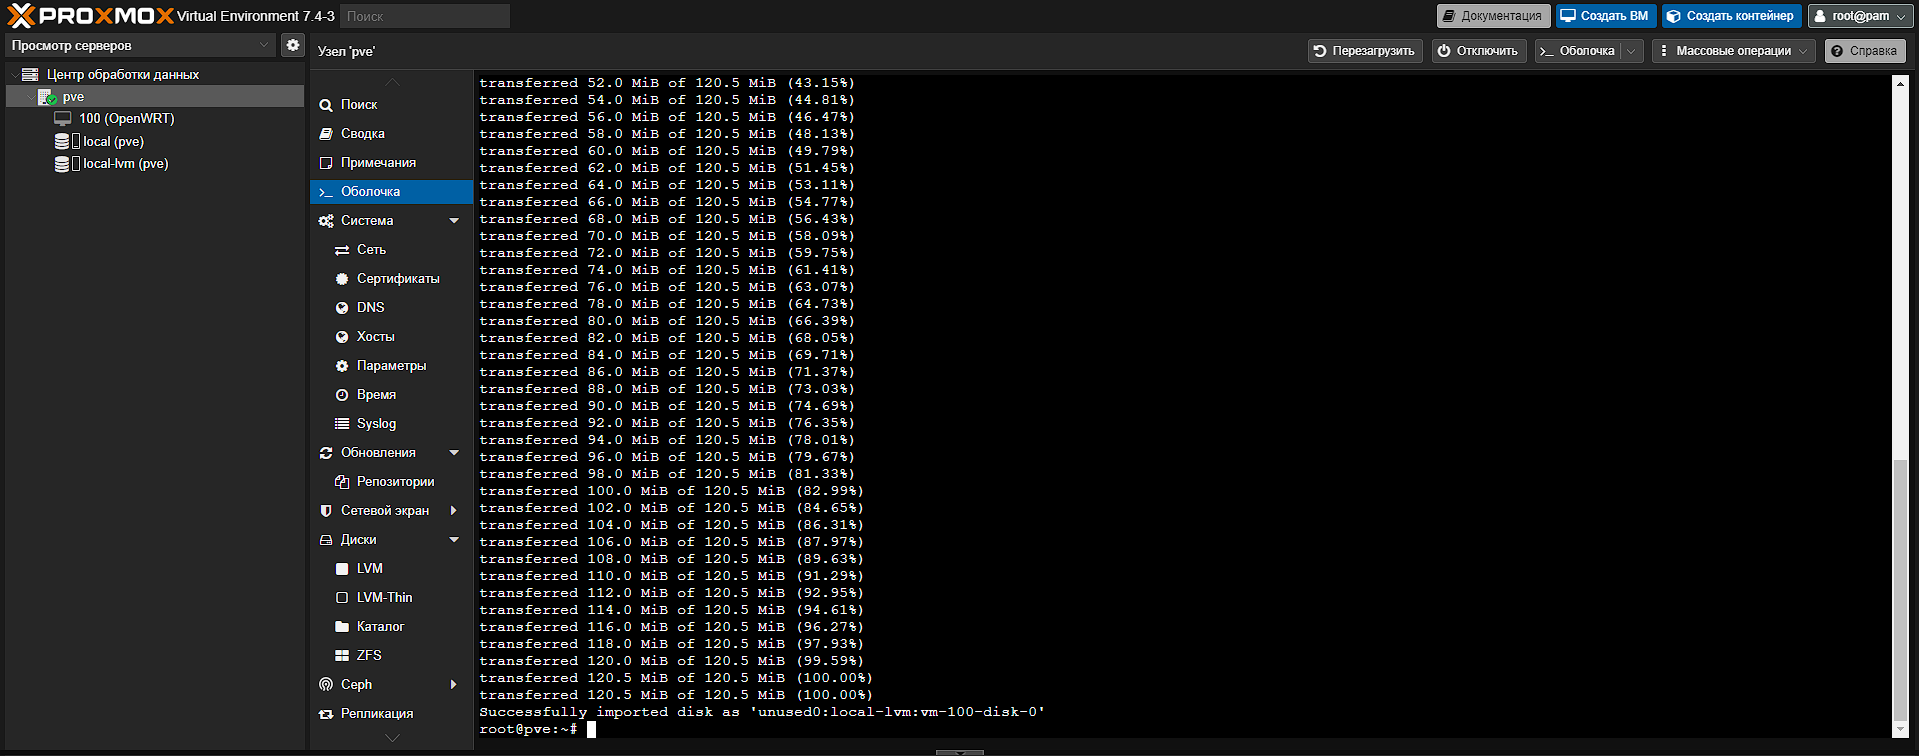
Return to the OpenWrt VM Hardware tab; you will see the imported Unused Disk 0. Select it and click Edit.
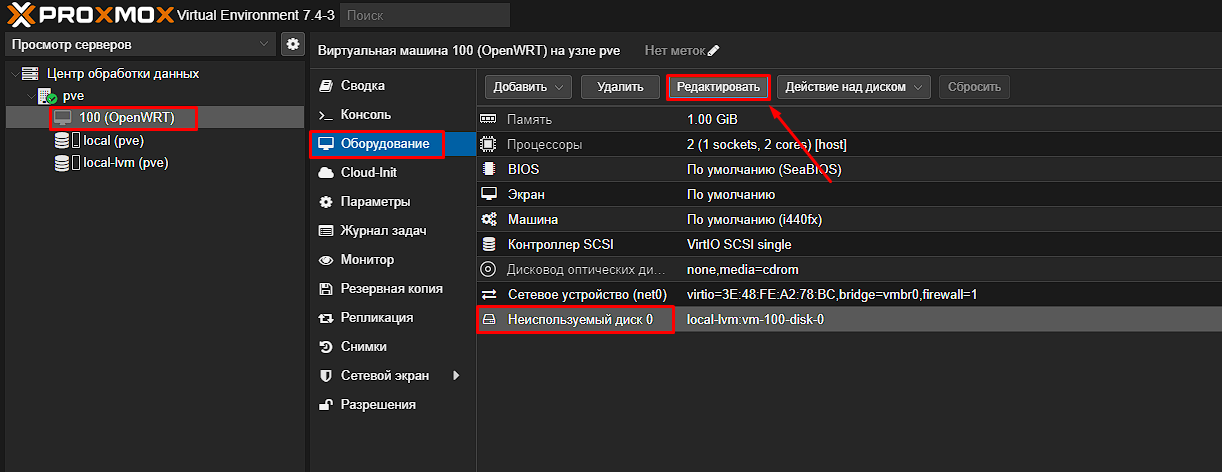
Select SCSI for Bus/Device (sometimes you need “SATA”) and click Add
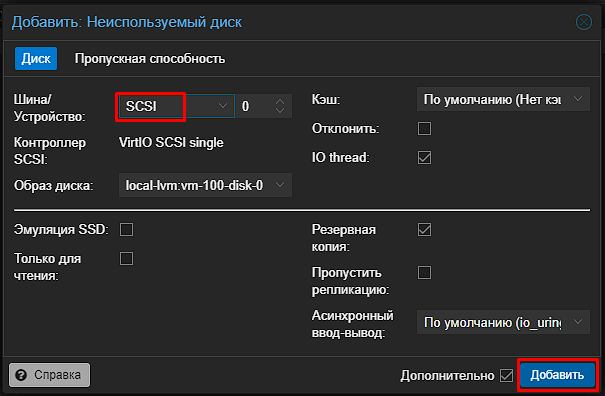
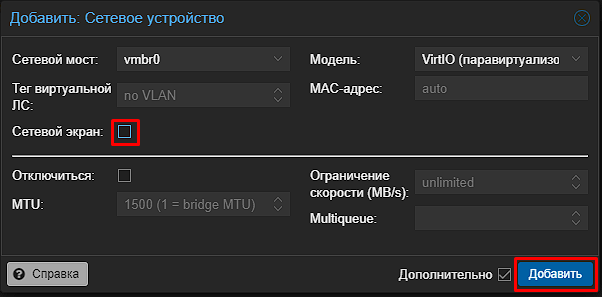
You also need to add a correct network device so OpenWRT can reach the internet and download packages
Click Hardware -> Network Device

Disable Firewall and click Add; you can leave the default network bridge. We will configure networking in more detail in later steps.
Next, add the imported virtual disk to the boot order. Go to Options -> Boot Order.
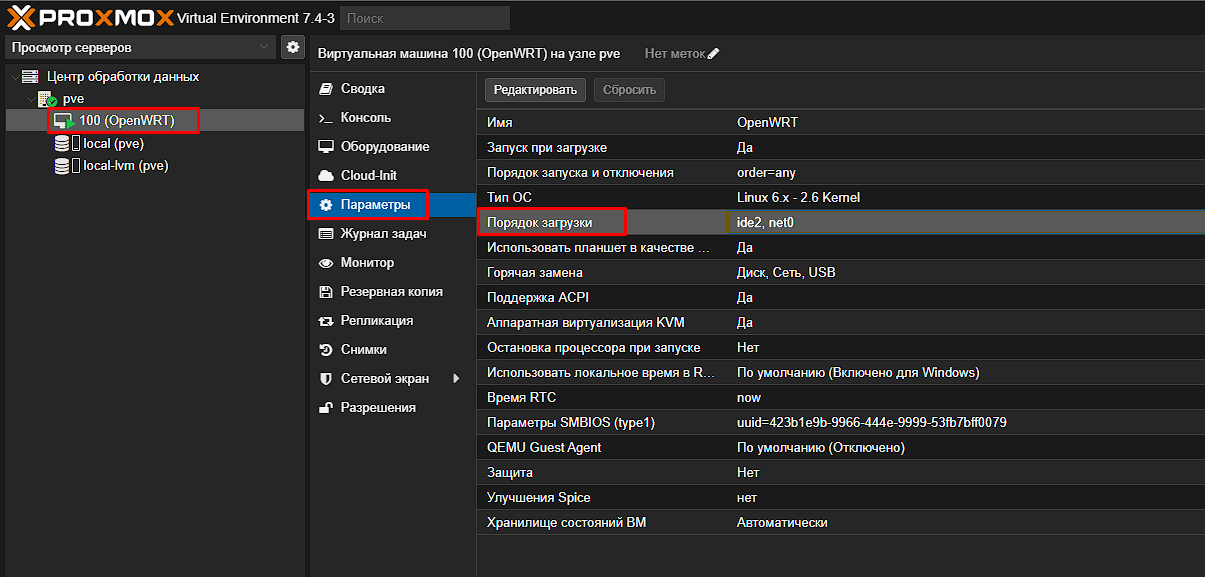
Check the OpenWRT virtual disk and drag it to the top. Click OK
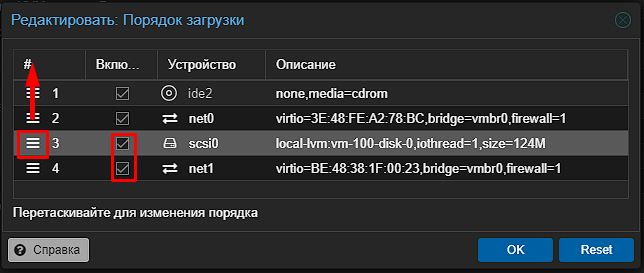
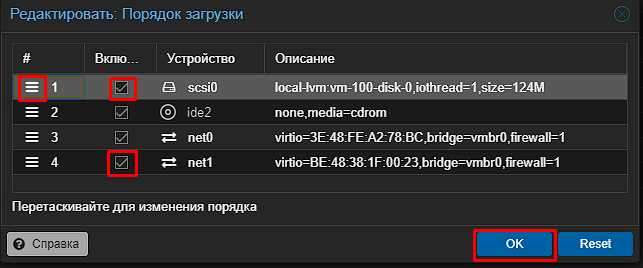
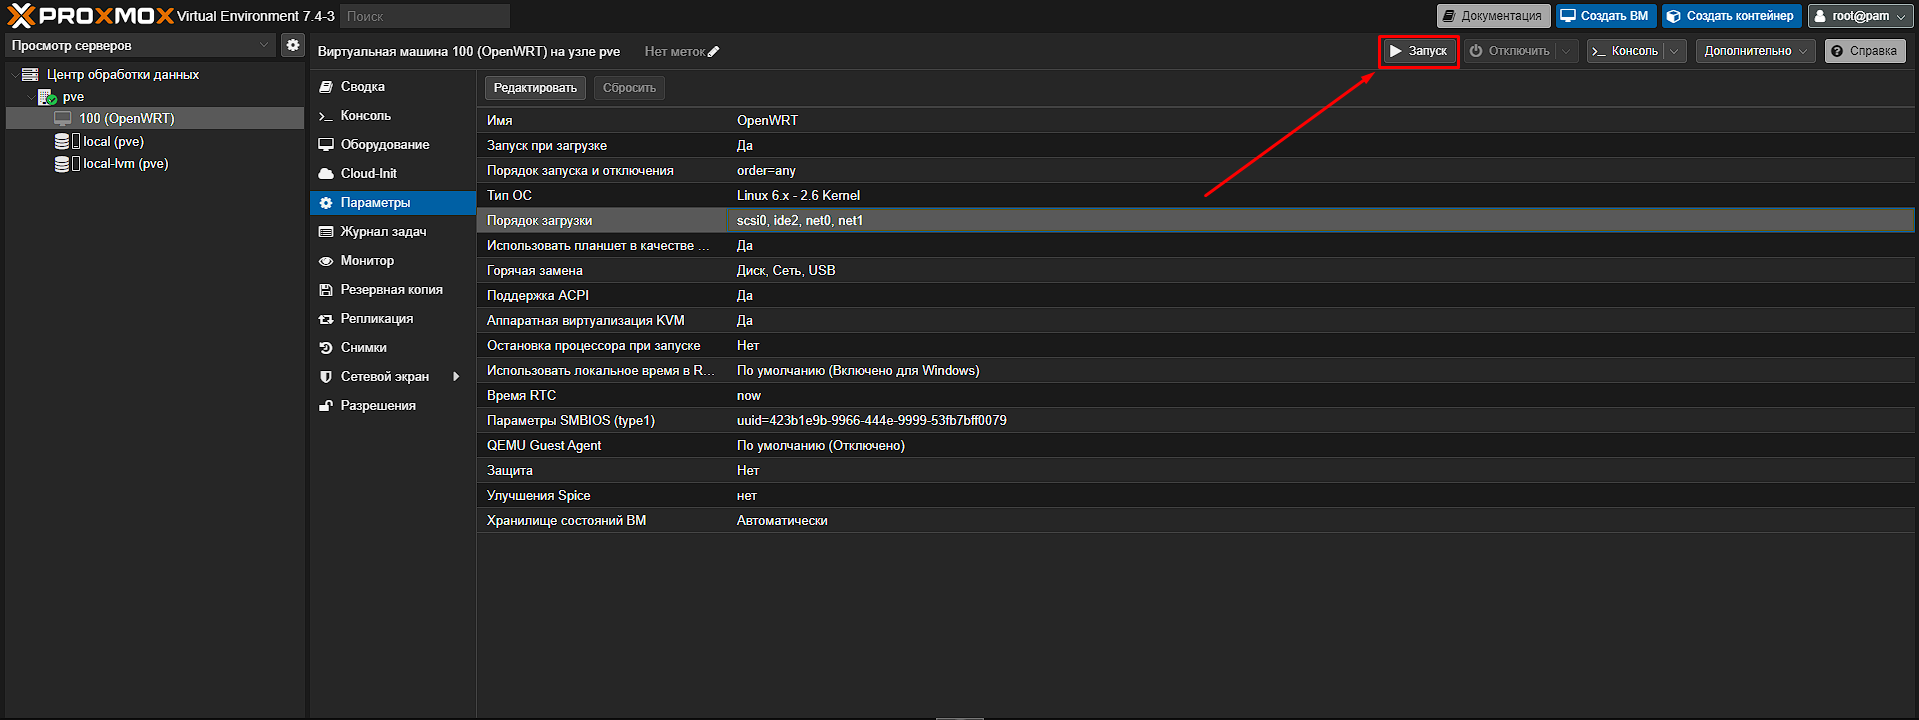
Start the OpenWRT virtual machine by clicking Start in the upper-right corner.
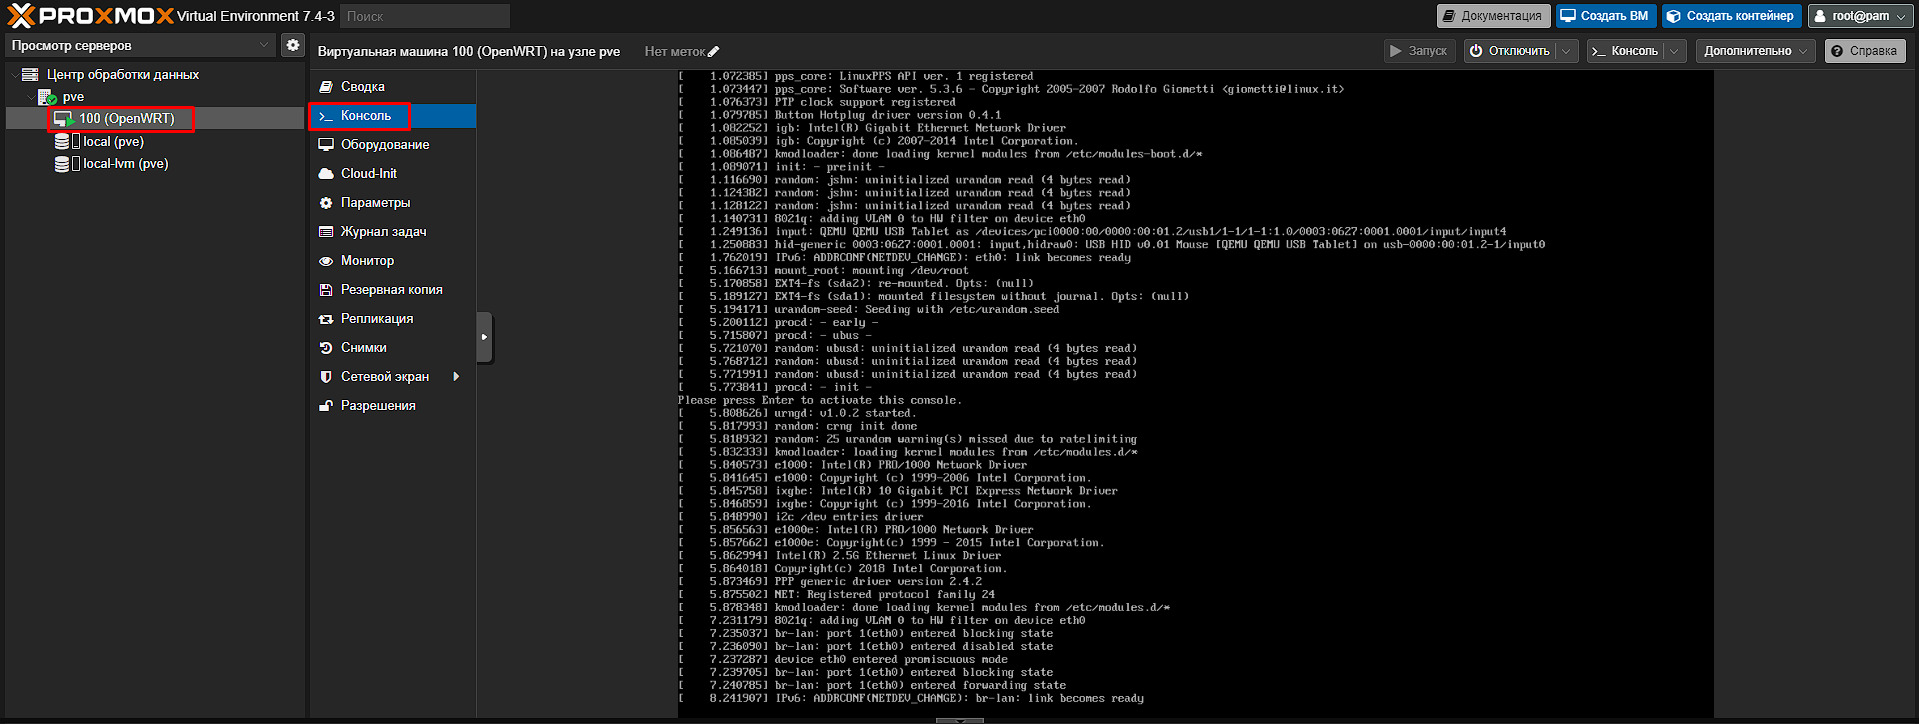
Then switch to the OpenWRT Console and press Enter to enter commands inside OpenWRT.
By default the OpenWRT IP is 192.168.1.1; that is also how you open the OpenWRT web UI.
If Proxmox and your current LAN use a different range such as 10.0.0.1, change the default OpenWRT IP with the following command. Replace X.X.X.X with the new OpenWRT IP address.
Type commands manually—copy/paste in the Proxmox console does not work for OpenWRT. Once OpenWRT is reachable on the network, you can use an SSH client such as WinSCP or Tabby instead.
uci set network.lan.ipaddr='X.X.X.X'
uci commit network
/etc/init.d/network restart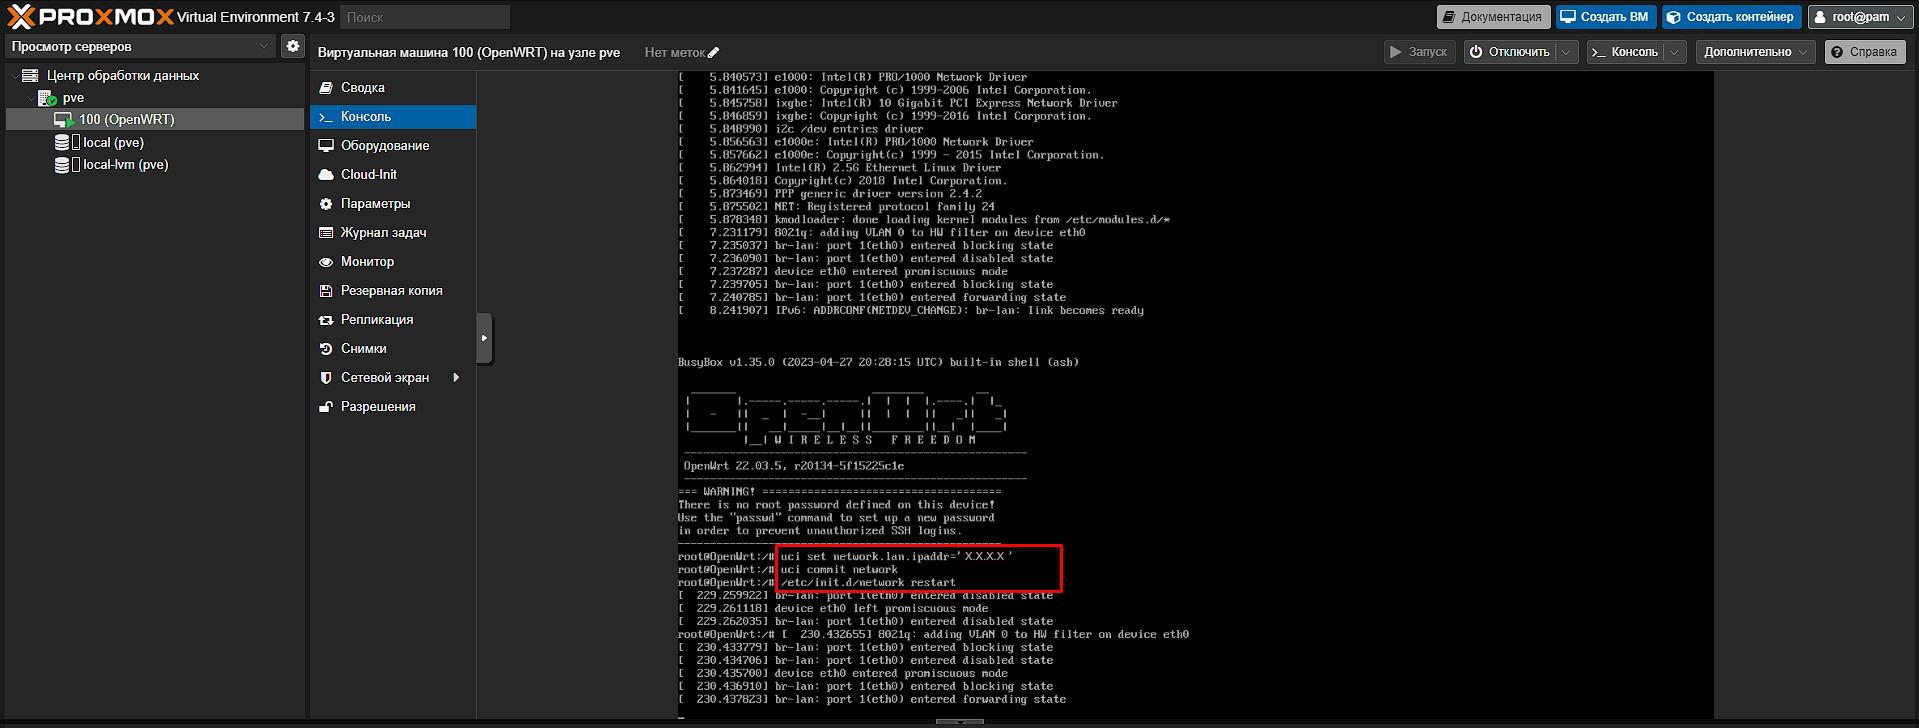
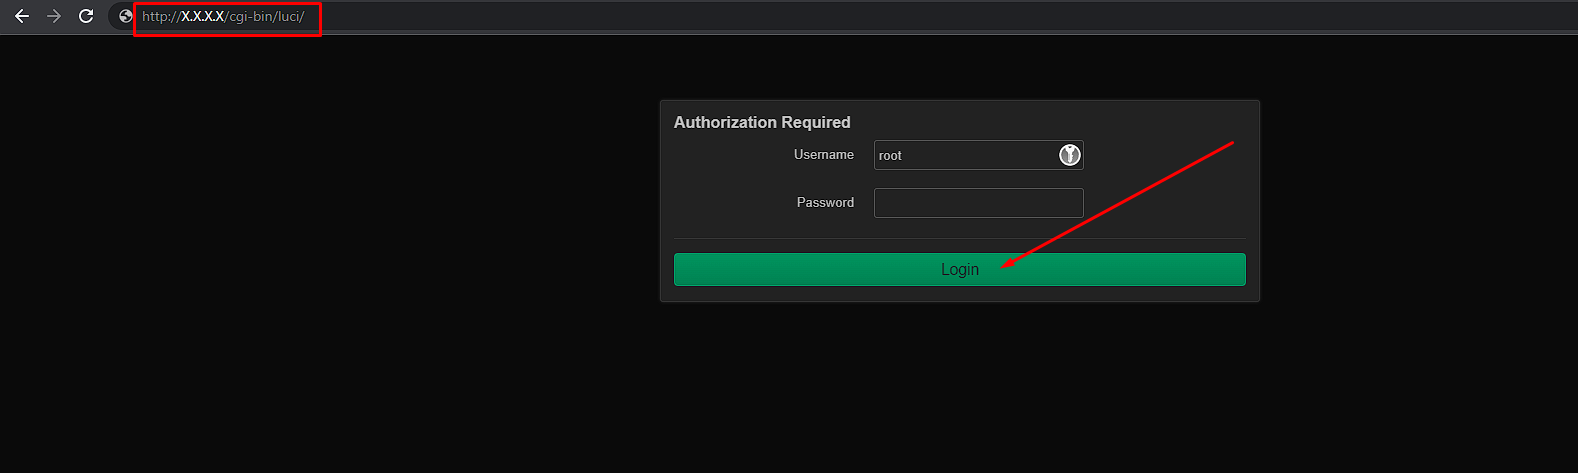
By default OpenWRT uses the root account with no password. To log in, just click Login without entering a password
Setting the OpenWRT password
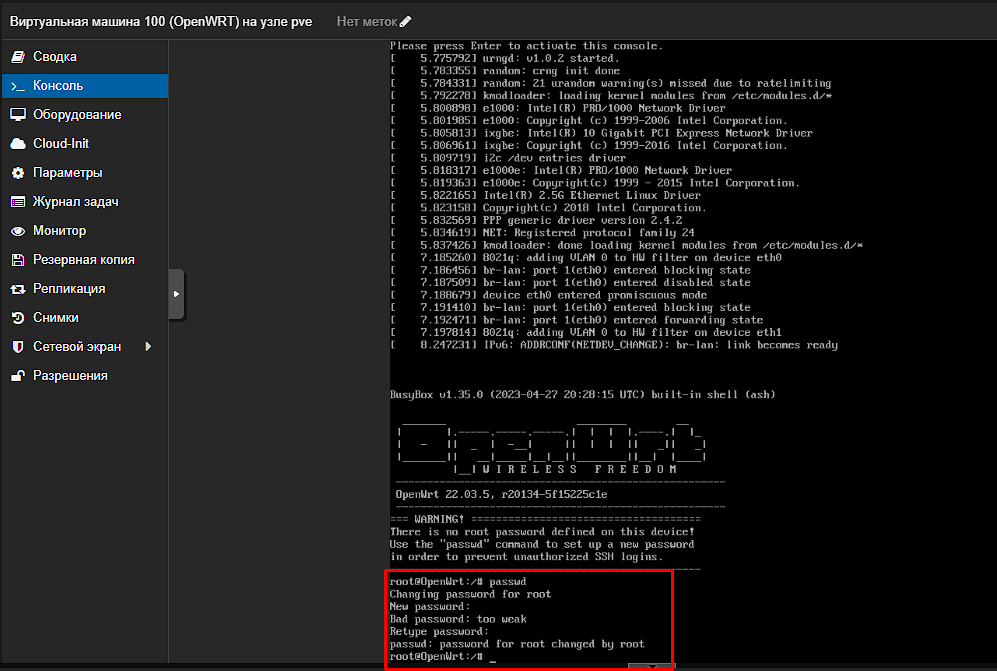
To set the first OpenWRT password, run passwd in the OpenWRT console
passwdAfter running passwd, enter the new root password twice
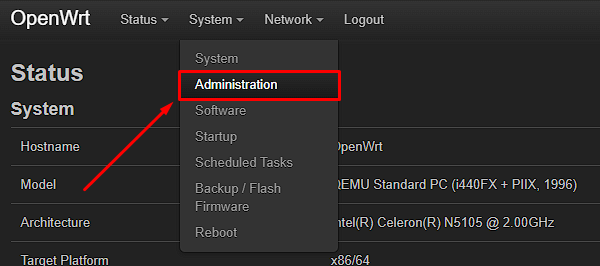
You can also change the root password in the OpenWRT web UI:
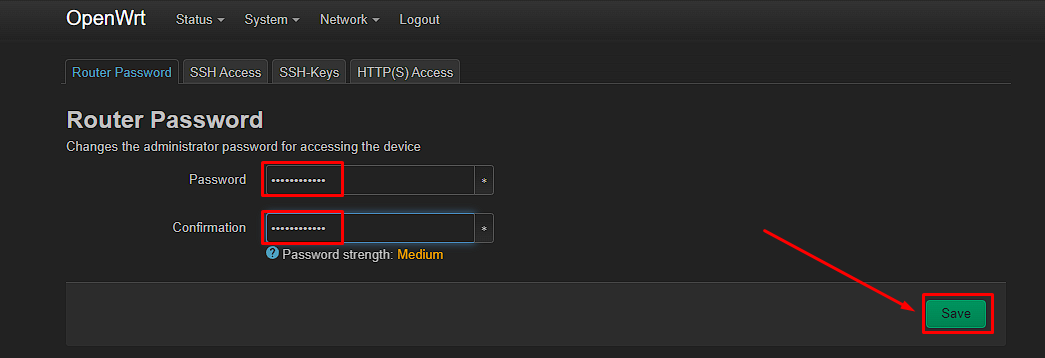
Expanding the OpenWRT disk in Proxmox
The OpenWRT x86 image uses the following partition layout (as seen from inside the system):
- /dev/sda1 — a 16 MB ext4 /boot partition holding GRUB and the kernel.
- /dev/sda2 — a 104 MB partition with either a squashfs root plus a read/write f2fs filesystem, or an ext4 root filesystem (depending on which image you chose).
Any extra space on the device is unallocated.
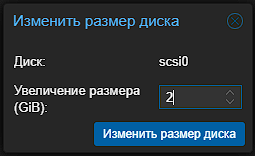
Since our Proxmox host has plenty of storage, we can expand the router’s /dev/sda2 from 104 MB to 1 GB or more. 1 GB is enough for all typical OpenWRT packages, but we will allocate with headroom—2 GB.
I do not recommend allocating a very large disk, because shrinking is much harder than expanding. Use 2 GB or less.
First shut down the OpenWRT VM so you can resize the virtual disk. Click Shutdown in the upper-right corner.
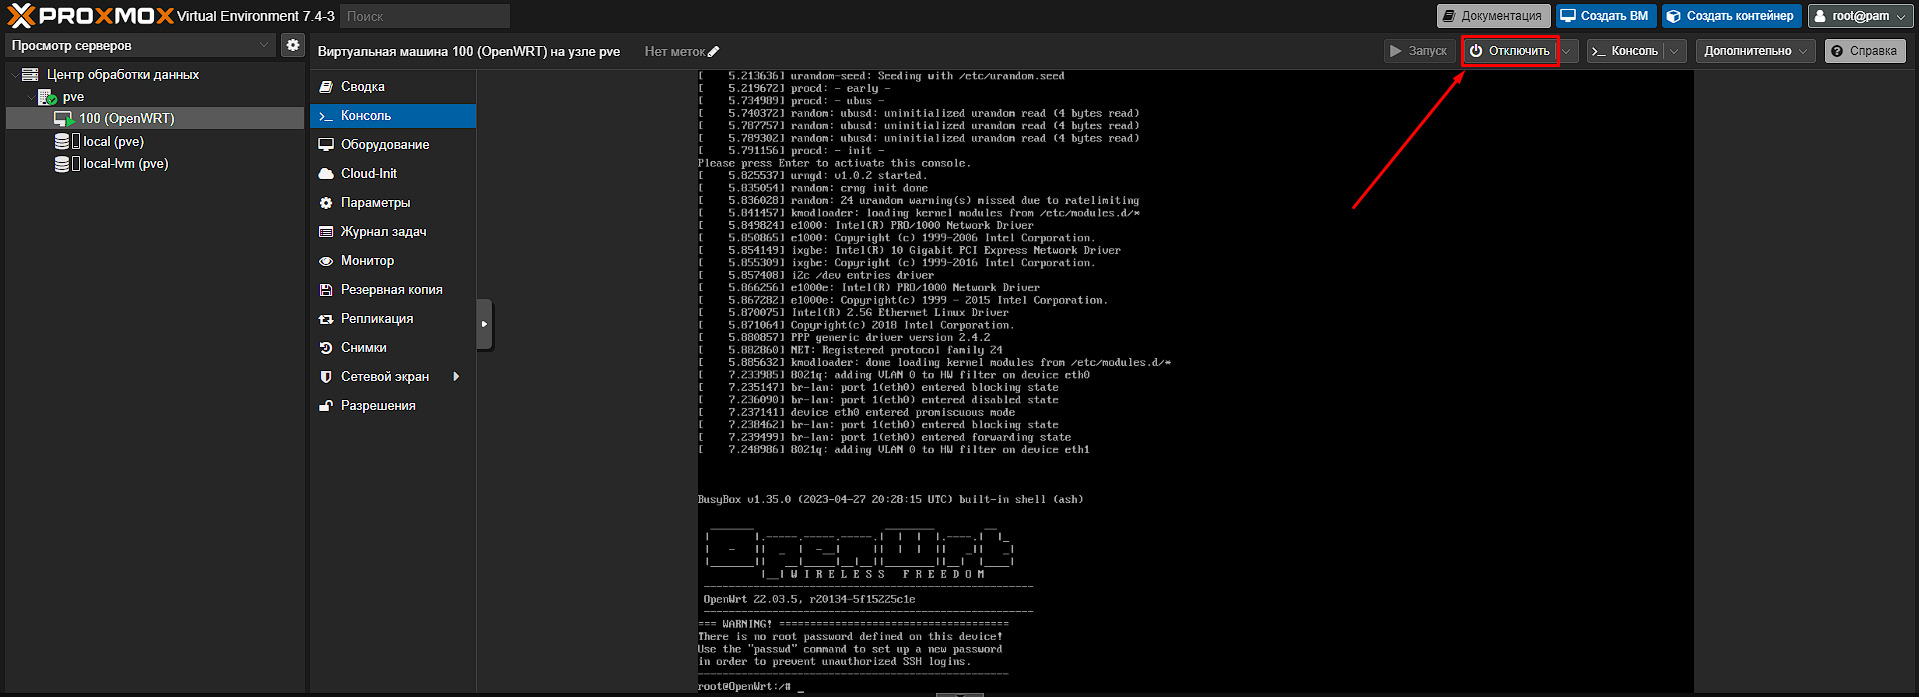
Confirm shutdown by clicking Yes

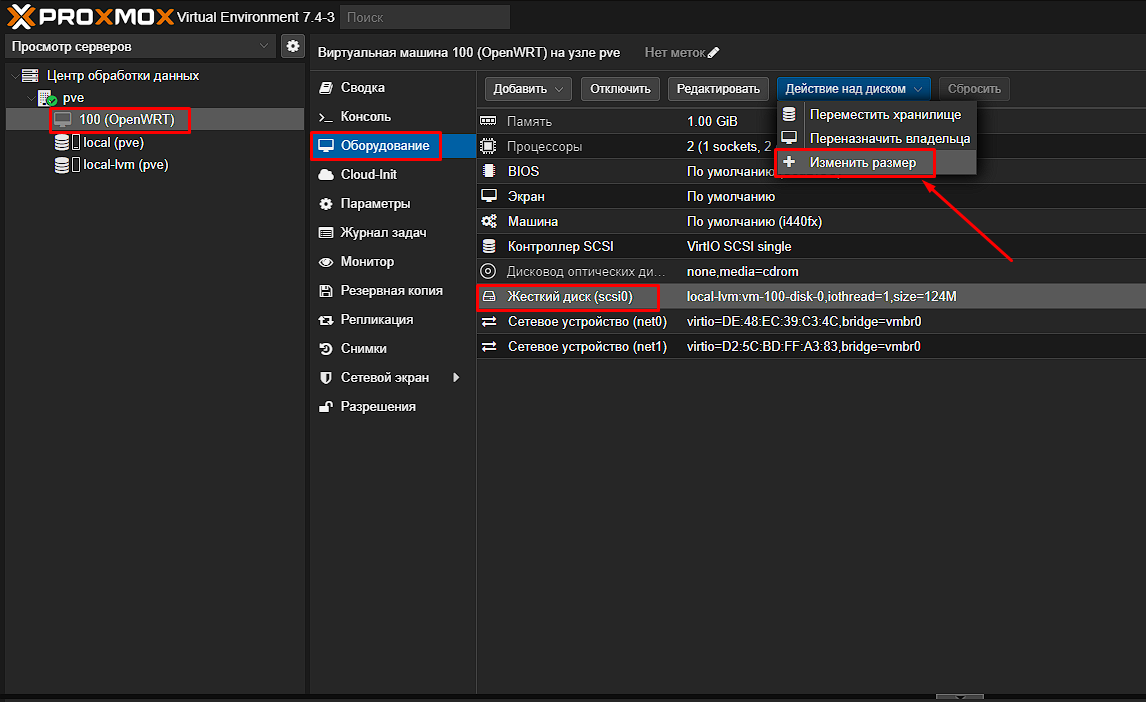
Open the Hardware tab, select Hard Disk, click Disk Action -> Resize
Set the disk size to 2 GB and click Resize disk
Start the OpenWRT VM by clicking Start in the upper-right corner

The disk size changed, but the system does not see it yet—you must grow the filesystem and apply changes with losetup and resize2fs
Connect to OpenWRT over SSH. I will use Tabby; you can use any other SSH client
Use these SSH connection settings:
- IP address (Host): the one you assigned to OpenWRT at the end of step 4
- Port: 22
- Username: root
- Password: the one you set in step 5
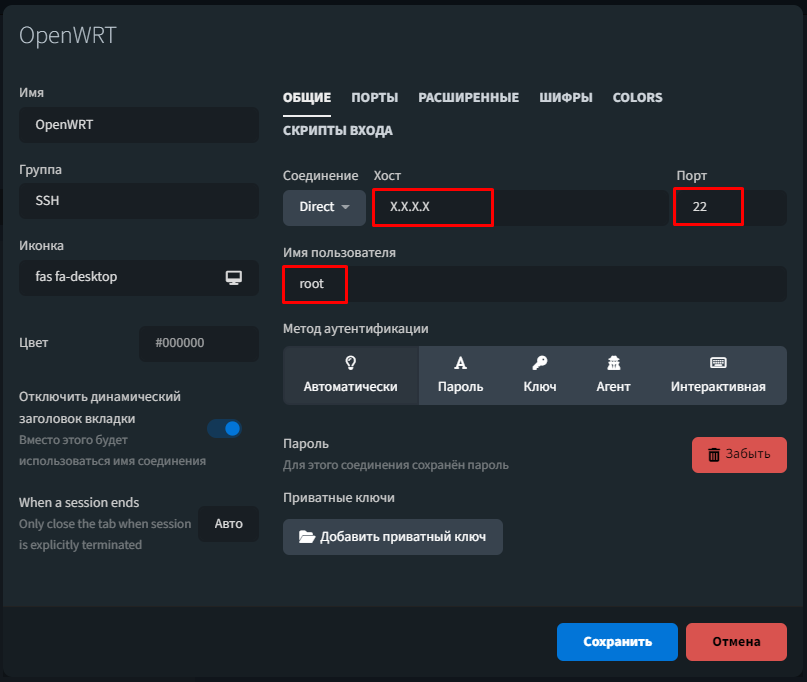
Use the parted package in OpenWRT to fix the partition table, identify, and expand the root partition.
Use the losetup package to map the root partition and resize2fs to expand the root filesystem.
Run the following commands to expand the OpenWRT root partition and root filesystem:
# Install packages
opkg update
opkg install parted losetup resize2fs

## Expand the root partition
# Identify disk name and partition number
echo -e "oknfix" | parted -l ---pretend-input-tty

# Expand the root partition
parted -s /dev/sda resizepart 2 100%

## Expand the root filesystem
# Map the root partition to a loop device
losetup /dev/loop1 /dev/sda2

# Grow the root filesystem
resize2fs -f /dev/loop1

## Apply changes
reboot
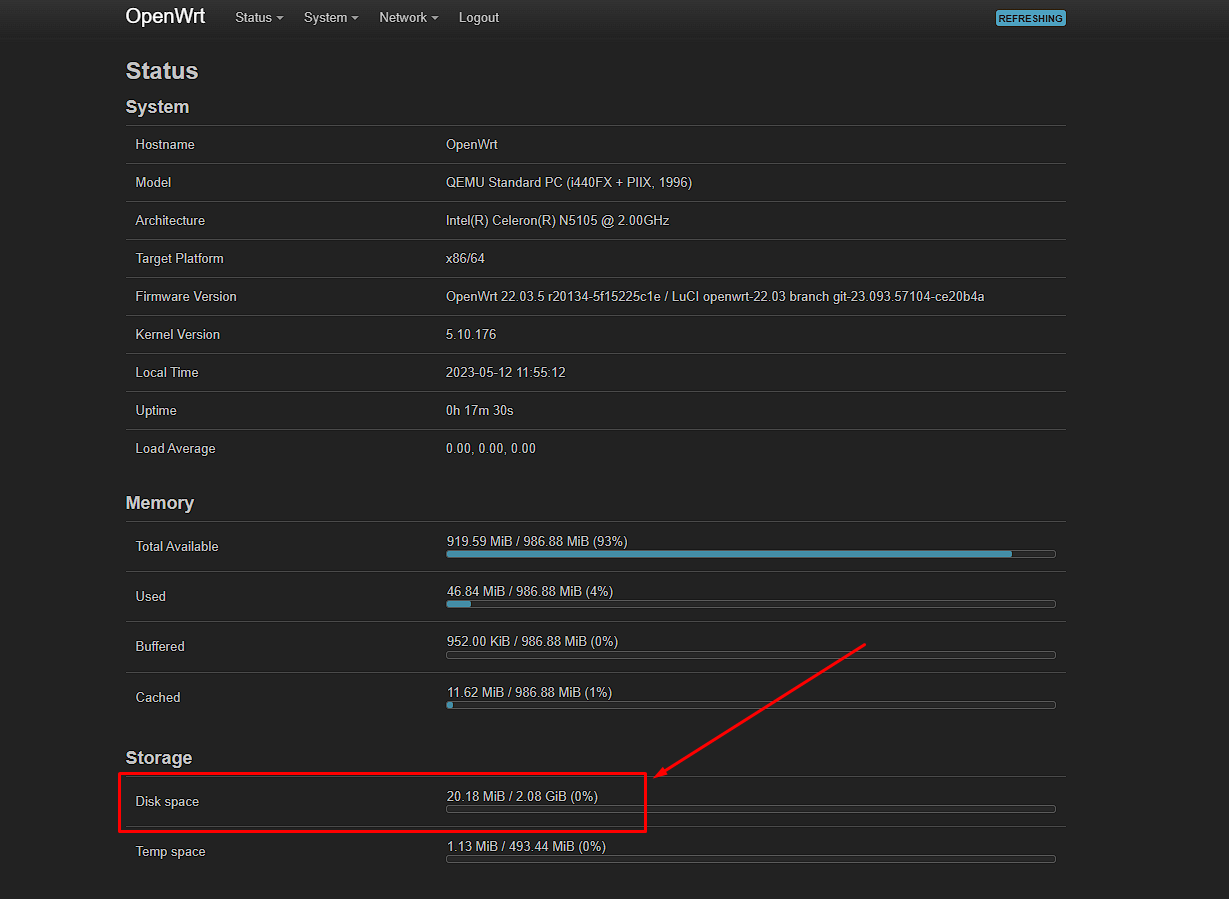
The OpenWRT disk is now expanded to 2 GB:
Localizing the OpenWRT LuCI web UI
To install OpenWRT localization, run the following commands in an SSH client:
# Install the LuCI OpenWRT localization package for Russian
opkg update
opkg install luci-i18n-base-ru
You can also install the Russian localization package via the web UI: open the top menu System -> Software, click Update lists… to refresh the package repository. Then enter luci-i18n-base-ru in the Filter field and click Install next to the luci-i18n-base-ru package.
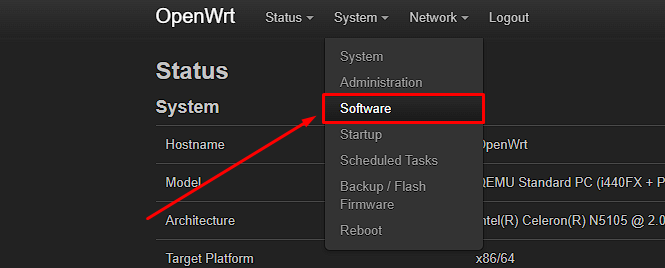
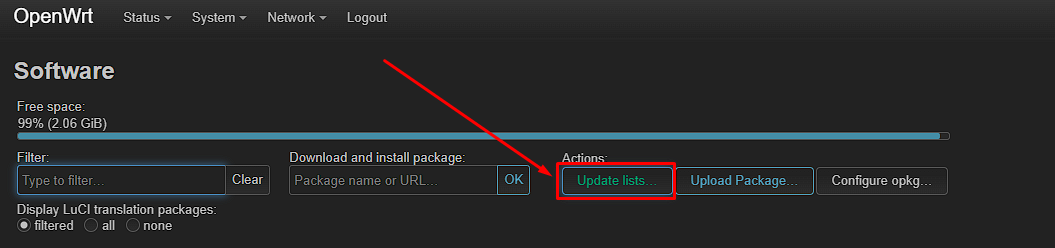
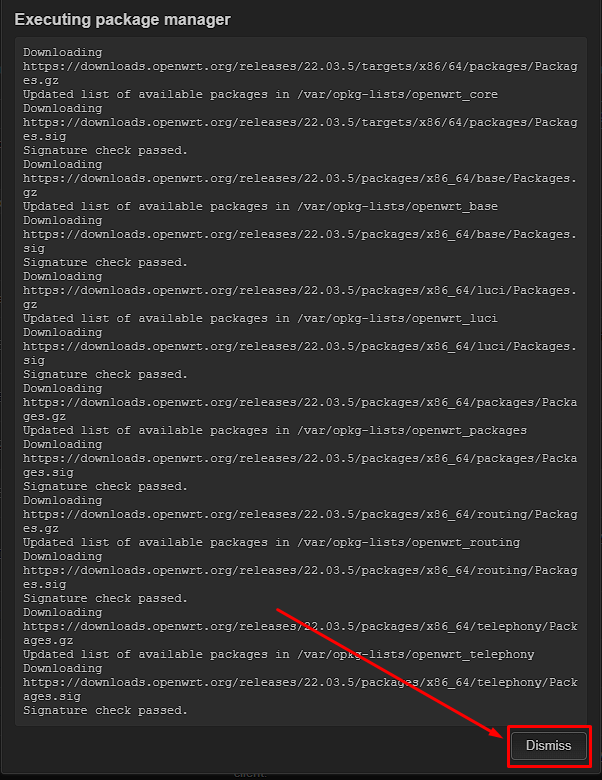
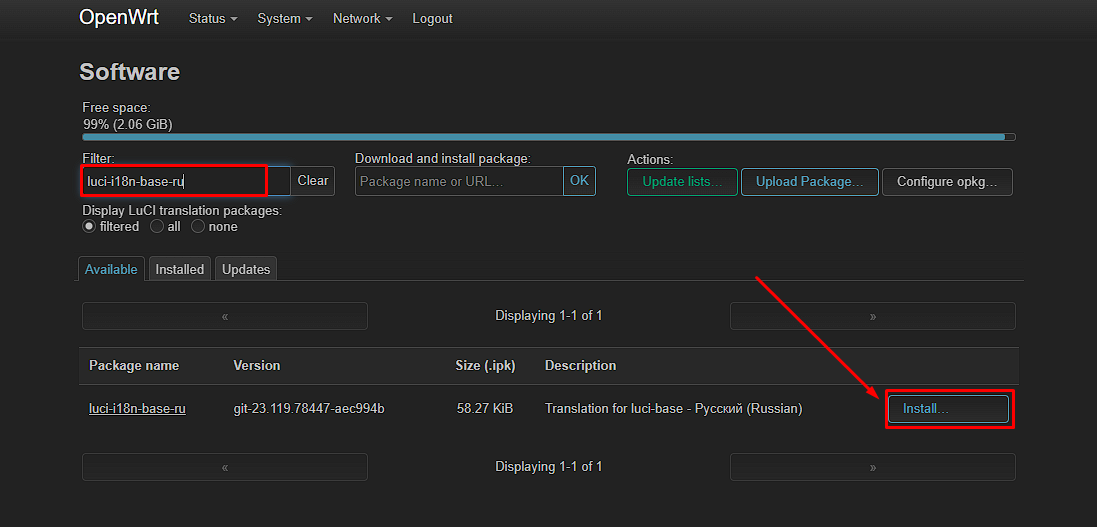
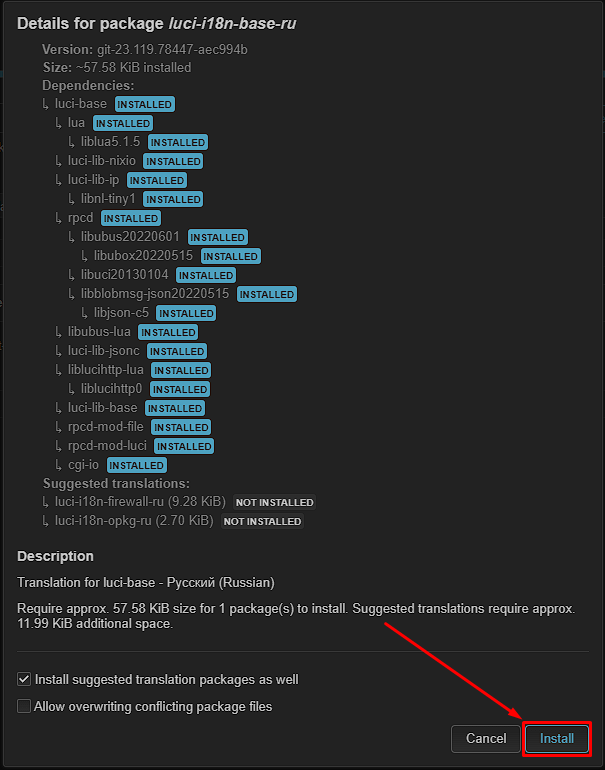
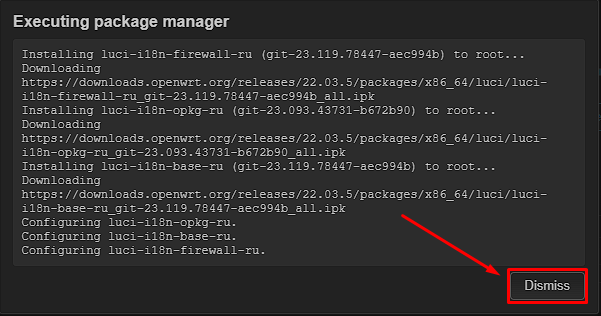
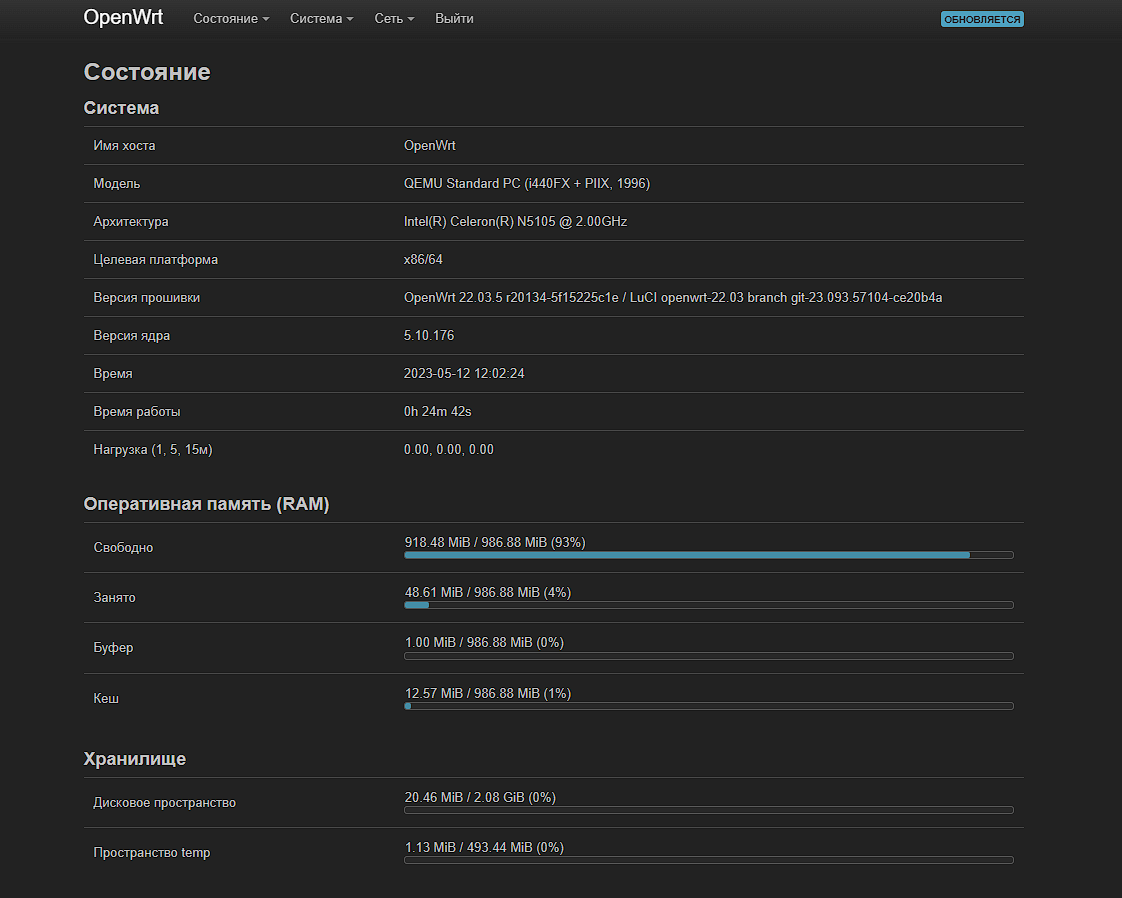
After installing the package, refresh the web UI by clicking the OpenWRT logo or any other page in the interface.
Configuring Proxmox OpenWRT network interfaces
The settings below are specific to my setup; for you they can serve as a baseline for OpenWRT network interfaces in Proxmox. The goal is for the virtual OpenWRT router to fully take over DHCP and port management.
Go to pve management and in the left menu open System -> Network. The window shows all ports of your software router as network devices—I have 4—and you need to create a Linux Bridge for each port. Right now OpenWRT uses only one port; we will fix that by adding more first in Proxmox, then in the OpenWRT VM, then activating them inside OpenWRT.
Bridge vmbr0 was created automatically by Proxmox for the first port (enp2s0); its address and gateway were assigned by the home router used when Proxmox was installed
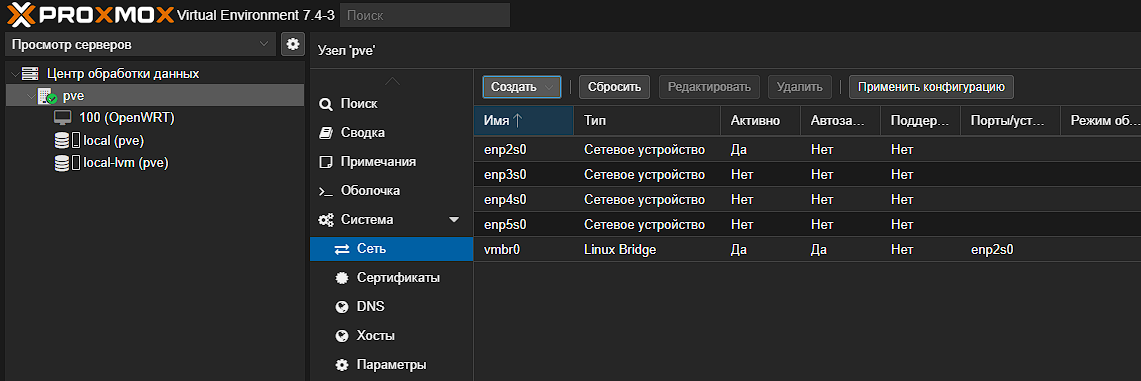
Add new Linux Bridge network bridges for each port by clicking Create
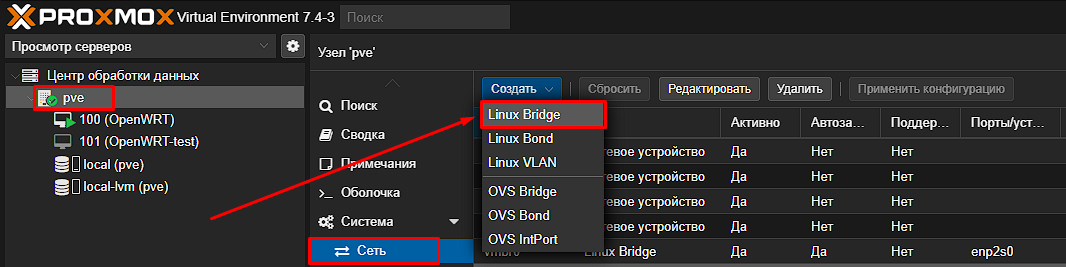
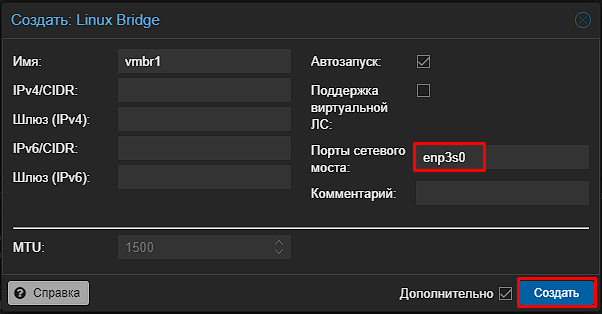
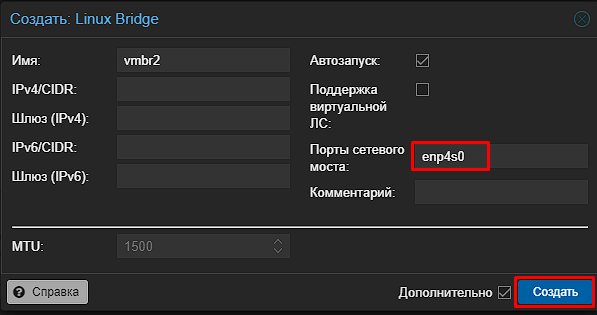
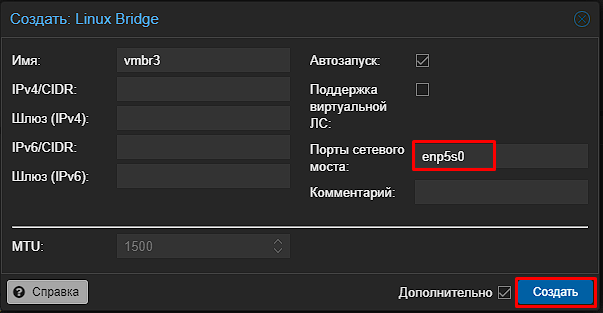
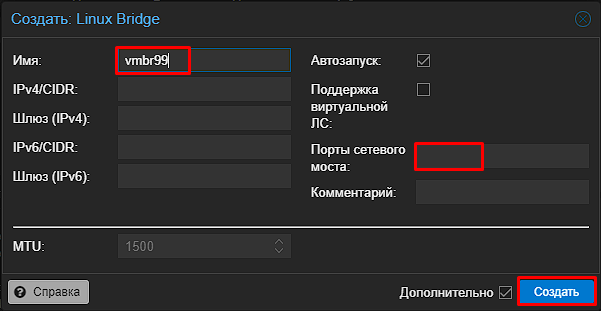
Also create one Linux Bridge without assigning a bridge port
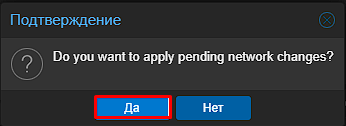
After all bridges are created, click Apply Configuration
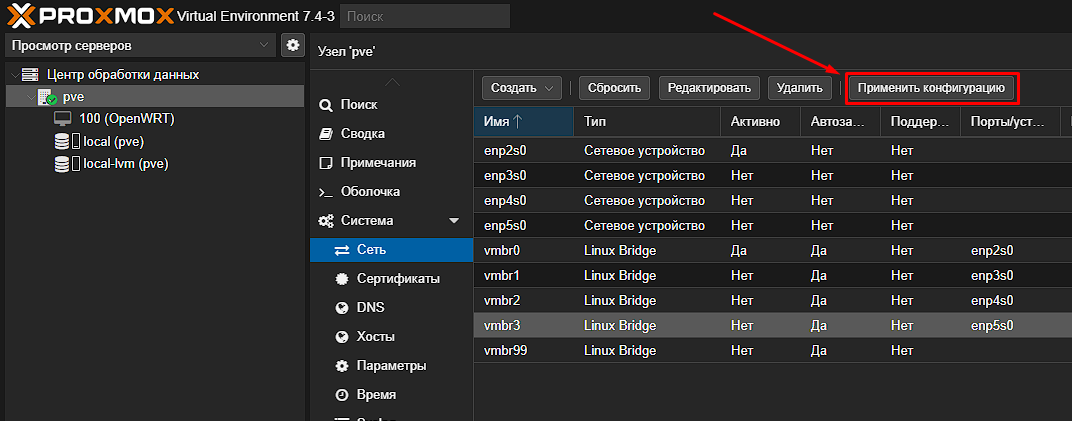
Confirm with Yes
Next, add the created bridges to the OpenWRT virtual machine itself
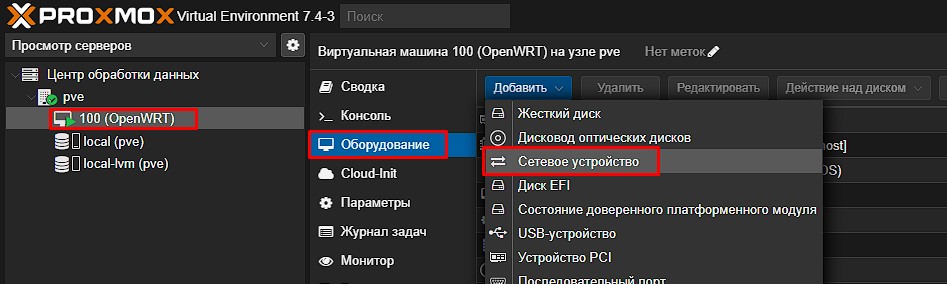
Open the OpenWRT VM tab, go to Hardware, then click Add -> Network Device
Add all previously created Linux Bridge bridges, and remember to uncheck Firewall:
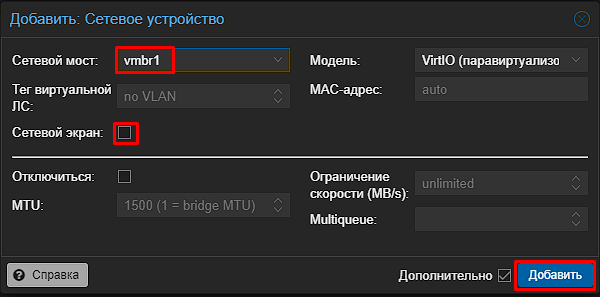
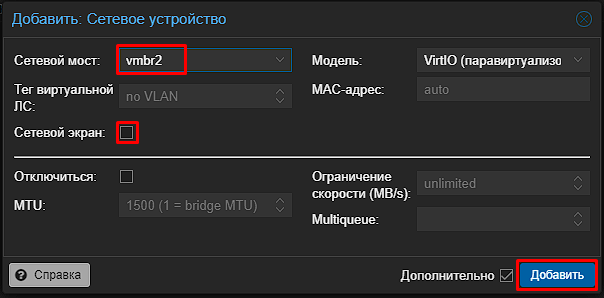
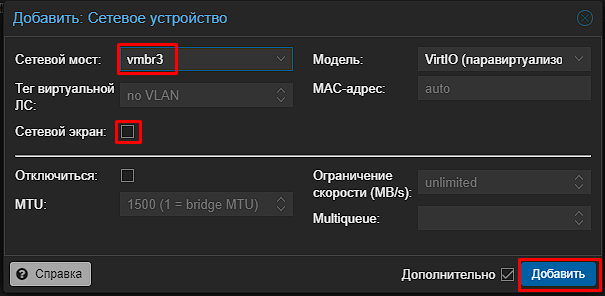
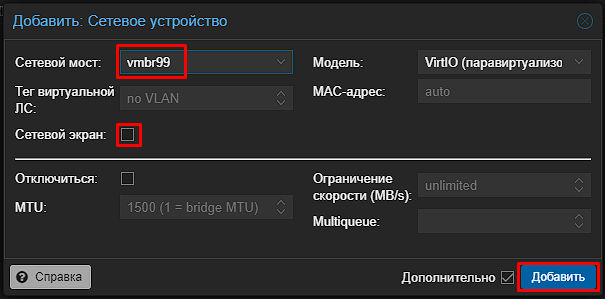
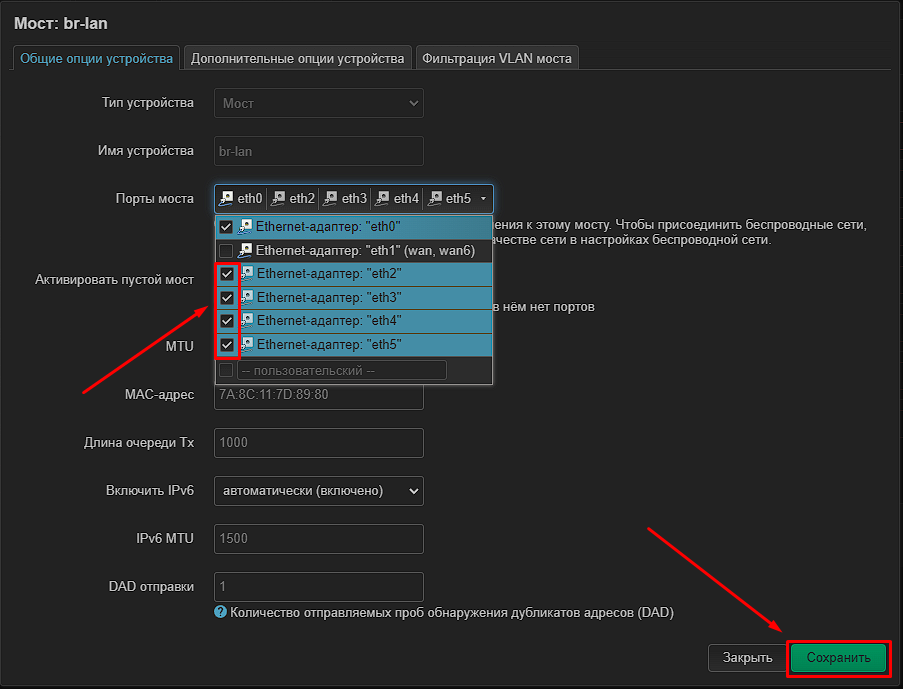
The added ports become available in OpenWRT. Open the OpenWRT web UI and activate them by adding them to the br-lan bridge
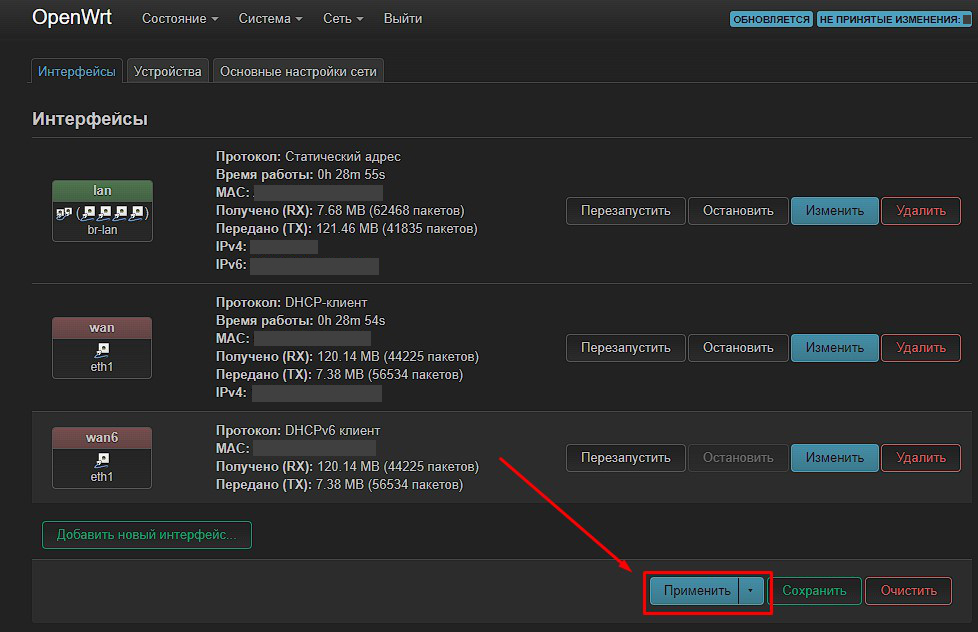
Click Network -> Interfaces, open the Devices tab, and click Configure next to the br-lan bridge. Then under Bridge ports select the new ports—these are the network devices and virtual bridges in Proxmox. Click Save. Then in the bottom bar you MUST click Apply
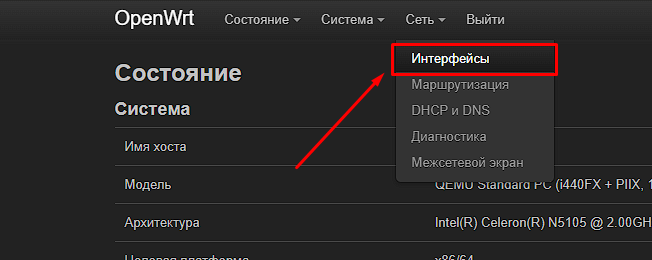
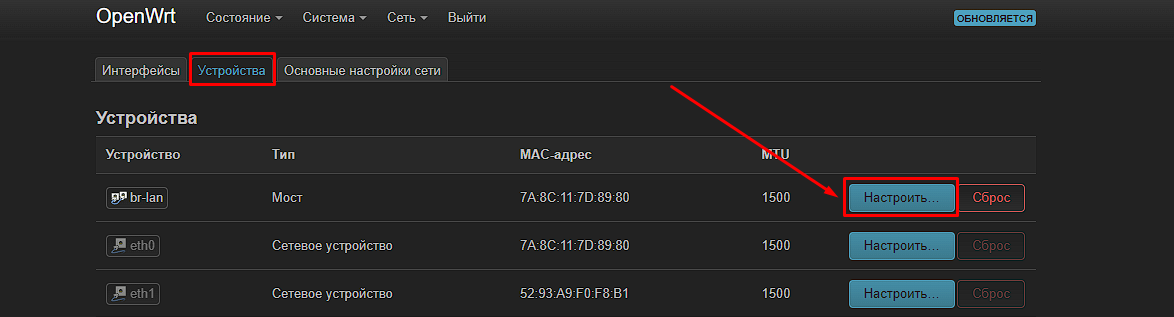
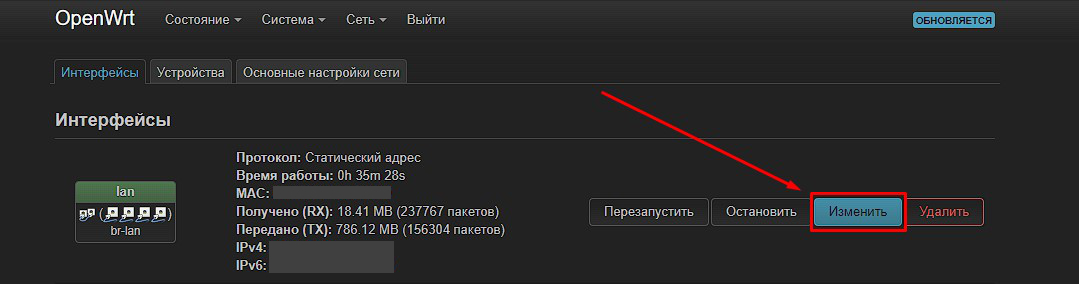
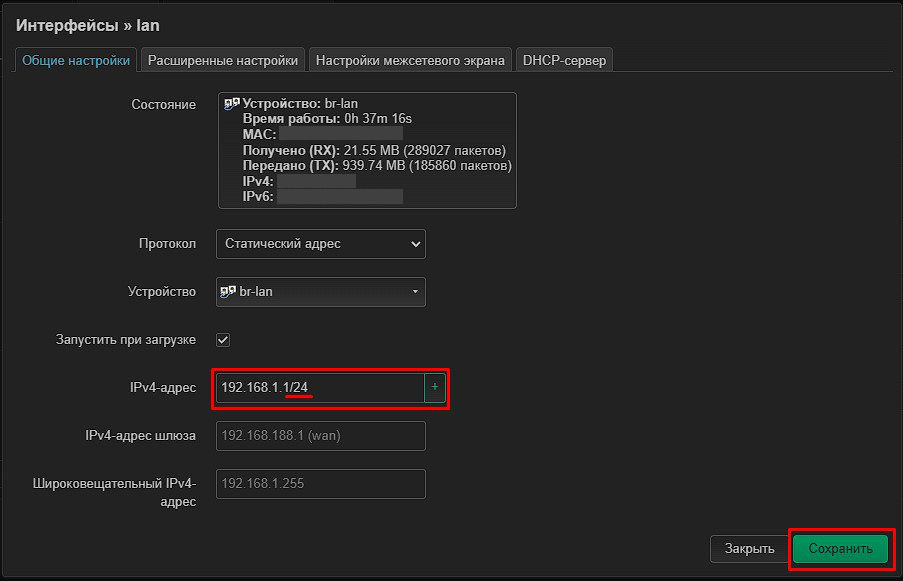
Also change the LAN prefix length from /8 (default) to /24 for more familiar IP assignment inside the network. Go to Network -> Interfaces, click “Edit” on the lan interface, set an IPv4 address like X.X.X.1/24, then click Save. In the bottom bar you MUST click Apply, as in the previous step
Now configure the Proxmox network to use the virtual OpenWRT router as the gateway.
Go to Proxmox – pve – Network.
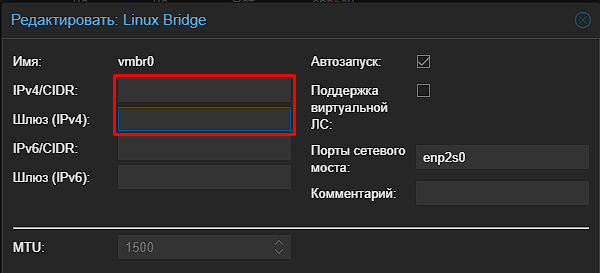
Double-click Linux Bridge vmbr0, clear the IPv4/CIDR and Gateway (IPv4) fields, then click OK
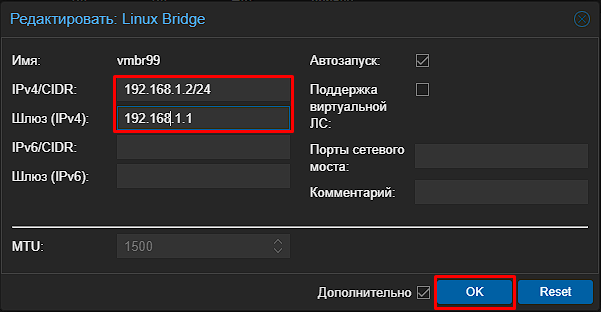
Then double-click the previously created Linux Bridge vmbr99 and fill in IPv4/CIDR and Gateway (IPv4):
- IPv4/CIDR: 192.168.1.2/24 (or any other X.X.X.X/24 IP for your Proxmox)
- Gateway (IPv4): 192.168.1.1 (your virtual OpenWRT router IP; may differ from my example)
Click OK.
Click Apply Configuration
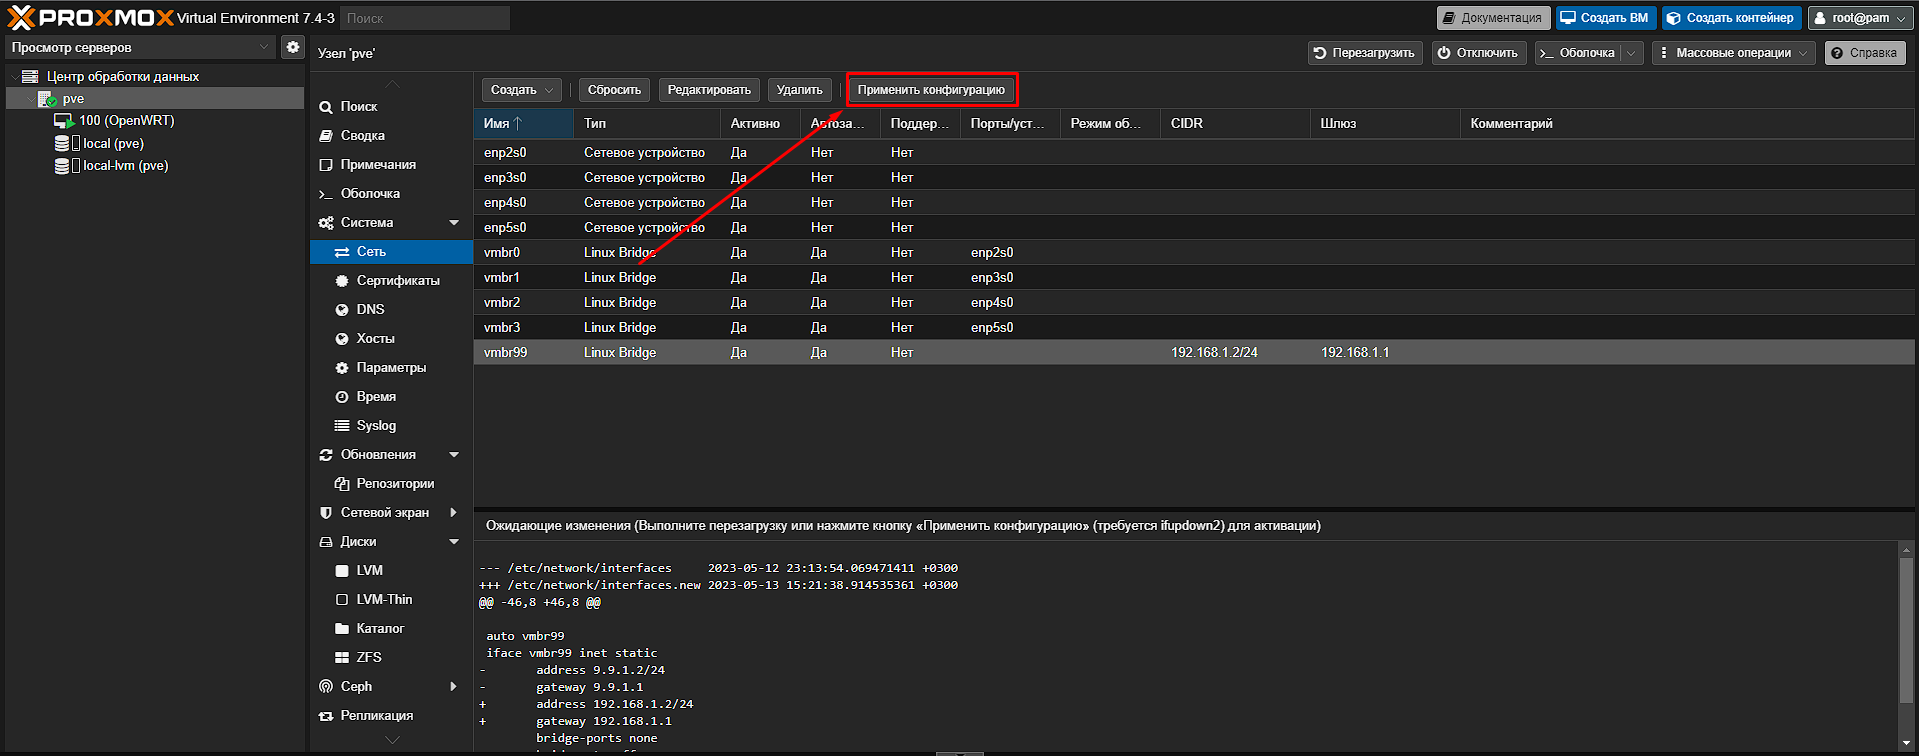
After applying the changes, your virtual OpenWRT router works like a regular OpenWRT router, and you can use Linux Bridge vmbr0 for other VMs as the internet and LAN source from your virtual router.
Upgrading OpenWRT x86
https://openwrt.org/docs/guide-user/installation/openwrt_x86#upgrading/
Notes
Backing up Proxmox VE network settings
To back up Proxmox VE network settings, use:
cp /etc/network/interfaces /etc/network/interfaces.2This command creates a copy of the interfaces file in /etc/network
Proxmox WAN port device mix-up in OpenWRT
Sometimes you need to swap eth0 and eth1 in OpenWRT. That happens because in Proxmox they are assigned automatically to Linux bridges and are effectively the same physical port on the mini PC.
Set eth1 instead of eth0 under Network – Interfaces – Devices – br-lan – Bridge ports. Also set eth0 instead of eth1 under Network – Interfaces – wan – Device.
Or the other way around.
No email, no trackers — just the update feed.
Russian feed
https://en.kiberlis.ru/feed/