

- 1.A. Exporting contacts from Google
- 1.A.1. Manual Google contacts export. Preparing to export contacts
- 1.A.2. Exporting contacts from Google
- 1.B. Exporting contacts from iCloud
- 2. Importing contacts into Yandex
- 3. Syncing contacts with Yandex
- 3.1. Create an app password
- 3.A. Syncing Android contacts with a Yandex account
- 3.A.1. Set up the sync app
- 3.A.2. Add contacts from Mail to phone contacts
- 3.B. Syncing iOS (iPhone or iPad) contacts with a Yandex account
- 3.B.1. Add a CardDAV account
- 3.B.2. Add phone contacts to CardDAV
- 3.B.3. Add contacts from Mail to phone contacts
- 4. Notes
Due to recent events and possible blocks of foreign services, there is a need to sync phone contacts with Russian services.
You can sync contacts from your Android phone or iPhone with a Yandex account. To do this, export your contacts from Google or iCloud to a vCard (*.vcf) file, then upload that file to your Yandex account.
This guide is a supplement to the existing guide “Leaving Google. Preparing for a possible Google block”
1.A. Exporting contacts from Google
Be sure to sync your phone contacts with Google before starting the export so you do not lose recently added contacts.
1.A.1. Manual Google contacts export. Preparing to export contacts
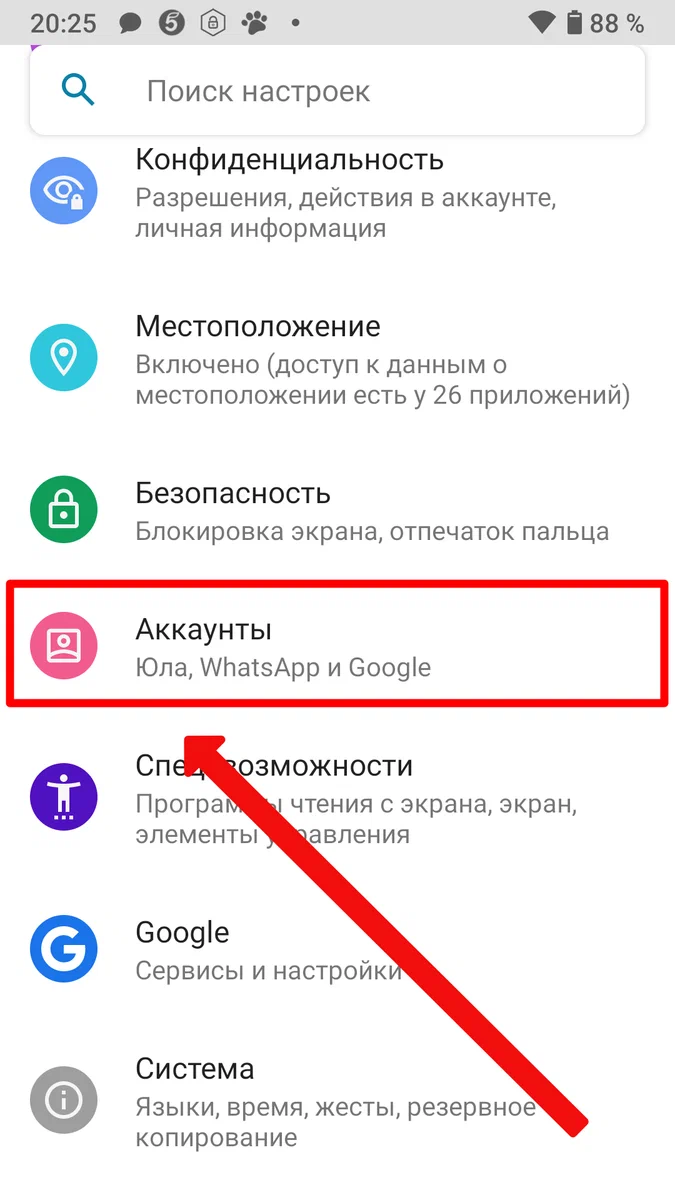
Note. Some menu items may differ depending on the phone model and Android version
1. Go to phone Settings and tap Accounts
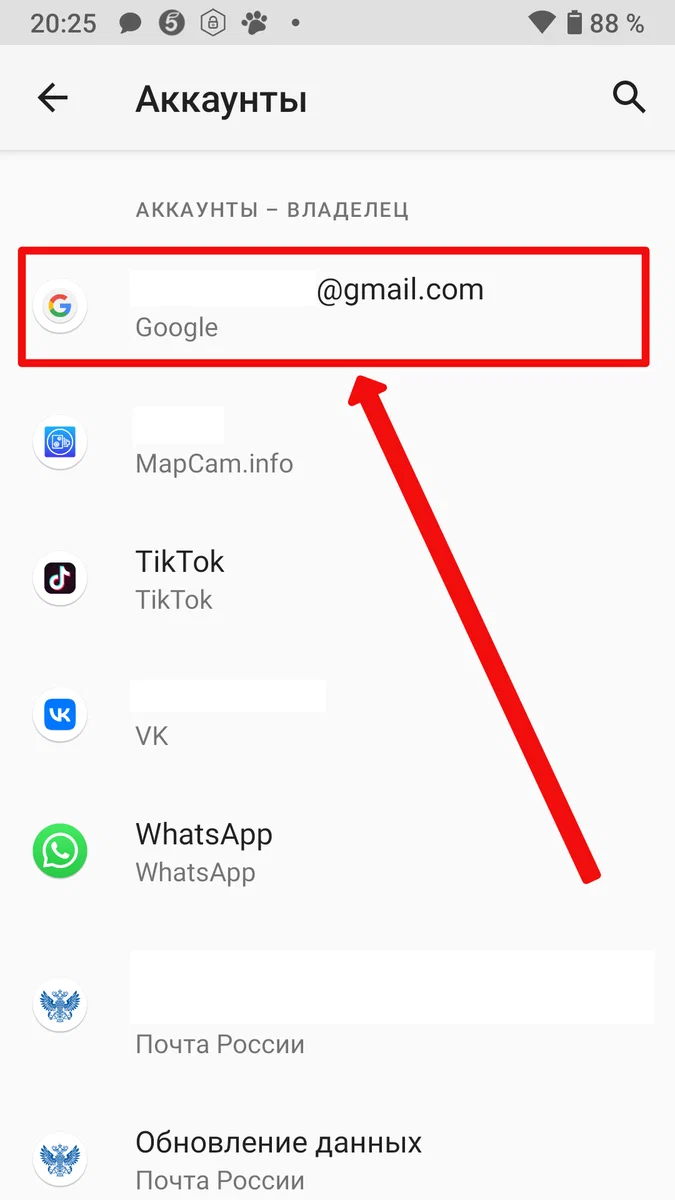
2. Tap your Google account
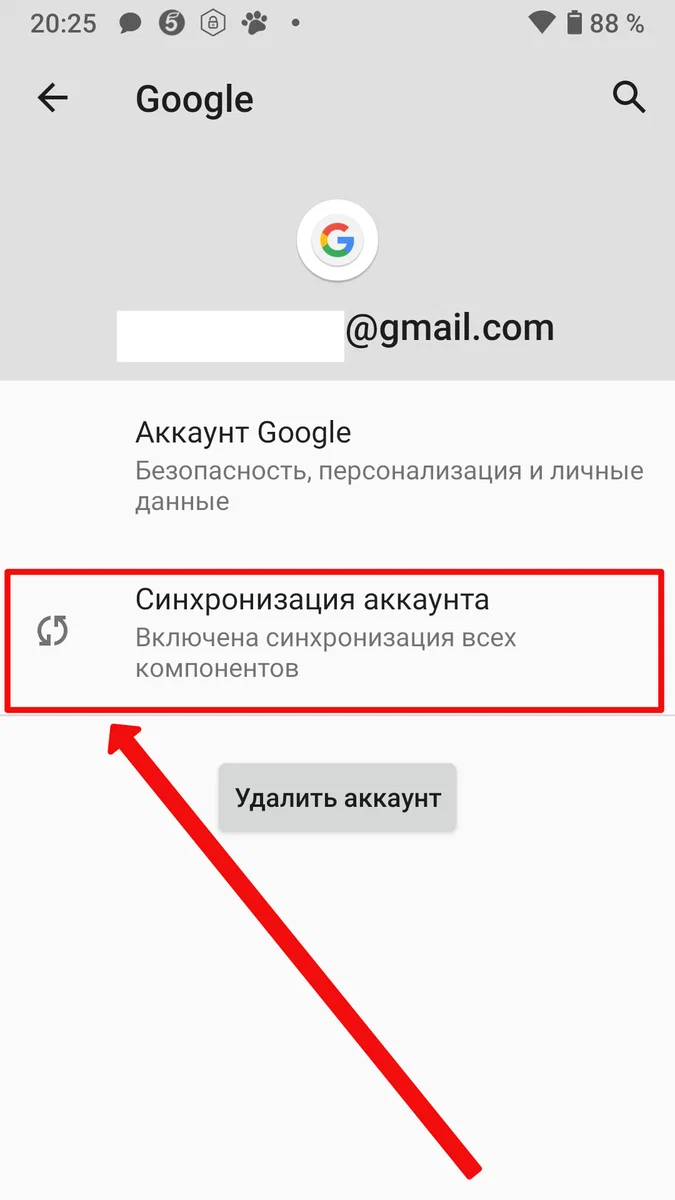
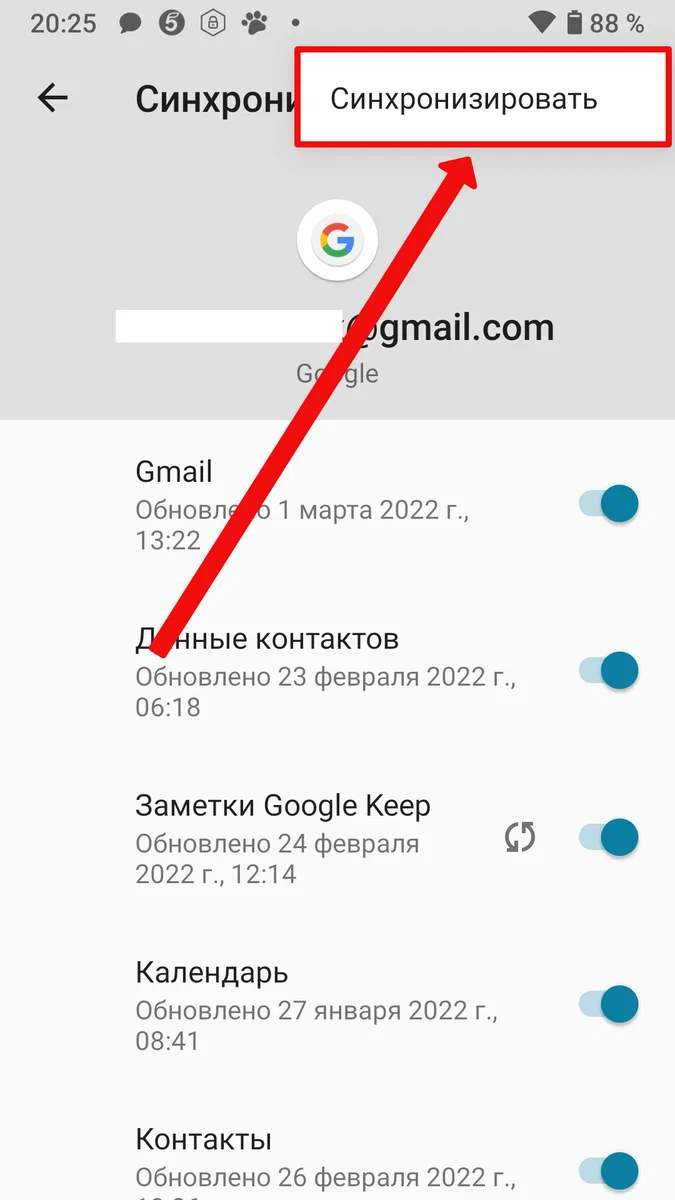
3. Tap Account sync
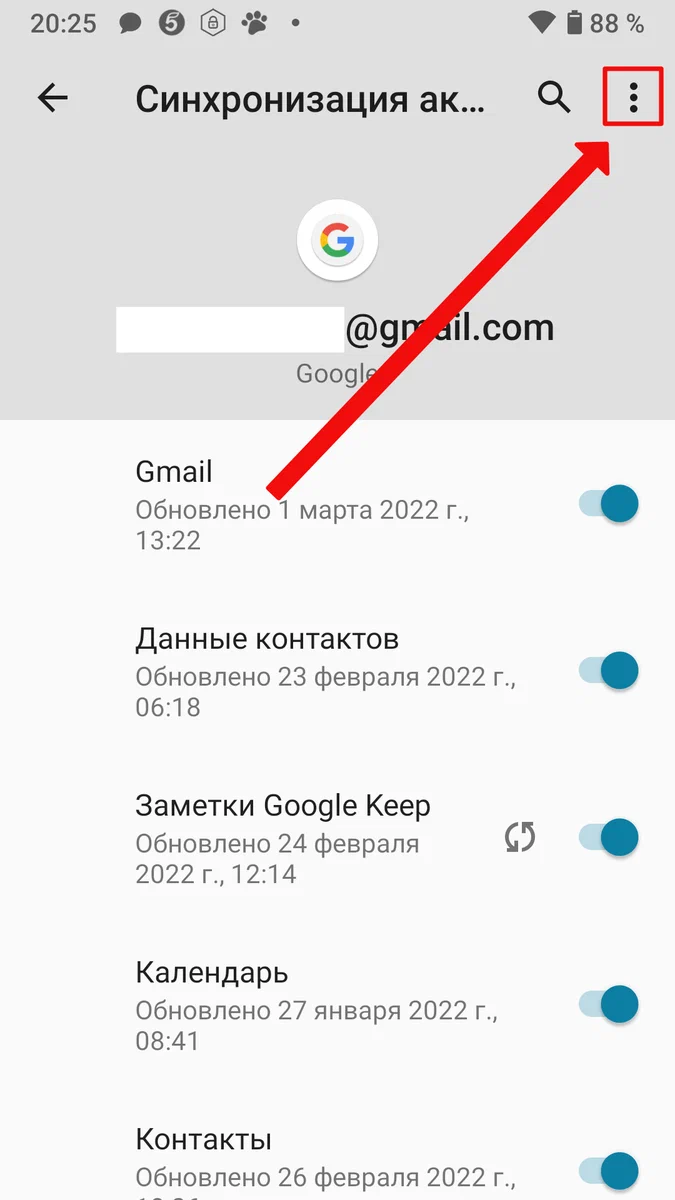
4. Tap the three dots in the upper-right corner
5. Tap Sync now
1.A.2. Exporting contacts from Google
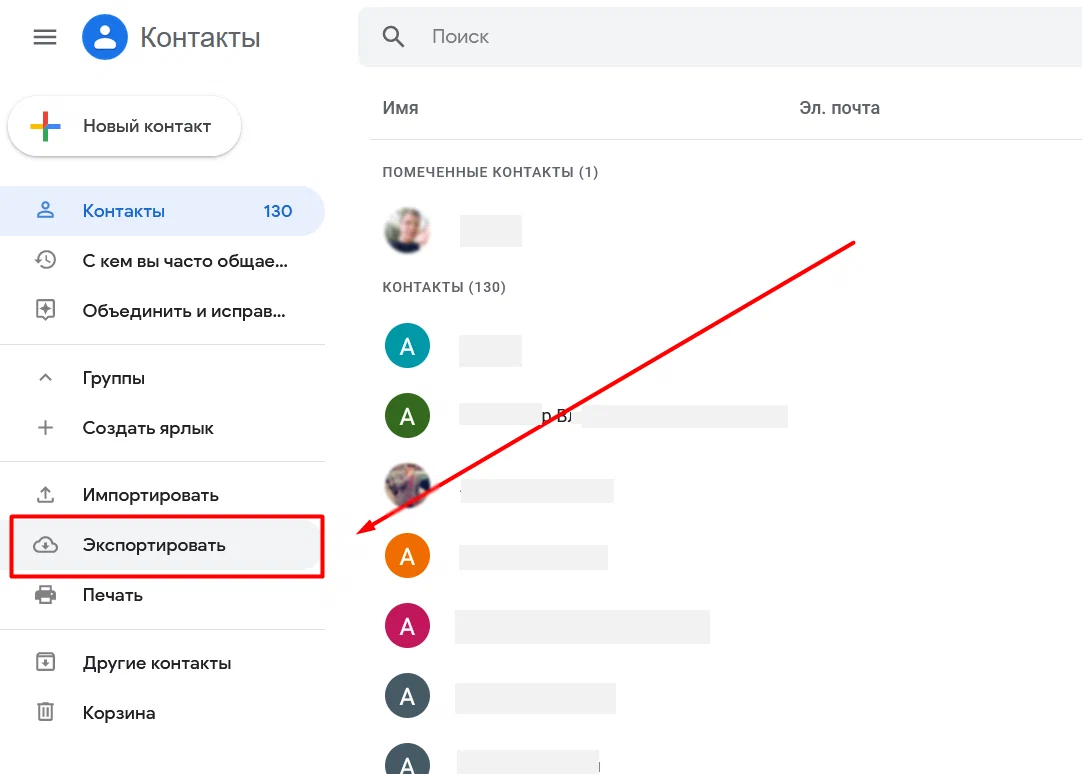
1. Open Google Contacts
2. Click Export
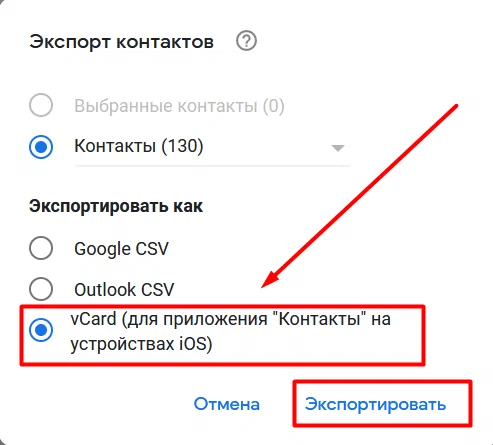
3. Be sure to select vCard (for the Contacts app on iOS devices) and click Export
4. Save the downloaded contacts.vcf file in a safe place. The contacts.vcf file will appear in the Downloads folder on your computer
1.B. Exporting contacts from iCloud

To export contacts from iCloud, follow this guide: https://support.apple.com/ru-ru/guide/icloud/mmfba748b2/icloud
2. Importing contacts into Yandex
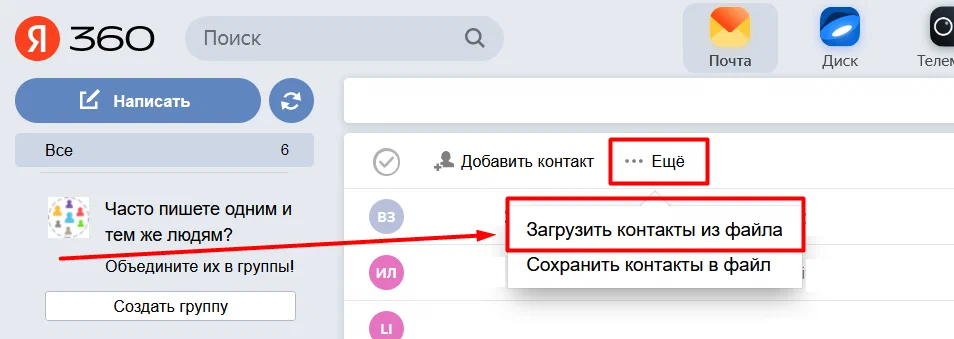
To import contacts into the Yandex Mail address book, go to https://mail.yandex.ru/#contacts, click More in the top menu of the Contacts section, and choose Upload contacts from file. Select the contacts.vcf vCard file previously exported from Google and click Save.
3. Syncing contacts with Yandex
This section of the guide is adapted from Yandex documentation
On the first sync, contacts will appear in Yandex Mail in the Contacts from phone group when connected to the internet (the group is created automatically on the first sync). For Yandex Mail contacts to appear on the mobile device, add them to this group.
Note. Only contacts that were saved to the CardDAV account when created are synced from the mobile device address book. Contacts saved to the phone’s memory or another account will not be synced with Yandex Mail.
Contacts are synced over the CardDAV protocol. CardDAV is an internet protocol that lets you sync address books with a mobile device. A CardDAV account can be set up with the phone’s built-in tools or with a third-party app.
3.1. Create an app password
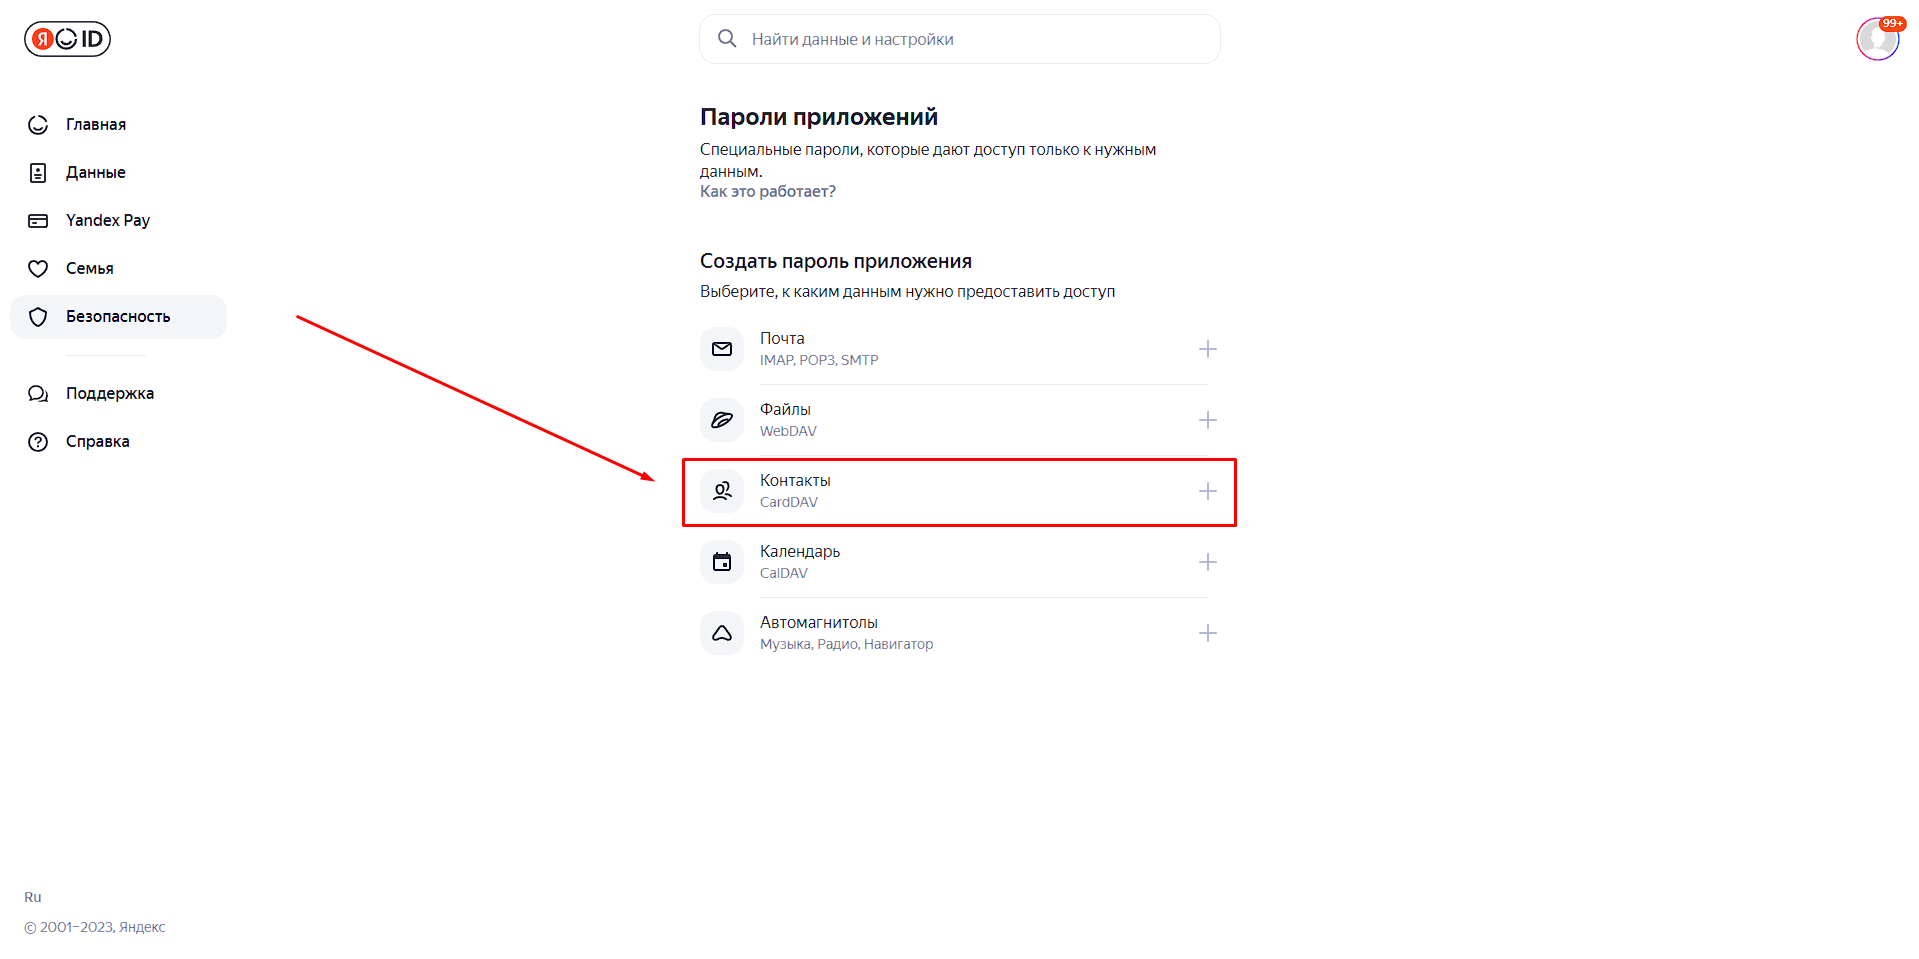
1. Open the App passwords page via the link that leads to one of the Yandex ID pages.
2. Click Contacts under Create app password and a pop-up window will appear.
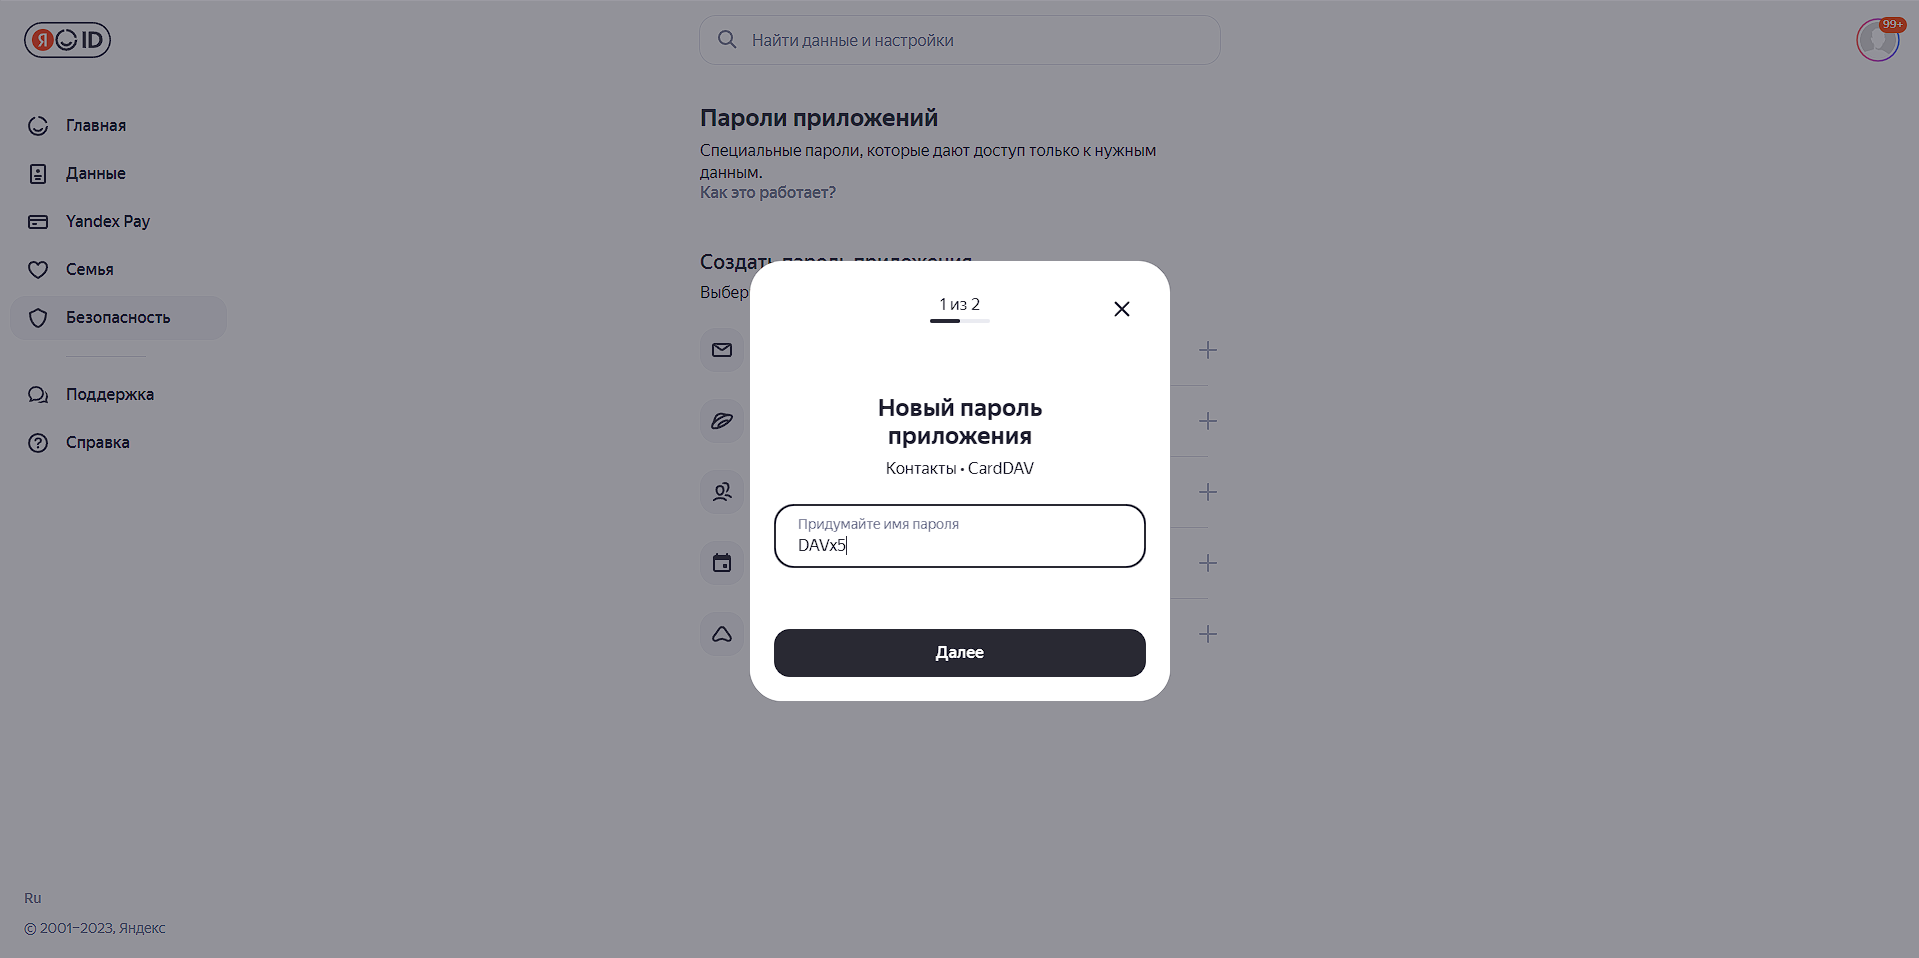
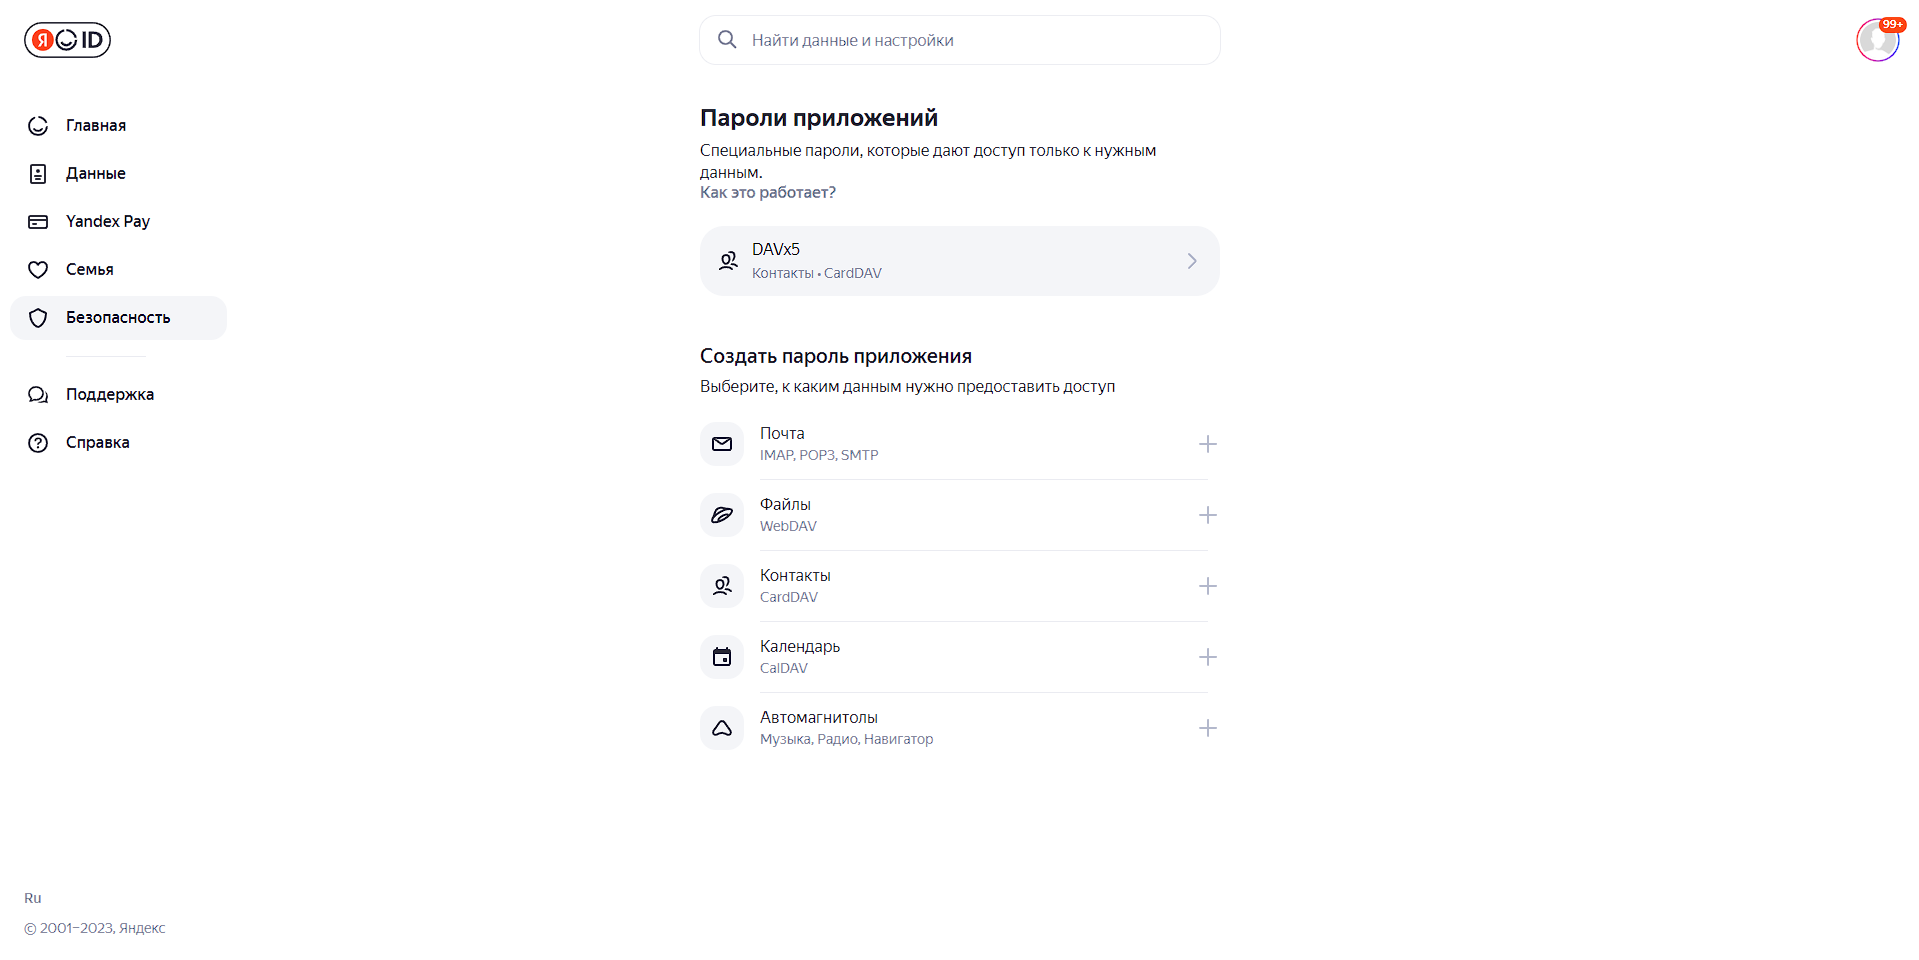
3. Choose a name for the password. For example, enter the name of the app you are creating the password for. The password will appear under that name in the App passwords list.
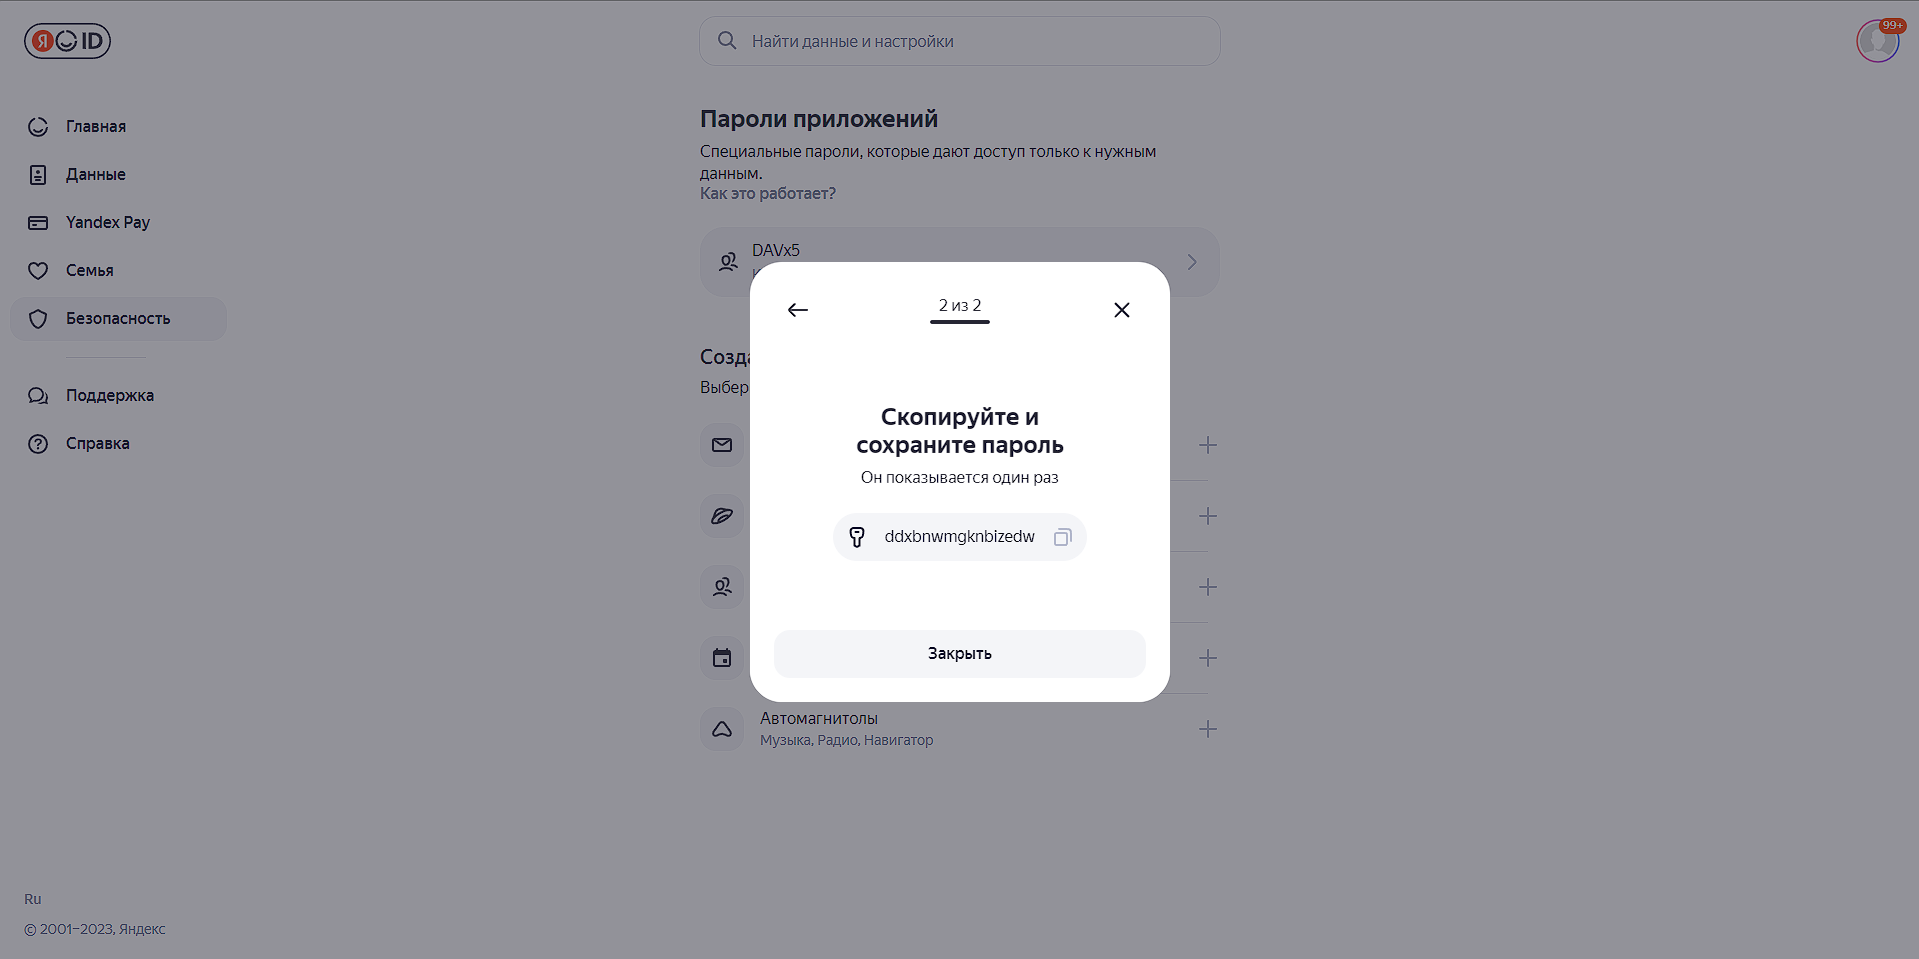
4. Click Next. The app password will appear in the pop-up window. Copy it and save it somewhere.
5. Limitation. You can see the created password only once. If you entered it incorrectly and closed the window, delete the current password and create a new one. So save the password in a safe place for later entry on the phone.
3.A. Syncing Android contacts with a Yandex account

3.A.1. Set up the sync app
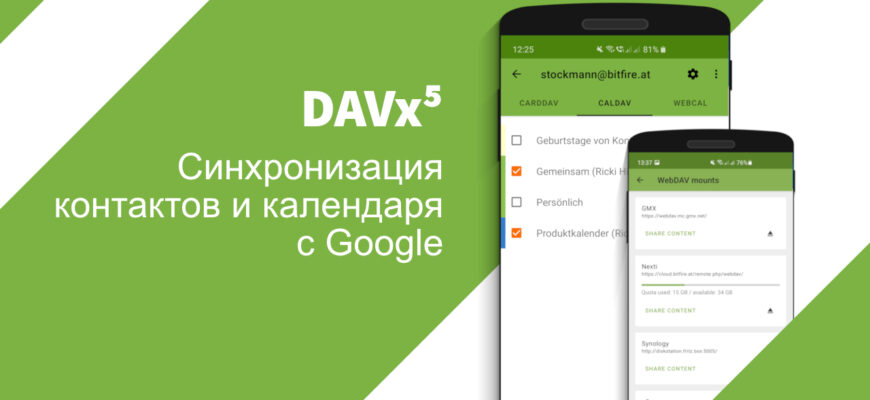
1. Download and install an app that works with the CardDAV protocol, for example DAVx⁵ from F-Droid (in F-Droid all apps are free and open source, so you can safely update all apps from there without worrying about new sanctions).
You can also download the paid version of DAVx⁵ from the Google Play Store; it is no different from the free version on F-Droid.
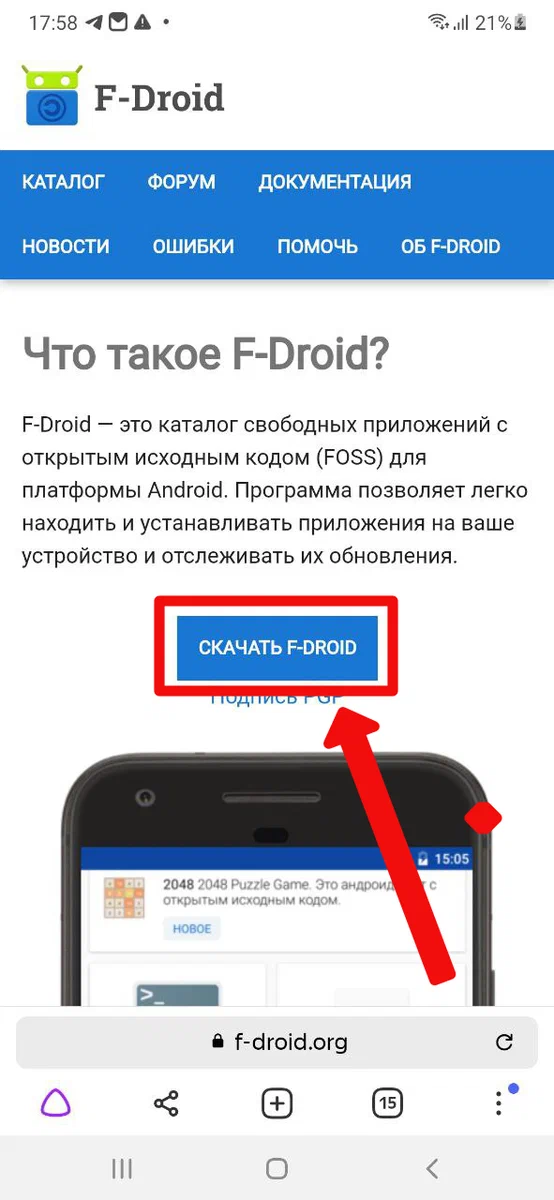
1.1. Open https://f-droid.org/ in a mobile browser and tap Download
Note. The remaining steps apply to the DAVx⁵ app. In other apps some steps may differ.
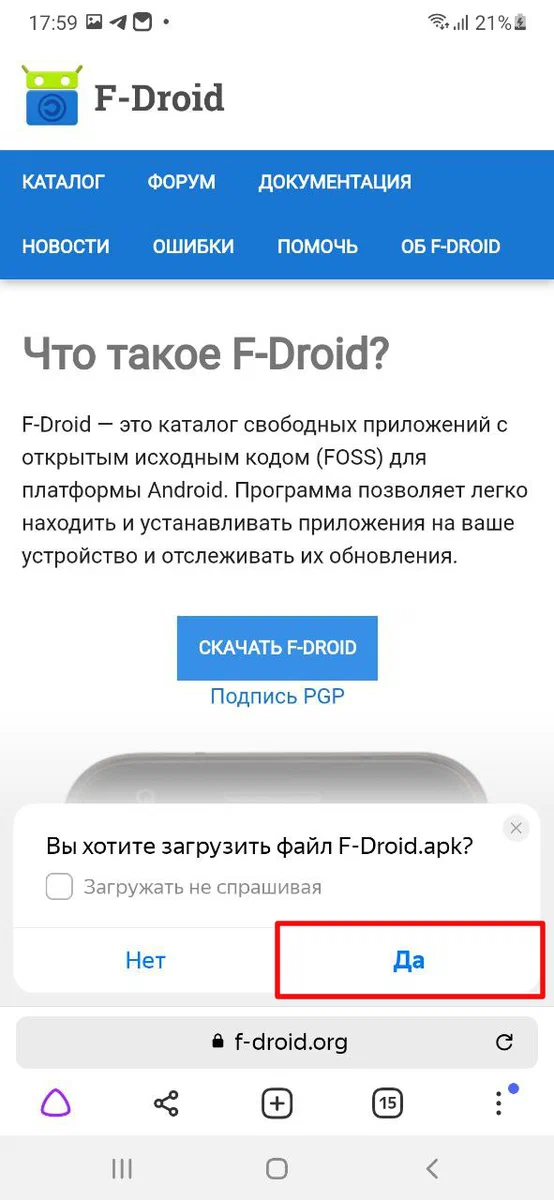
1.2. Tap Yes on the download prompt
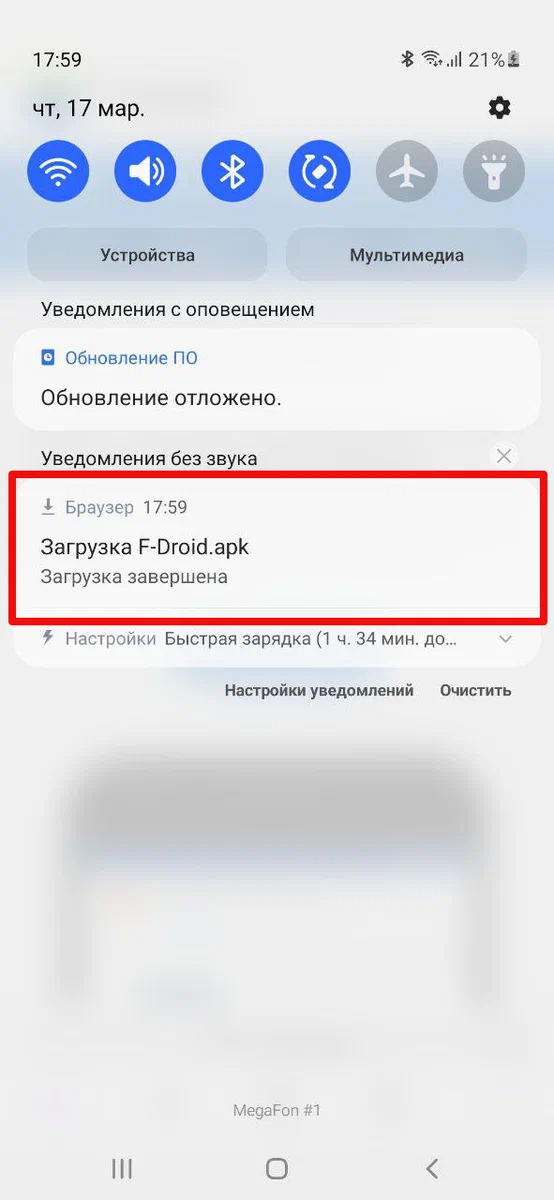
1.3. Open the downloaded F-Droid installer file
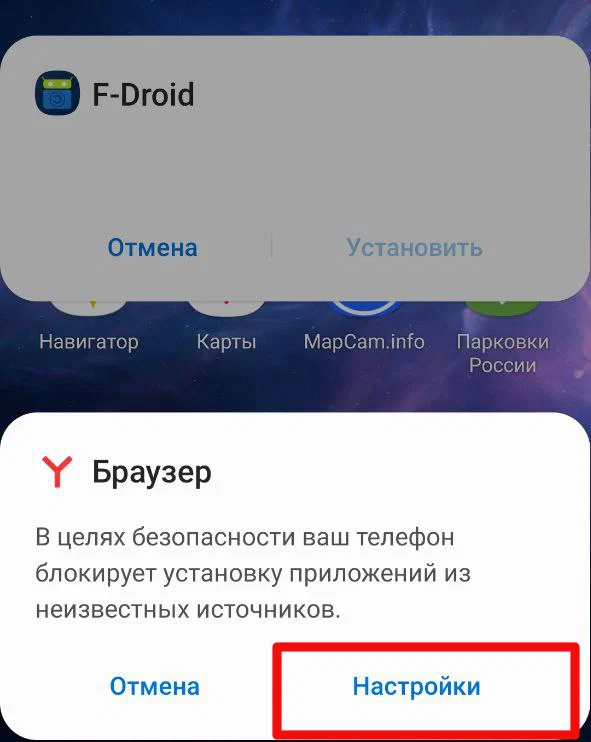
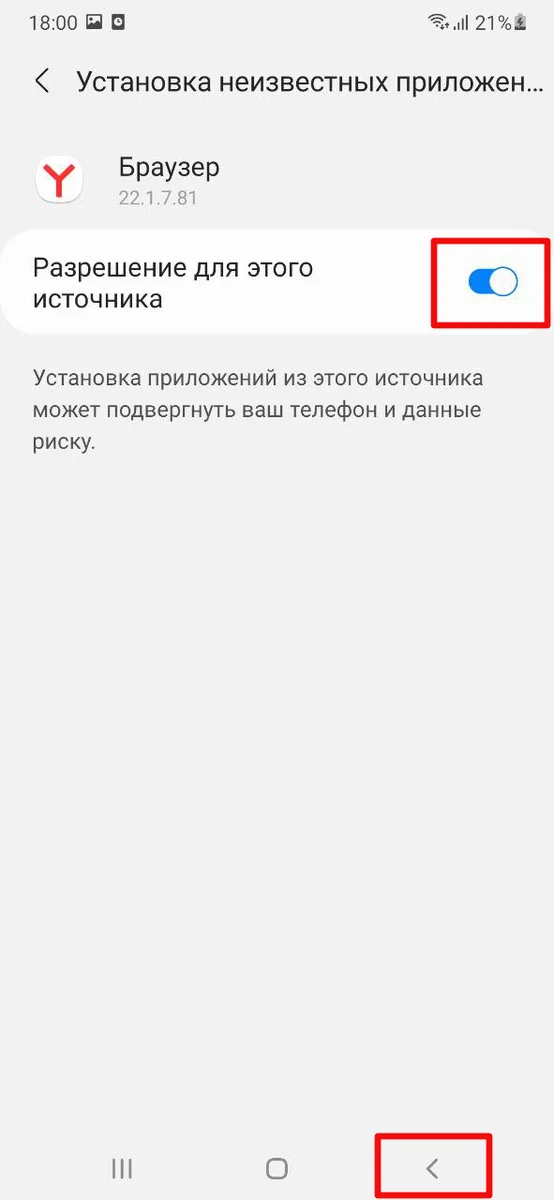
1.4. Allow installation from unknown sources
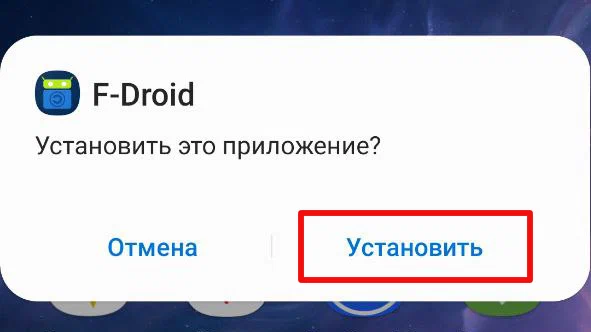
1.5. Tap Install
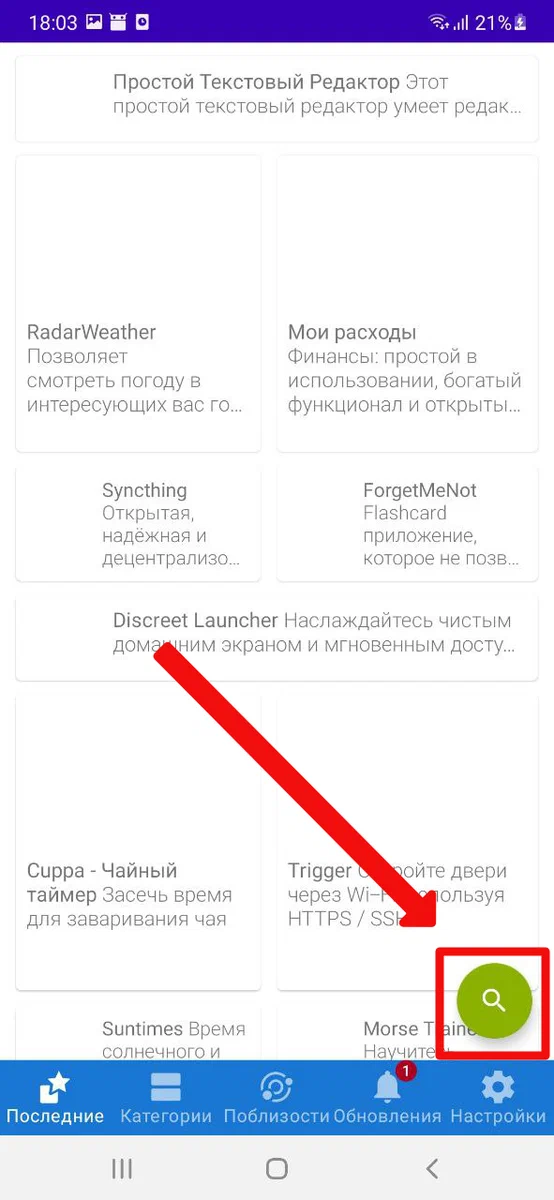
1.6. Launch the F-Droid app, wait for the repositories to update, and tap Search.
1.7. In search type DAVx and download DAVx⁵
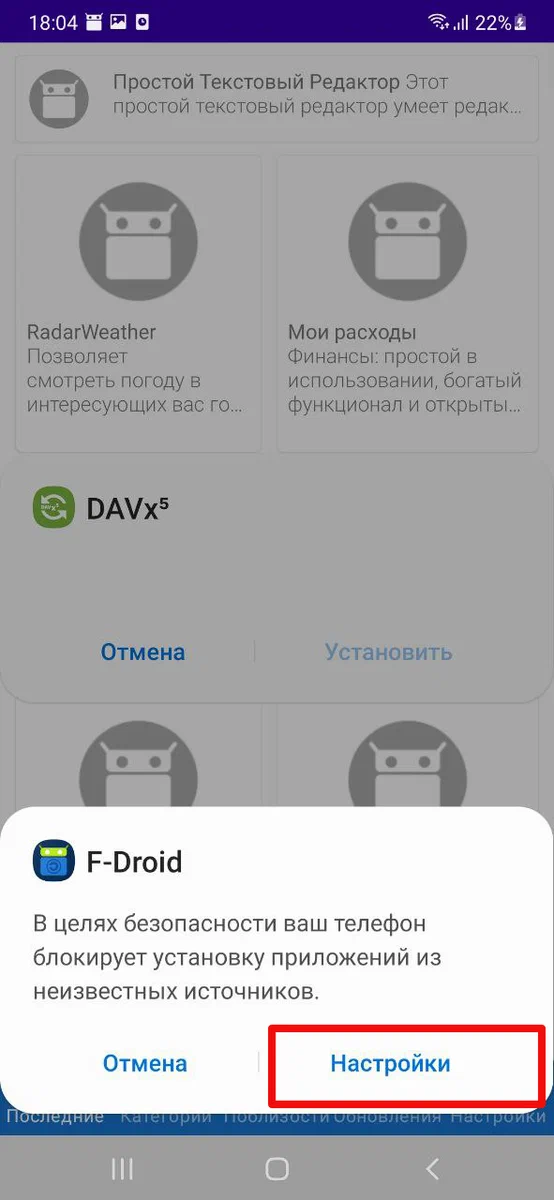
1.8. Download the app, again confirm installation from unknown sources as you did for F-Droid, and launch DAVx⁵
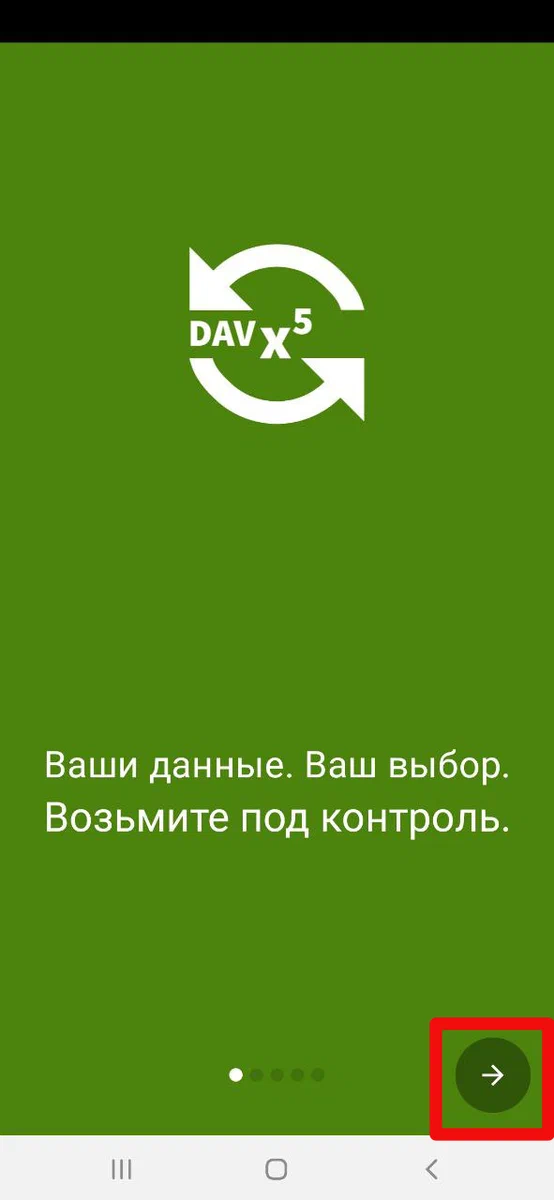
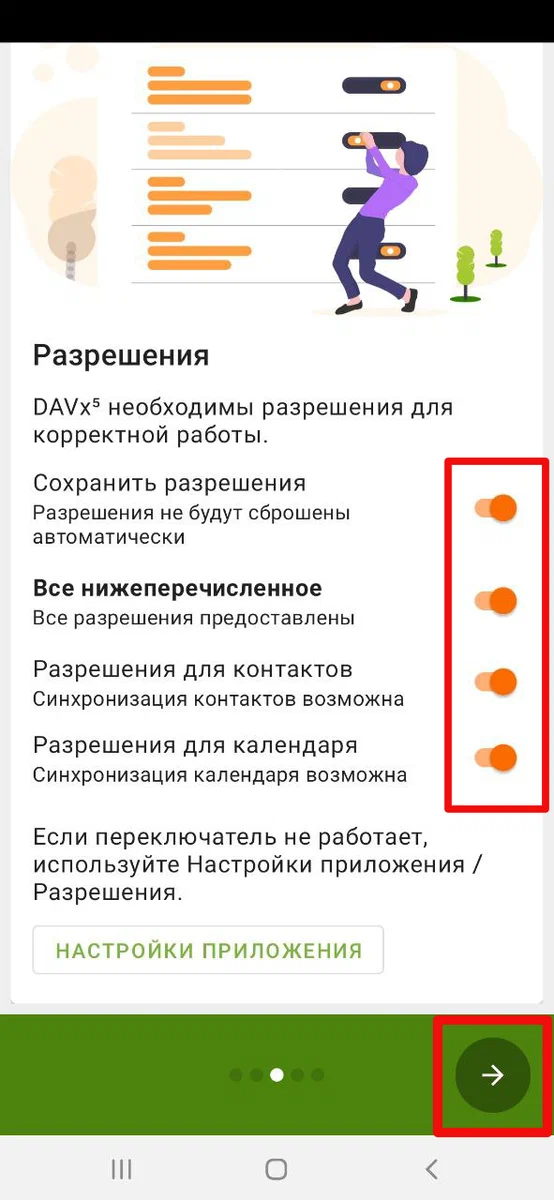
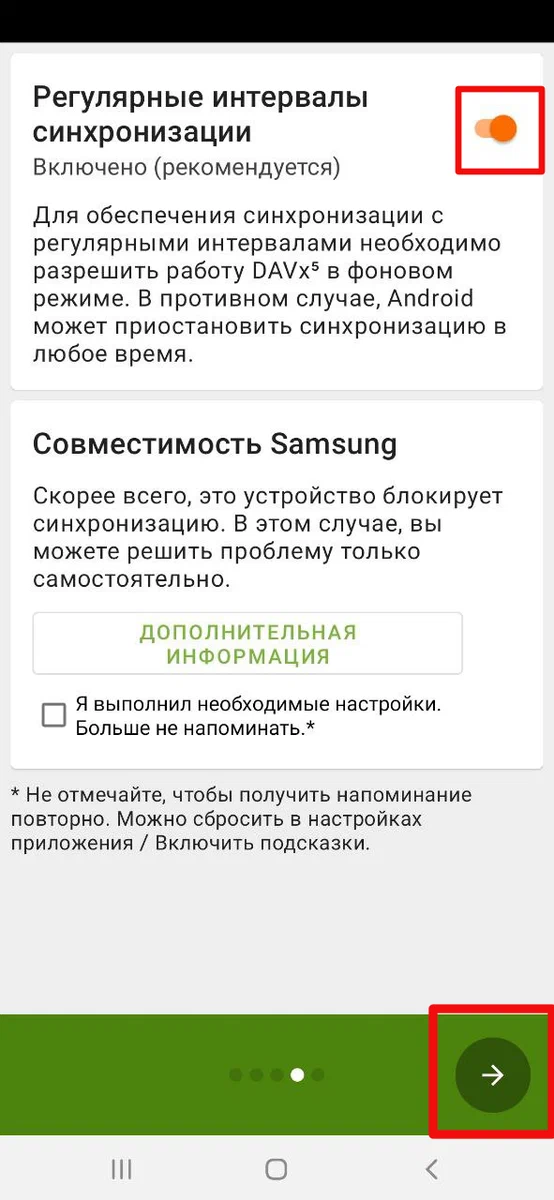
2. Open the app and grant it all permissions.
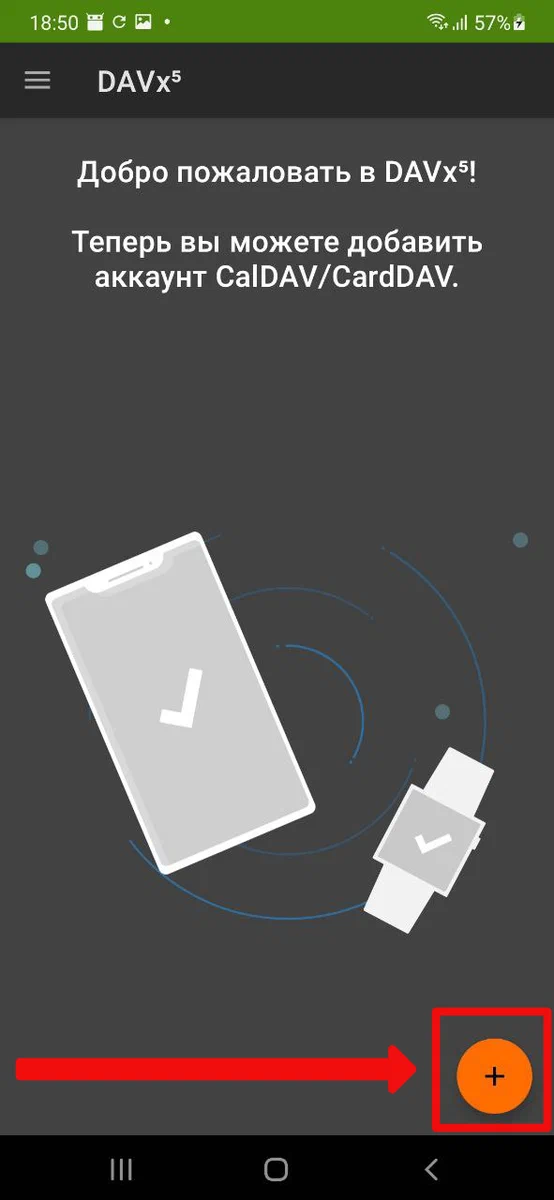
3. Open the app and tap ➕ in the lower-right corner.
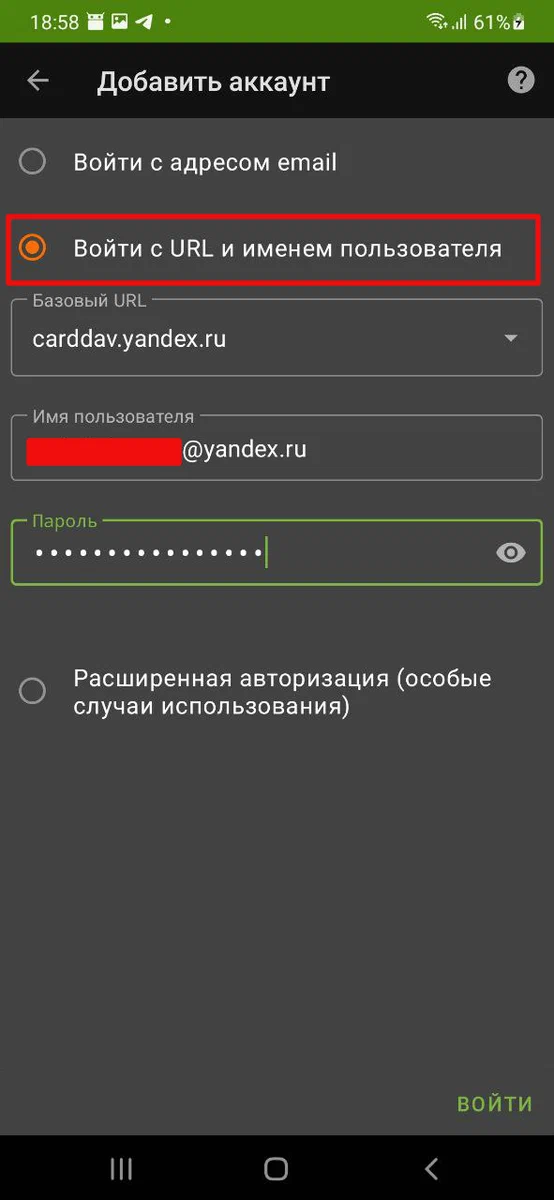
4. In the Add account list, choose Login with URL and username.
5. Enter the following parameters:
- Base URL: carddav.yandex.ru
- Username: your_login@yandex.ru
- Password: the app password created in the previous step
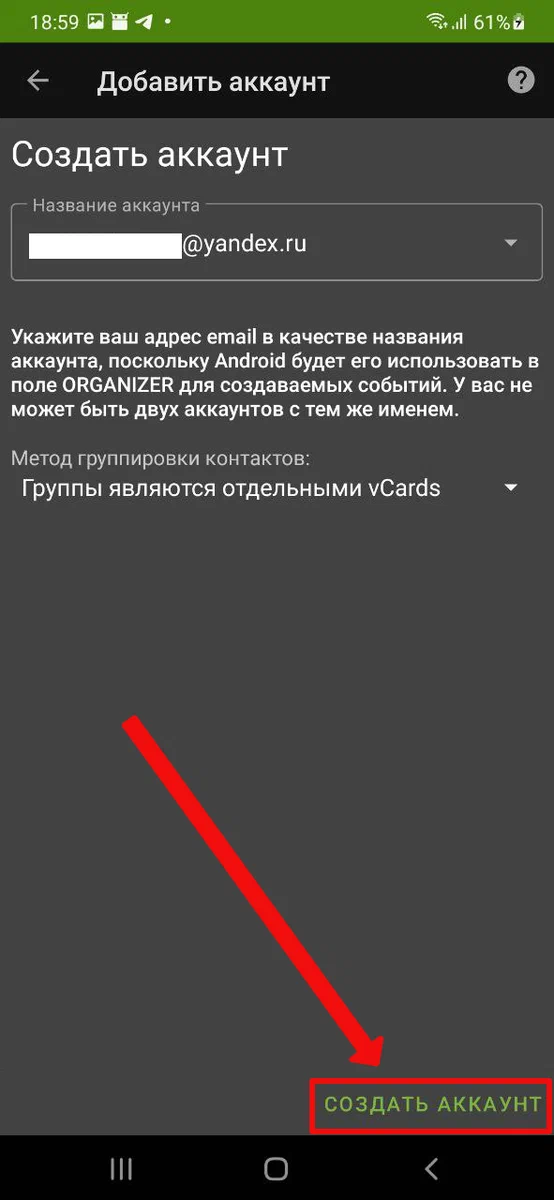
6. Tap Login → Create account.
Username: your_login@yandex.ru
Password: the app password created in the previous step
3.A.2. Add contacts from Mail to phone contacts
1. Create a new contact on the mobile device with any name — when creating it, under Save to account choose CardDAV.

2. Pull the screen up in DAVx⁵ or tap the sync button to sync the address book.
3. Open the Contacts page in Yandex services.
4. Add the needed contacts to the Contacts from phone group.


5. Open the Contacts app on the mobile device.
6. Pull the screen up in DAVx⁵ or tap the sync button to sync the address book again.
3.B. Syncing iOS (iPhone or iPad) contacts with a Yandex account

3.B.1. Add a CardDAV account
Note. This guide applies to devices with iOS 14. On other versions some steps may differ.
1. Open Settings → Contacts → Accounts.
2. Tap Add Account.
3. In the list choose Other.
4. Choose Add CardDAV Account.
5. Enter the following parameters:
- Server: carddav.yandex.ru
- User Name: your_login
- Password: the app password created in the previous step
6. Tap Next.
3.B.2. Add phone contacts to CardDAV
1. Open Settings → Contacts.
2. Choose carddav.yandex.ru as the default account.
3.B.3. Add contacts from Mail to phone contacts
1. Create a new contact on the mobile device with any name.
2. Open the Contacts app on the mobile device.
3. Pull the screen down to refresh the address book again.
4. Open the Contacts page in Yandex services.
5. Add the needed contacts to the Contacts from phone group.


6. Open the Contacts app on the mobile device.
7. Pull the screen down to refresh the address book again.
4. Notes
- If the Contacts from phone group is missing, create any new contact from the phone using DAVx⁵ and run a sync. The Contacts from phone group will be created and you will see your new test contact in it.
No email, no trackers — just the update feed.
Russian feed
https://en.kiberlis.ru/feed/