



- What is Ziti?
- What is Zero Trust Network Access (ZTNA)?
- Preparing the system
- Installing OpenZiti with Docker Compose
- Network diagram
- Network descriptions
- Purple Ziti network
- Red Ziti network
- Blue network
- “Fabric” Router
- Testing OpenZiti and running commands inside a Docker container
- Authenticating to OpenZiti inside the Docker container
- Checking Edge Router statuses
- Viewing Edge Router identities
- Pinging Ziti networks
- Test — underlay Ziti network connection failure
- Test — Connecting to Web Test Blue
- Configuring OpenZiti services
- Configuring OpenZiti ZTNA as a VPN alternative
What is Ziti?
OpenZiti is a free open-source project focused on bringing the Zero Trust Network Access (ZTNA) concept into any application. The project provides all the components needed to implement or integrate zero trust into your solutions.
OpenZiti includes an overlay network, application tunneling for all operating systems, and numerous SDKs that make it easy to add ZTNA zero trust directly into your application.
OpenZiti also makes it easy to embed a software-defined zero-trust network directly into your application. With OpenZiti you can get a high-performance, secure ZTNA zero-trust network over any internet connection — without a VPN!
The OpenZiti (Ziti) network consists of the following building blocks: OpenZiti Controller, OpenZiti Router, and OpenZiti Clients. These components work together to provide a secure connection between two endpoints, such as a client and a server. This type of network is considered an overlay because it provides secure connectivity on top of the existing network infrastructure (i.e., an overlay).
What is Zero Trust Network Access (ZTNA)?
ZTNA (Zero Trust Network Access) is a security model that assumes the same security approach must be applied both inside and outside the organization. That means whenever a user or device requests access to network resources, they must go through authentication and authorization and receive access only to the resources they need to do their job. This approach helps reduce security breach risks and strengthens the network infrastructure.
The core idea of ZTNA is that there are no trusted devices or users on the network. Every request for resource access must pass through access control and security policies before access is granted. It does not matter where the user or device is — inside or outside the corporate network. All connections must be protected and verified against security policies.
This security approach is becoming increasingly popular with the growth of remote work and cloud services. It helps prevent data leaks and other security threats that can arise when accessing the corporate network from outside.
Preparing the system
First, update the Ubuntu 22.04 repository list and upgrade the system.
To update the system, use the following command in the console over an SSH connection. (I use the SSH client Tabby, and sometimes PuTTY)
Update the repositories and packages:
apt update -y &&
apt upgrade -y
Installing OpenZiti with Docker Compose
Installation guide on the developer site: https://docs.openziti.io/docs/learn/quickstarts/network/local-docker-compose/
Install Docker:
# Install Docker
curl -fsSL https://get.docker.com -o get-docker.sh  &&
sh get-docker.sh

# Start and enable the Docker service
systemctl start docker  &&
systemctl enable docker
Install Docker Compose:
# Install docker-compose
curl -L --fail https://raw.githubusercontent.com/linuxserver/docker-docker-compose/master/run.sh -o /usr/local/bin/docker-compose  &&
chmod +x /usr/local/bin/docker-compose
To install OpenZiti, run the following commands:
mkdir openziti  &&
cd openziti  &&
curl -so docker-compose.yaml https://get.openziti.io/dock/docker-compose.yml
Then grab the default environment file, or simply create a file in this folder that looks like this:
curl -so .env https://get.openziti.io/dock/.envor, if you prefer to create the .env file manually, create it somehow — for example with the command shown below:
cat > .env <<DEFAULT_ENV_FILE
# OpenZiti Variables
ZITI_IMAGE=openziti/quickstart
ZITI_VERSION=latest
ZITI_CONTROLLER_RAWNAME=ziti-controller
ZITI_EDGE_CONTROLLER_RAWNAME=ziti-edge-controller

## Additional variables to override.
#ZITI_EDGE_CONTROLLER_RAWNAME=some.other.name.com
#ZITI_EDGE_CTRL_ADVERTISED_HOST_PORT=some.other.name.com:1280
#ZITI_CTRL_ADVERTISED_ADDRESS=some.other.name.com
#ZITI_EDGE_CONTROLLER_HOSTNAME=some.other.name.com
#ZITI_CONTROLLER_HOSTNAME=some.other.name.com
#ZITI_EDGE_CONTROLLER_IP_OVERRIDE=20.20.20.20
DEFAULT_ENV_FILE
Deploy the Docker containers and start Ziti
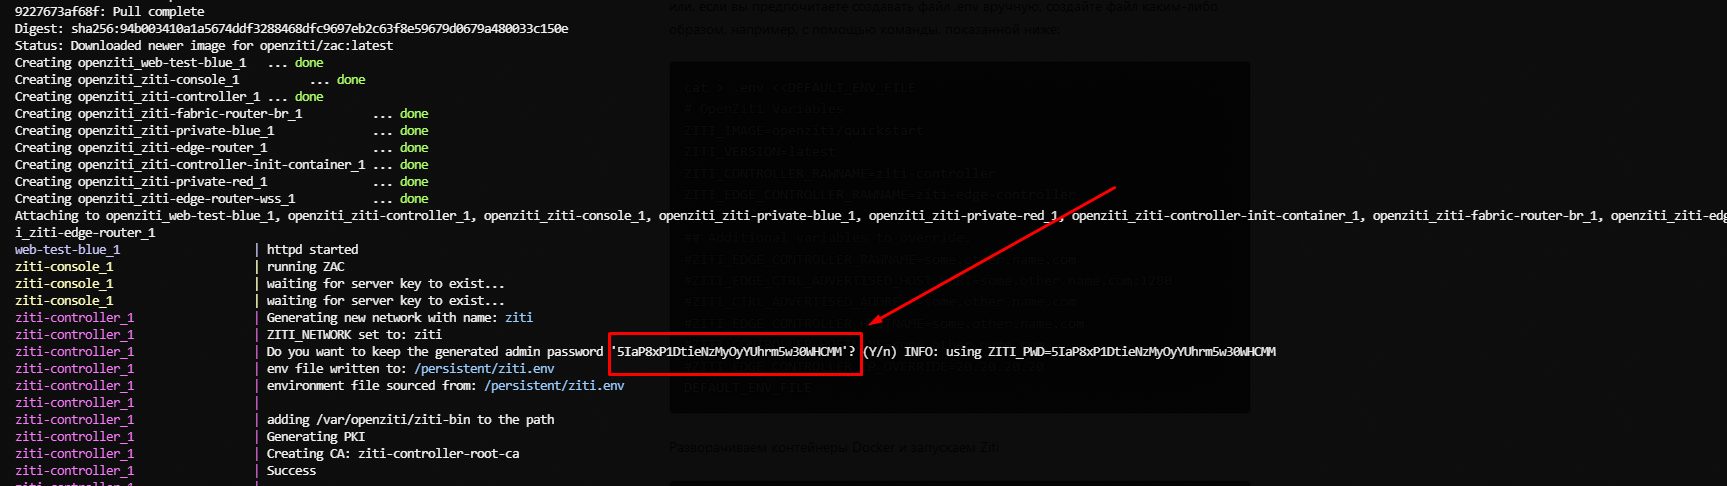
docker-compose upThe password will be shown in the command output when the containers start — save it
The admin panel is available at https://server-IP:8443/login
In the Edge Controller Name field enter docker, and in the URL field enter https://ziti-edge-controller:1280
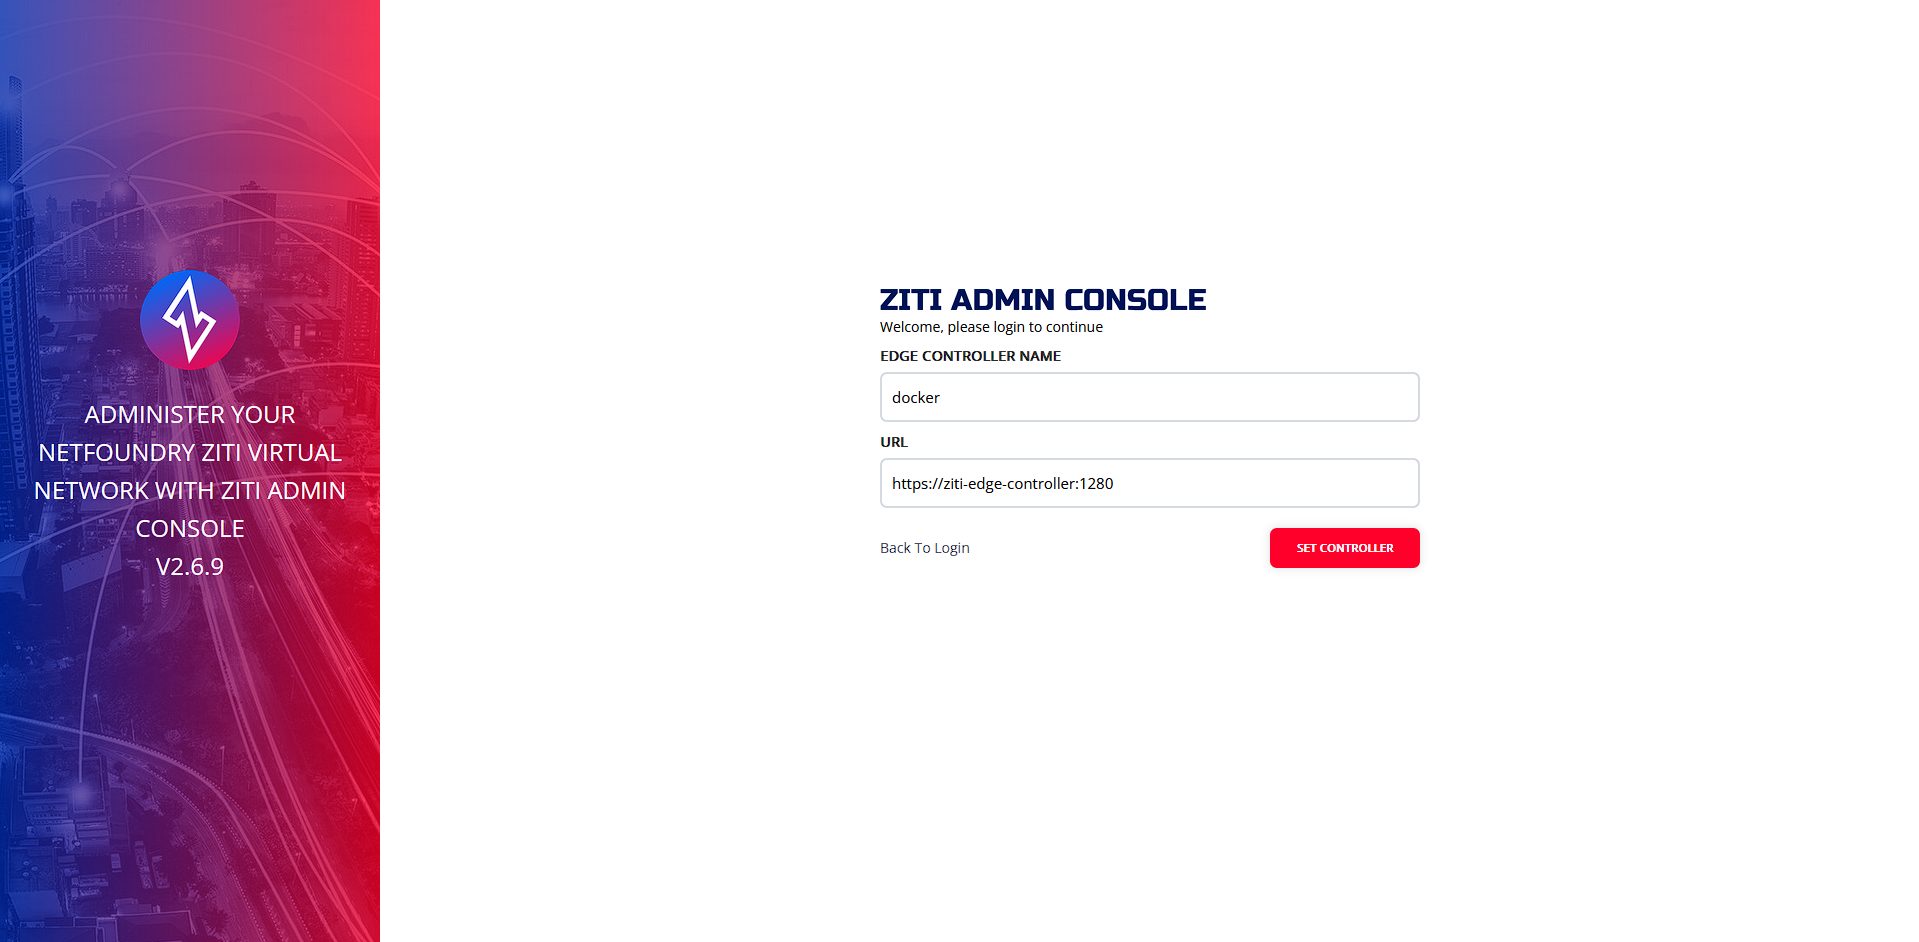
Click the Set Controller button and you will go to the login screen.
Your default login is admin; the password is the one you saved earlier.
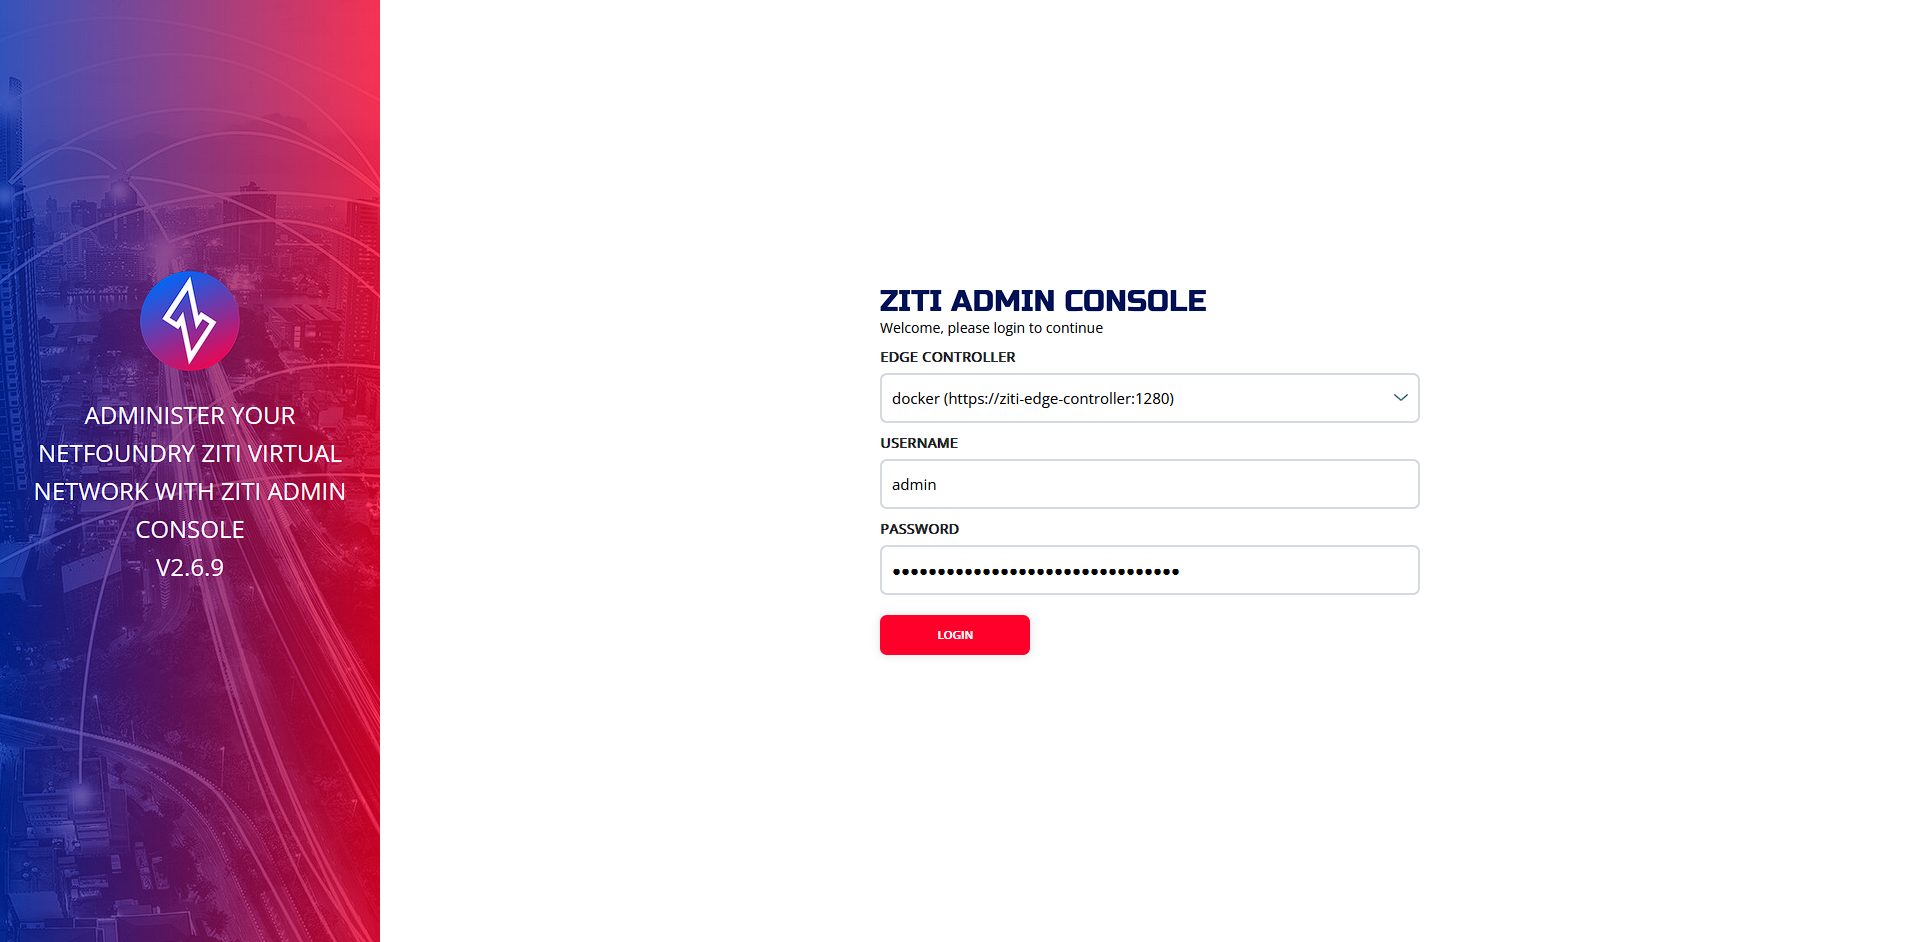
Click Login after entering the password and you will enter the Ziti admin panel
Network diagram
The docker-compose file will create quite a few containers on your behalf. Here is a logical overview of the network that will be created:
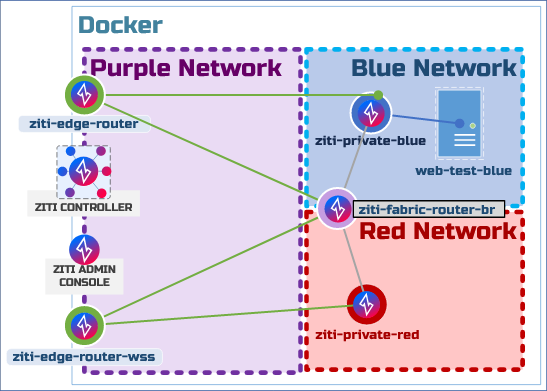
As you can see, docker compose will create many network elements — let’s break them down. The first thing to note is that the entire image sits within the Docker network. In the compose file used here you will see three overlay segments spanning the Docker network: the controller, the edge router, and the WebSocket-based edge router.
The standard docker-compose.yml deploys many components and is somewhat complex. If you prefer a simplified Docker Compose deployment that includes only the basic controller and edge router combination, you can download simplified-docker-compose.yml instead
Network descriptions
Inside the Docker network you will see three networks:
- blue Docker network
- red Docker network
- purple “logical” network
Docker ensures that only elements in a given network can exchange messages within that network. The topology of this network roughly matches how it would look on a public network. The purple network roughly corresponds to the Internet itself, the blue network represents a private cloud provider network (e.g., AWS), and the red network may represent another cloud provider network (e.g., Azure). These details are not important — the main point is that the networks are fully isolated from each other. See the “Testing” section below for more.
Purple Ziti network
There is no Docker network named “purple” in the Compose file — it is a purely logical construct. It is shown only for clarity. All assets in the purple network sit in both the blue and red Docker networks (hence the name “purple”). Assets in the purple network must be in both the red and blue networks because assets located in the blue and red networks need to communicate with the public edge routers and the controller. If this is confusing, see the “Testing” section below, which hopefully makes it clearer.
Red Ziti network
The red network exists only for demonstration for now. As you can see, there are no assets in the red network other than the private router ziti-private-red and the router ziti-fabric-router-br. That means there is nothing in the red network that you could access through Ziti. It can be a great place to put your own assets and learn how to use Ziti!
Blue network
The blue network contains two important assets: the ziti-private-blue router and the web-test-blue server. Along with these assets, the network also contains ziti-fabric-router-br.
Although the web-test-blue server exports a default port (port 80 on your localhost maps to port 8000 on the web-test-blue server), you can use Ziti to access this server without the exported port.
“Fabric” Router
The ziti-fabric-router-br router exists to show that you can create edge routers that are not necessarily fully public. This single router can communicate with all other routers. The Ziti network may choose to use this router if the algorithm shows it is the fastest path. We may learn more about this in future documentation.
Testing OpenZiti and running commands inside a Docker container
Now that we have deployed the docker compose containers to create a relatively complex network, we can start testing it and make sure all services are up and running correctly. Let’s try.
For verification we will use the docker exec command against the active Ziti controller:
docker exec -it openziti_ziti-controller_1 bashAfter running the command above, the command-line interface will show a path for running commands inside the OpenZiti container.
Authenticating to OpenZiti inside the Docker container
There is also a zitiLogin command that works inside the OpenZiti container and simplifies authentication to the Ziti controller. Run zitiLogin now and make sure you are authenticated.
zitiLoginThe command output will look roughly like this:
ziti@724087d30014:/persistent$ zitiLogin
Token: 55ec6721-f33b-4101-970a-412331bd7578
Saving identity 'default' to /persistent/ziti-cli.json
Checking Edge Router statuses
After authenticating, let’s see whether all our routers are connected to the network by running ziti edge list edge-routers:
ziti edge list edge-routersThe output should look like this, and in it we will see that all the Ziti routers created in the network are listed:
ziti@724087d30014:/persistent$ ziti edge list edge-routers
╭────────────┬───────────────────────┬────────┬───────────────┬──────┬───────────────────────╮
│ ID         │ NAME                  │ ONLINE │ ALLOW TRANSIT │ COST │ ATTRIBUTES            │
├────────────┼───────────────────────┼────────┼───────────────┼──────┼───────────────────────┤
│ C6LbVE7fIc │ ziti-edge-router      │ true   │ true          │    0 │ public                │
│ GY1pcE78Ic │ ziti-private-blue     │ true   │ true          │    0 │ ziti-private-blue     │
│ H0UbcE78Tc │ ziti-fabric-router-br │ true   │ true          │    0 │ ziti-fabric-router-br │
│ KHTAct78Tc │ ziti-private-red      │ true   │ true          │    0 │ ziti-private-red      │
│ Yblbct7fTc │ ziti-edge-router-wss  │ true   │ true          │    0 │ public                │
╰────────────┴───────────────────────┴────────┴───────────────┴──────┴───────────────────────╯
results: 1-5 of 5
Viewing Edge Router identities
In this compose file we used a script that also adds an identity for each of our edge routers. We can see them by running ziti edge list identities:
ziti edge list identitiesNote that each router has an identity
ziti@724087d30014:/persistent$ ziti edge list identities
╭────────────┬───────────────────────┬────────┬────────────╮
│ ID         │ NAME                  │ TYPE   │ ATTRIBUTES │
├────────────┼───────────────────────┼────────┼────────────┤
│ C6LbVE7fIc │ ziti-edge-router      │ Router │            │
│ GY1pcE78Ic │ ziti-private-blue     │ Router │            │
│ H0UbcE78Tc │ ziti-fabric-router-br │ Router │            │
│ KHTAct78Tc │ ziti-private-red      │ Router │            │
│ Yblbct7fTc │ ziti-edge-router-wss  │ Router │            │
│ kkVrSLy.D  │ Default Admin         │ User   │            │
╰────────────┴───────────────────────┴────────┴────────────╯
results: 1-6 of 6
Pinging Ziti networks
The Ziti controller should be able to reach both the red and blue routers using the underlay network. Let’s use ping and check the red router first:
ping ziti-private-red -c 1Command output:
PING ziti-private-red (172.29.0.2): 56 data bytes
64 bytes from 172.29.0.2: icmp_seq=0 ttl=64 time=0.387 ms
--- ziti-private-red ping statistics ---
1 packets transmitted, 1 packets received, 0% packet loss
round-trip min/avg/max/stddev = 0.387/0.387/0.387/0.000 ms
Then ping the blue router:
ping ziti-private-blue -c 1Command output:
PING ziti-private-blue (172.28.0.6): 56 data bytes
64 bytes from 172.28.0.6: icmp_seq=0 ttl=64 time=0.633 ms
--- ziti-private-blue ping statistics ---
1 packets transmitted, 1 packets received, 0% packet loss
round-trip min/avg/max/stddev = 0.633/0.633/0.633/0.000 ms
Test — underlay Ziti network connection failure
Now let’s exit the Ziti controller and instead connect to the blue Ziti router. After connecting to the blue router, we will verify that we cannot connect to the private red router.
First run the exit command to leave the previously selected Ziti controller Docker container:
exitThen enter the command to connect to the blue Ziti router:
docker exec -it openziti_ziti-private-blue_1 bashAfter connecting to the blue router, ping the red router from it with the following command:
ping ziti-private-red -c 1Command output:
ping: unknown hostTest — Connecting to Web Test Blue
While we are connected to the blue router, let’s make sure we can connect to the web-test-blue test server with the following command:
curl http://web-test-blue:8000Command output:
<pre>
Hello World


                                       ##         .
                                 ## ## ##        ==
                              ## ## ## ## ##    ===
                           /""""""""""""""""___/ ===
                      ~~~ {~~ ~~~~ ~~~ ~~~~ ~~ ~ /  ===- ~~~
                           ______ o          _,/
                                         _,'
                             `'--.._..--''
</pre>
Don’t forget — you can also access this via the exported port 80 on your local machine!
exitthen
curl http://localhost:80Command output:
<pre>
Hello World


                                       ##         .
                                 ## ## ##        ==
                              ## ## ## ## ##    ===
                           /""""""""""""""""___/ ===
                      ~~~ {~~ ~~~~ ~~~ ~~~~ ~~ ~ /  ===- ~~~
                           ______ o          _,/
                                         _,'
                             `'--.._..--''
</pre>
Configuring OpenZiti services
Configuring OpenZiti ZTNA as a VPN alternative
The only information I found about going out to the internet through OpenZiti using the server IP. I have not configured this service myself yet; as soon as I succeed I will add the setup description to this guide
https://openziti.discourse.group/t/openziti-as-replacement-for-client-vpn/980/6
No email, no trackers — just the update feed.
Russian feed
https://en.kiberlis.ru/feed/